• Steel Soldiers now has a few new forums, read more about it at: New Munitions Forums!

  • Microsoft MSN, Live, Hotmail, Outlook email users may not be receiving emails. We are working to resolve this issue. Please add support@steelsoldiers.com to your trusted contacts.

Post blasting / sanding flash rust elimination tests

asstor

New member
35
0
0
Location
Austin, TX
Hi guys.

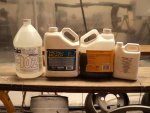
I have been going crazy over the past year trying to figure out what the best products or process is to prepare sanded or blasted body parts for painting. Phosphoric acid, Metal Ready, Rust Blast, PickleX 20, POR15, Rust Mort, Zero Rust, Hold Tight 102, Chlor*rid, Hold Blast, Evaporust, Master Series, Epoxy, AAAGGGHHH :mad: etc, etc, etc.....

I have experimented with several of these products and understand the difference between rust converters, rust encapsulators, etch primers, surface cleaners and so on. I also understand the need for a good base to start from like blasting or DA sanding. Where I have run into trouble, as I suspect many others have is ending up with a less than clean surface after blasting.

My example is as follows. I had the stripped down frame of my 1951 M37 blasted, and boy what a job - all clean everywhere. When I picked the frame up, however, I noticed a couple of finger and palm prints on several places on the frame. By the time I had the frame back in my workshop, I had added to the contamination by my sweat dripping on to the frame on a couple of place (90 degrees in my shop with 45% humidity). Now I needed to wait until the next weekend before I could dust, prep and spray primer. By that time the contaminated spots on the frame were sporting some nice flash rust (luckily no over-all flash rust bloom, just the contaminated spots).

I expect this is a fairly common scenario, so I have decided to do an experiment to test a couple of product and processes to see how I get the best results at eliminating or removing flash rust, and where I get the best paint adhesion.

I have twelve 6 inch by 3 inch 22Ga carbon steel test panels that are fairly well rusted (as you would typically find when doing a resto) that I am treating with a combination of the surface prep solutions mentioned above. All the rusted panels will first be sand blasted on one side, and DA sanded with 220 grit on the other side. This will be the starting point for all 12 panels. From there they will be treated by the various solutions and eventually primed with Master Series Silver, and top coated with 2K Urethane from TM9ordnance. The tests will identify the development of flash rust after the blasting and application of the various surface treatments, and how / if they effect paint adhesion (via cross hatch adhesion tests)

The reason I am posting now is to get any input or suggestions from folks to see whether there is interest in such a test or whether I am flying solo. Either way I will post the results when all is said and done. The test involves storing some of the panels in the unfinished state to see if flash rust develps, so this experiment should be done in about a month or so.

I have detailed explanations of the tests, the product and the procedures here:

http://www.m37rebuild.com:82/Shared Documents/Paint adhesion tests.pdf

I am open to any ideas, suggestions or criticism to help make this a valid and worthwhile test. Let me know what you think. I will post pictures as the test progresses.

(here are pictures of my primed and painted frame) :)

http://www.m37rebuild.com:82/Paint%2.../AllItems.aspx


Thanks,
Louis :)
 
Last edited:

Beerslayer

Well-known member
Steel Soldiers Supporter
1,054
55
48
Location
Tualatin, Oregon
Very interested. Thanks Louis. This type of content is what makes this site great, one of the most useful I have ever participated in. I really appreciate your work to this end as I have a couple of big blasting/painting projects coming up and share your concern with flash rust.

As I will be water blasting [water + sand] all the big parts, what I am looking for is a product I can spray on right after blasting that will phosphatize the bare metal. I won't be blasting to white metal but am primarlily interested in removing all loose material and giving some tooth for the topcoat to adhere to.
 

asstor

New member
35
0
0
Location
Austin, TX
Thanks Beerslayer,

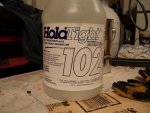
I too considered wet blasting, but have never gone that route. For wet blasting look at HoldTight © 102 Flash Rust Inhibitor and Salt Remover or Chlor*rid International, Inc. (blast Hold) I am going to be testing Hold Tight 102, but all I know at this point is what I have read on their web sites. It seems that those products should help with wet blasting. They will not help with phospatizing but might help with the flash rust issue, or maybe a combo of Metal Ready (from POR) which contains Zinc Phosphate , then rinse with one of the above.


Let me know what you find out.

Thanks,
Louis :)
 
Last edited:

Heath_h49008

New member
1,557
102
0
Location
Kalamazoo/Mich
Subscribed.

Thank you! (Wet sandblasting planned as well)

Ospho... or many other phosphoric acid solutions ... should work to phosphate the surface in preparation for paint. In theory. Maybe...

I can't wait to see your tests!
 

Truckoholic

New member
492
13
0
Location
Colorado Springs, CO
Eastwood sells a product called "Afterblast" that I got a bottle of and have used some. It takes dirty rust flashed metal and makes it nice, clean and bright. It's got phosphoric acid in it. It seems to work quite well. My problem with it though, is that freshly sandblasted metal has a kind of rough texture to it, and I have yet to find the perfect means of application as far as rags go. Because this is a product that you are supposed to apply with a rag, and make sure you wipe off the excess before it dries. And I find little bits of rag left all over the surface from the rough metal.

So for these military trucks, since they don't require an absolutely perfect showcar shine most of the time, I don't even bother with stuff like that. I just blast it, then go over it with a good surface cleaner, and then spray primer and call it good.
 

Truckoholic

New member
492
13
0
Location
Colorado Springs, CO
Just a bit of my personal experience on wetblasting.........:-?

I also watched all the videos on youtube and heavily researched the method before buying the wet sandblasting attachment for my pressure washer..... I thought it looked like an awesome way of doing it! I was very much less than impressed!

For one, getting sand all over the place is allready a big hassle of sandblasting. But now, you have WET sand stuck all over absolutely everything! And one of the most irritating things is, the wet sand sticks all over your face shield or goggles and you can not see a freaking thing after just a few seconds. You go to wipe the sand off of your face shield, and because it's wet, all it does is scratch the heck out of your face shield and then you have a very scratched up face shield that still has wet sand stuck all over it!

Two..... You can not reuse the sand because now it is all soaking wet all over the ground.

Three....... you have to be very careful not to let any water get in the bucket from which you are drawing the sand with your wetsandblaster, or the sand will clog up and not go through the tube.

Four...... you have to be extremely careful when using the wetblaster attachment, to always keep the nose of it pointed down, because if you don't, water runs back down the siphon tube and gets all the sand in the tube wet, and again clogs up and will not feed through.

Five...... when they say in the instructions for the wetblaster attachment that it is best used with a 5gpm 5000psi pressure washer, what they really mean, is it won't work worth a crap with anything less than that, and 5000psi pressure washers are freaking expensive!

So yeah.......Don't get me wrong......It is a pretty cool little invention, and I did get a little use out of mine, but holy cra p what a freakin pain in my a$$! It is not something I would be likely to go around suggesting to people.
 

68t

Active member
375
55
28
Location
Michie, ,tn
We do alot of blasting, halftracks , cars, trailers and parts. We use black diamond from tractor supply. We blast, then prime, don,t waste your time worrying about flast rust. Just do a good job painting . Most rust show up later because it was not painted good. In other words paint the **** out of it. Then, there will be no rust.
 

asstor

New member
35
0
0
Location
Austin, TX
Truckoholic,

Yeah, I had the exact same problem with Picklex20. I like the product but when I tried to wipe it off of my blasted frame - DISASTER. I ended up with thousands of little fibers stuck to the frame. The blast left a pretty good profile and all those sharp little edged tore up the "lint free" rag and the tack cloth. There is no way I have found to wipe off the PIckleX 20 without ending up with what looks like two day old beard strubble (on the frame, not on me!). That is why I am looking at some kind of rinse solution where there is no wiping involved.

Also, I called Picklex and spoke to them. They suggested treating the frame in little sections at a time and blow drying with compreede air as you go. When I tried that I was left with white residue - not good.

Thanks,
 
Last edited:

paulfarber

New member
1,081
20
0
Location
Gordon, PA
Rust needs AIR for chemical conversion to take place. Blast it dry.

If you have a shop vac that you hate you can rig up a suction device to reclaim sand. A dust Deputy is $30 and will make reclamation faster. Plus your filter won't clog (as fast).

Once clean hit it with metal prep and wash.

WAIT FOR EVERYTHING TO DRY!

Now prime it. A good zinc oxide or epoxy primer. zinc is a sacrificial metal for corrosion resistance and epoxy is an oxygen barrier.

That's about as good as you can get.
 

Beerslayer

Well-known member
Steel Soldiers Supporter
1,054
55
48
Location
Tualatin, Oregon
I used to blast and paint trailers back in the 80s... We would typically sand the flat surfaces with a DA after blasting, the surface was so rough. So I wouldn't touch a blasted surface with a rag.

I was thinking that one of the phosphoric acid based solutions could be sprayed on with a spray pump bottle or plastic garden sprayer. After it had a chance to pickle, the acid residue could be rinsed off with a hose or pressure washer. Then when dry it could be painted.

That is my wet blasting and painting fantasy. Sound feasible? Wish me luck.
 

NDT

Well-known member
Steel Soldiers Supporter
10,458
6,532
113
Location
Camp Wood/LC, TX
You are worring about nothing. 68T said it best, just put a thick prime coat over it and keep all the magic potions off your anchor profile!
 

asstor

New member
35
0
0
Location
Austin, TX
Beerslayer,

I used plain old phosphoric acid from home depot to pickle several pieces. Sprayed it on with a spray bottle for larger stuff or dipped smaller pieces. It works very well. I then rinsed with distilled water. On some pieces, afetr the water rinse I immediately rinsed with 99.9% pure Isopropyl alcohol. The alcohol washes away the water and then evaporates leaving no residue and a flash rust free surface. The Isopropyl alcohol is about $11 per quart and gets used up pretty quickly so although this worked well, turned out to be expensive.

I also used Metal Ready (from POR) a lot and applied it with a spray bottle. Keep the surface wet for 15 minutes to get the zinc phosphate deposited, and the rinse with distilled or clean water. This also worked very well and left little to no flash rust. :) The plan phosphoric acid is a little stronger than the Metal Ready so will deal with heavier rust deposits more effectively, but does not leave the zinc layer. Depending on the results of my testing, but I have confidence in Metal Ready or similar product containing zinc. :)
 

asstor

New member
35
0
0
Location
Austin, TX
And so the test begins:

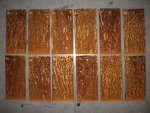
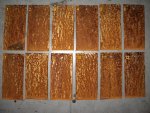
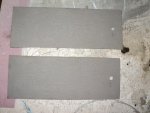
Her are the test panels after their "weathering" period. They spent two weeks bathing in the hot Texas sun and received daily spray downs from me and my sprinkler. I prepared all 12 test panels the exact same way. They were washed down with Zep industrial cleaner to remove all mill oil, then they were all sanded down with 220 grit sandpaper to get them nice and clean to establish a nice rust.

Pic 1 shows the front of all 12 panels after rusting for two weeks.
Pic 2 shows the back of all 12 panels after rusting for two weeks.
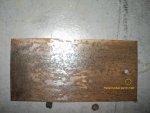
Pic 3 shows panel 1 after brushing the loose rust off with a wire brush.
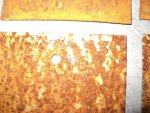
Pic 4 shows a close up of the panel number that I stamped in to each panel

The wire brushed panel shows that the rust is more than just surface or flash rust.

More to follow later this week after I sand blast all twelve panels and start the surface prep process.:beer:
 

Attachments

asstor

New member
35
0
0
Location
Austin, TX
Hi guys. I have had a slight delay in being able to do the test properly (funny how work seems to get in the way of having fun)

In the meantime I have done a little test to keep things going until I can start the real test.

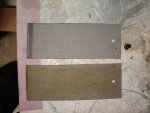
Today I took three panels, two of which were rusted for two weeks, and the third which was unrusted. I sand blasted all three at the same time, then I rinsed the first panel with fresh water, I then rinsed the second panel with the Hold Tight 102 solution, and the third panle I treated with PickleX 20 for about 30 seconds, then rinsed it with the Hold Tight 102 solution.

Very interesting results!.

The panel rinsed with only fresh water immediately got a nice flash rust bloom as it dried. The panle rinsed with the Hold Tight 102 solution did not show any flash rust at all!! The panel treated with PickleX 20 did not show any flash rust either, but it did get some brownish marks or stains. Per the guys at PickleX this is not flash rust, rather a result of the treatment and is to be expected.

Right off the bat this shows me that Jolh Tight 102 has done a fantastic job inhibiting flash rust. I mixed it in a 1:50 solution with clean faucet water and sprayed it on with a 1 gallon garden sprayer. The two plates were prepeared exactly the same in every respect other than the rinse water containing Hold Tight 102 for the plate that shows no flash rust.

The jury is still out on the PickleX 20 as this test did not show anything different for the PickleX 2o other than rinsing with water is a viable option to avoid getting the white PickleX 20 residue if it were left to dry on the surface.
 

Attachments

Last edited:
asstor

New member
35
0
0
Location
Austin, TX
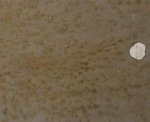
Here is a close up photo of the panel rinsed with clean water that developed the flash rust.

It almost looks like the rust pits that were not cleaned out by the sand blasting acted like seeds for the flash rust. It looks like the flash rust developed from the rust pits.

On the panel that was treated with Hold Tight 102 the pits can also been seen in the close up photo, but there is no flash rust. Interesting! :-|

The third picture shows the panel that was treated with PickleX 20. This panel was not pre-rusted so you can see the smooth surface void ov any pitting. This is really just to show the pitting damage the rust did in two weeks.
 

Attachments

Last edited:

asstor

New member
35
0
0
Location
Austin, TX
To continue.....

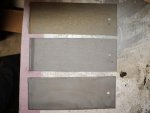
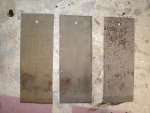
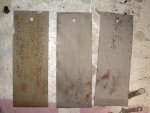
The three panels numbered 13, 14 and 15 have been sitting in my workshop for a week now. The average temperature has been around 90 degrees with around 50% humidity.

Panel 13, which was rinsed with clean water shows a definite flash rust bloom and some deeper surface rust in areas.

Panel 15, which was rinsed with Hold Tight does not show the all over flash rust bloom, however, there is definite surface rust spots.

Panel 14, which was treated with PickleX 20 and then rinsed with the Hold Tight Solution shows no flash or surface rust - except on the bottom half of the panel - which is where I rubbed sweat from my brow on the panel with my fingers. (the same for the other two panels as well)


I conclude form the test that the HoldTight helps eliminate all over rust bloom immediately after a water rinse, however it does not stop surface rust from developing after a couple of days. I also conclude that the PickleX 20 has done a great job of stopping any rust from developing, except where the panel was rubbed with sweating fingers. In the close up of plate 14 you can see very little spots of rust, but minimal compared to the other two plates.
 

Attachments

Last edited:

asstor

New member
35
0
0
Location
Austin, TX
Hi guys,

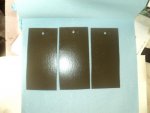
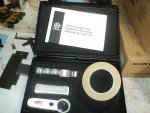
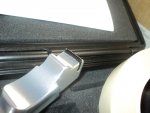
Some paint adhesion test results. After blasting and cleaning panels 1, 2 and 3, I painted them all with MasterSeries Silver primer and then TM9Ordnance polyurethane. After the paint had dried I performed the paint adhesion tests per ASTM D3359 specifications using certified adhesion tape and scraping blade. (all very scientific in my garage ...of course...). The temperature was 90 degrees and the humidity was 47%

Here are shots of the panels 1, 2 and 3 seven days after being painted, and the test equipment
 

Attachments

Last edited:

asstor

New member
35
0
0
Location
Austin, TX
Panel 1 test:

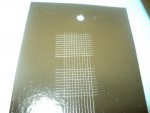
Per ASTM D3359 I cut thru the paint to the base metal in a crosshatch pattern using the scraping tool. I then applied the tape and performed the test. The shots below show the following:

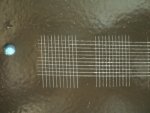
1 Panel 1 after the crosshatch created
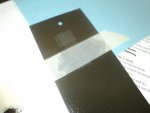
2 Panel 1 with the tape applied
3 Panel 1 again after the tape removed
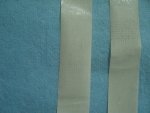
4 The tape showing the debris removed during the test

The results show that the primer and paint combination worked very well on the sand blasted surface, with no perceptible paint being removed by the tape. The only debris on the tape is from the scratch lines. I inspected the crosshatch area with a magnifying glass and there is no sign at all of any paint lifting or coming off.
 

Attachments

Top
AdBlock Detected

We get it, advertisements are annoying!

Sure, ad-blocking software does a great job at blocking ads, but it also blocks useful features of our website like our supporting vendors. Their ads help keep Steel Soldiers going. Please consider disabling your ad blockers for the site. Thanks!

I've Disabled AdBlock
No Thanks