• Steel Soldiers now has a few new forums, read more about it at: New Munitions Forums!

  • Microsoft MSN, Live, Hotmail, Outlook email users may not be receiving emails. We are working to resolve this issue. Please add support@steelsoldiers.com to your trusted contacts.

M1028 Small Lift Build

GPrez

Member
208
0
16
Location
Mt. Airy, MD
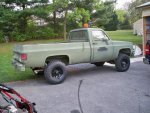
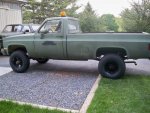
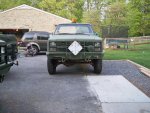
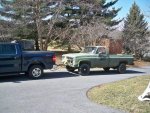
I have not seen any threads with small lifts and smaller tires so I figured I would document and take pics along the way. Of course some of this was completed before I made that decision, but here goes.

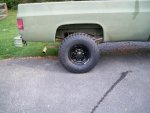
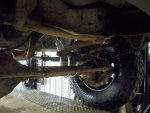
Items competed thus far: Tuff Country 2" lift springs in front, Tuff Country Shocks, 1" Zero Rates in the rear, Black Rock Wheels, and BF Goodrich 255 x 85 x 16 KM2 Mud Terrains.

Items on the list or en route: Class V receiver, trailer brake controller, brake lines, Doghead Mod, resistor bypass, electrical items from CUCV electric, overhead console w/speakers & radio, tiny tach, insulate & carpet the interior, reupolstered seat, and new paint.

I am also considering adding a Gear Vendors overdrive, but want to spend a little time behind the wheel before investing in one.

Mechanically everything seems to be fine except for my left front hub is not unlocking.

I purchased the lift items from Off Road Design based on numerous recommendations I read for them. I was a little disappointed that they were apparently unfamiliar with the requirements for parts for the CUCV chevy's and they were very slow returning phone calls. The front springs were fine, but the zero rates were a problem. They sent the wrong U-bolts and the new center pins were way too short. I ended up purchasing both items elsewhere. The products I did receive were very nice. Keep this in mind if you order from them.

It's a good height for me and 2" up front and 1" in the back leveled out the truck. I wanted a little extra clearance, but didn't want to go to crazy cause I'm getting old and having to jump in is not as much fun as it used to be.
 

Attachments

Last edited:
bronco74

New member
12
0
1
Location
Lewes, Delaware
m1008

I have not seen any threads with small lifts and smaller tires so I figured I would document and take pics along the way. Of course some of this was completed before I made that decision, but here goes.

Items competed thus far: Tough Country 2" lift springs, Tough Country Shocks, 1" Zero Rates in the rear, Black Rock Wheels, and BF Goodrich 255 x 85 x 16 KM2 Mud Terrains.

Items on the list or en route: Class V receiver, trailer brake controller, brake lines, Doghead Mod, resistor bypass, electrical items from CUCV electric, overhead console w/speakers & radio, tiny tach, insulate & carpet the interior, reupolstered seat, and new paint.

I am also considering adding a Gear Vendors overdrive, but want to spend a little time behind the wheel before investing in one.

Mechanically everything seems to be fine except for my left front hub is not unlocking.

I purchased the lift items from Off Road Design based on numerous recommendations I read for them. I was a little disappointed that they were apparently unfamiliar with the requirements for parts for the CUCV chevy's and they were very slow returning phone calls. The front springs were fine, but the zero rates were a problem. They sent the wrong U-bolts and the new center pins were way too short. I ended up purchasing both items elsewhere. The products I did receive were very nice. Keep this in mind if you order from them.

It's a good height for me and 2" up front and 1" in the back leveled out the truck. I wanted a little extra clearance, but didn't want to go to crazy cause I'm getting old and having to jump in is not as much fun as it used to be.
I like your 2" lift.
ORD has great products, but I think they lack in customer service.
 

GPrez

Member
208
0
16
Location
Mt. Airy, MD
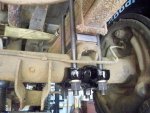
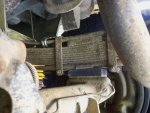
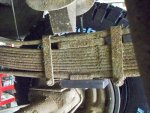
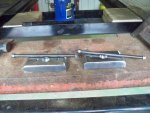
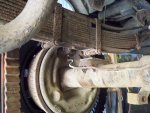
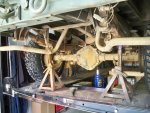
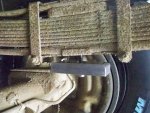
I didn't take pics of the front spring install, but it's pretty straight forward as is the zero rate install. I bought longer center pins and rear u-bolts so both had to be trimed off once installed.

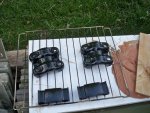
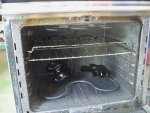
I sandblasted and powder coated the upper and lower U-bolt brackets while I had it apart. The lower bracket is a bad design and can hold dirt and moisture causing it to rust and degrade. Many choose to reverse the U-bolts and Off Road design has a new part to allow this, but it will not work on the 1-ton trucks unless you lift them I think 4-inches.
 

Attachments

cheiser666

New member
116
0
0
Location
Lansdale,PA
I have the kit to flip my shackles. Its not an ORD kit, its a kit a local 4x4 store puts together for 65$. Only problem I ran into with stock springs was that the new plate will just barely hit the bump stop bracket. My plan one of these days is to remove the bump stop and move it over 1 or 2"s.

btw i really like the 2" lift.
 

Cucvnut

Well-known member
3,804
61
48
Location
Carver, Oregon
looks good man imo i would have done a ubolt flip kit in the rear so your bolts dont get caught on stuff and rip off the axle! for anyone who wants to know WFOconcepts is just as good as ORD and better customer service.
 
Last edited:
Skinny

Well-known member
2,130
488
83
Location
Portsmouth, NH
I called Denise at ORD and he was very knowledgeable when it came to MV Chevys. He answered all of my questions regarding my M1031 with regards to the rear overload leaf setup and why I was better off using a shackle flip because of my particular usage. He also mentioned he personally owns a M1008. I've owned, built personally and professionally quite a few rigs. ORD was a pleasure to work with, reasonably priced, great quality, and overall a great vendor.
 

GPrez

Member
208
0
16
Location
Mt. Airy, MD
I called Denise at ORD and he was very knowledgeable when it came to MV Chevys. He answered all of my questions regarding my M1031 with regards to the rear overload leaf setup and why I was better off using a shackle flip because of my particular usage. He also mentioned he personally owns a M1008. I've owned, built personally and professionally quite a few rigs. ORD was a pleasure to work with, reasonably priced, great quality, and overall a great vendor.
I didn't say what I said to bash them in fact I was careful about what I said because when I did speak to Denise she (not he) was very pleasant. I merely wanted people to know they need to be very clear on the size of springs they have so they get the right parts. I did explain that I had a Military M1028 and the receipt even stated on it 86 1T Military so they understood what I had. My biggest disappointment was the slow response at returning phone calls which was why I ended up purchasing the U-bolts and center pins elsewhere. I would probably buy from them again as I do like some of their items.


Thanks for all the positive feedback folks. I am also very pleased with the look and hopefully how it will perform. The receiver is next on the list.
 

trooper632

Member
533
3
18
Location
Utopia, TX
i am thinking about a 2" lift myself for my 1028, what did everything cost you to do the job, also with the new front springs, aree they rated for the same weight rating or less or more, thanks
 

GPrez

Member
208
0
16
Location
Mt. Airy, MD
The lift with zero rates, shocks and all with shipping was about $775. The shipping alone was $110. More than I wanted to spend, but I wanted the Tuff Country springs which are a little pricier than some other brands.

The front springs had 1-addtional leaf over stock so I would say they would be rated more than stock. They have 2-options for the springs "Light Duty" and "Heavy Duty" you want the Heavy Duty.
 

GPrez

Member
208
0
16
Location
Mt. Airy, MD
Hitch installed

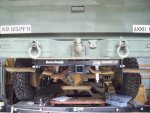
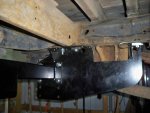
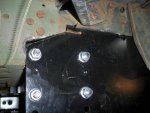
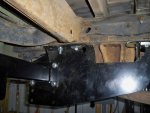
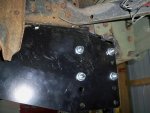
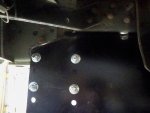
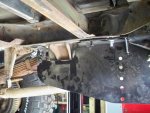
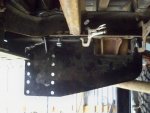
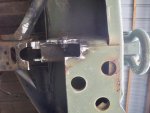
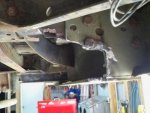
I got the draw-tite Class V receiver hitch installed. It took pretty much a full day and alot of patience, but in the end wasn't too bad. You will need to to some metal cutting in order to install. I did most of it with a 4-1/2" grinder with a metal cutting wheel, but did break out the torch once. Having a lift sure helps too! It would have been alot more difficult lying on the ground to do this. The first side took a lot of planning and marking and figuring out where exactly I wanted it mounted. Once the first side was done the opposite side went real quick.

I went with the Class V receiver since it really isn't that much more expensive than a Class III. The class V has a 1500 lb tongue weight and a 15,000 lb trailer towing capacity without the need of a weight distributing hitch. More than I need, but I like overkill.

I had to cut part of the bracket that holds the tow hooks and a little into the bumper itself. It still has plenty of meat holding everything to the truck though and I am not at all concerned about how sturdy it is. This hitch has 3 different mounting positions for the actual receiver. I mounted it in the highest position and now have alot of excess steel below it. I may cut off the excess, but not right away. There are 2 rivets that secure the horizontal cross member of the frame that hang down and interfere with the mounting bracket finishing off flush with the frame. Once I figured out where I was mounting everything I determined that I could grind them flush and used one of the mounting bolts to go thru the frame and cross member to hold it together without the rivets. I had seen where people shimmed the brackets away from the frame but that creates weakness in my mind so I wanted it mounted tight to the frame.
 

Attachments

Last edited:
GPrez

Member
208
0
16
Location
Mt. Airy, MD
Tiny Tach and more

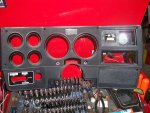
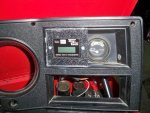
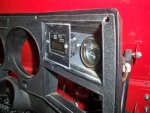
I did some head scratching on where to mount my tiny tach and searched thru the CUCV section for pics on where others had mounted theirs. I liked mounting it next to the voltage meter, but for the life of me could not see it fitting in the space next to it. I started to wonder if the voltage meter was mounted just slightly further to the right in some of the trucks than it was in mine. I ended up using a piece of plastic I had that closely matches the instrument panel plastic and was able to mount it in the same place but further out from the voltage meter. It overlaps the voltage meter slightly, but doesn't obstruct the view of it. I just used epoxy to mount the plastic piece.


I didn't take any pics of the wiring for the trailer hitch, but I did install a 7-pin connector and trailer brake controller. I have also completed the doghead relay mod, and resistor bank bypass.

I am currently working on the interior. I am preparing to install the LMC headliner with radio and speakers, and painting the door panels and dash with colorbond. Then I will insulate the floor and install carpet.

Coming soon will be electric fuel pump. spin on fuel filter, front winch mount, warn hubs, and paint. I was originally planning on the Olive drab paint, but have started considering desert tan. Any opinions?
 

Attachments

culverjoe

New member
9
0
0
Location
Great Falls, MT
LOVE IT! Likely because I have almost the exact same set up on my M1031. I have the old KM's in the exact same size and 2.5" springs in front and 2" blocks in the back. A hair taller, but what's 1/2 to 1 inch? Due to the u bolts I had floating around, my nuts are on top, like you were talking about. I think they look great with just a few inches on 'em.
 

islandguydon

Well-known member
3,724
783
113
Location
Michigan
Coming soon will be electric fuel pump. spin on fuel filter, front winch mount, warn hubs, and paint. I was originally planning on the Olive drab paint, but have started considering desert tan. Any opinions?
If the original color is 383 green and the interior is 383 why not stick with GREEN.
 

oddave715

Member
250
0
16
Location
Lexington, North Carolina
Sweet build!! I like the size lift you went with. Not too big that you loose the useability of the truck. Big enough that it gains a little beefier stance and taller tire for the road. I think you can't go wrong with either color.
 

GPrez

Member
208
0
16
Location
Mt. Airy, MD
If the original color is 383 green and the interior is 383 why not stick with GREEN.

At this point I am going to stick with the Green. The one thing I didn't coordinate well if I were to go tan was the color for the dash and door panels. I bought colorbond in Burgundy and already did the dash, new headliner, and door panels and they wouldn't look good up against the tan color in my opinion. Black would have gone better with the tan, so I will stick with the Green.
 

llong66

New member
453
2
0
Location
kokomo, In
Great looking truck! I was wondering if you could post a little about your powdercoating, how you did it, where you got the powdercoat. I have done a cpl of fire arms with Gun Kote in the oven but did not know you could do small parts like that. Is there alot of odor? Also, please make sure and post some pics of your headliner when installed, I have been thinking about one of those and would love to see how it looks. I had read someplace you need the civi headliner trim to finish out the install with those.
 
Top
AdBlock Detected

We get it, advertisements are annoying!

Sure, ad-blocking software does a great job at blocking ads, but it also blocks useful features of our website like our supporting vendors. Their ads help keep Steel Soldiers going. Please consider disabling your ad blockers for the site. Thanks!

I've Disabled AdBlock
No Thanks