• Steel Soldiers now has a few new forums, read more about it at: New Munitions Forums!

  • Microsoft MSN, Live, Hotmail, Outlook email users may not be receiving emails. We are working to resolve this issue. Please add support@steelsoldiers.com to your trusted contacts.

My Build Thread: M909 Recreational Vehicle

cbrTodd

Well-known member
Steel Soldiers Supporter
268
483
63
Location
Indianapolis, Indiana
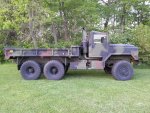
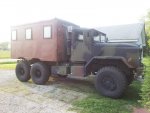
As I mentioned in my new member introduction thread, my first military vehicle was my M109A3. Mid way through the rust repair on the van body itself, which was desperately needed prior to my intended camper conversion, I purchased an M923A2 from GovLiquidation and changed my plans a bit. I decided to put the van body on the 5 ton chassis and use that resultant combination as my camper truck. So with that background, here's what I have done so far.

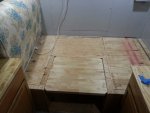
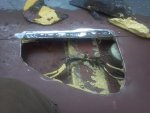
My work started with addressing a couple leaks in the roof. I thought that once I stopped those, then the rest of the problems would be minor. I was sealing up a small leak in one of the window frames during a light rain shower (It helped me find out what was actually leaking) when I felt just the slightest creak under one of the oak floor boards. Thinking I probably had a little rust under one of the boards, I took up a couple boards in the front driver's side corner and found that the metal pan beneath the floor was completely rusted through. The floor pan of these trucks holds in absolutely every single drop of water that gets in and doesn't evaporate. So, with a couple boards ripped up, there was no going back. This was also 2 weeks before I had intended to take the truck on a camping trip.

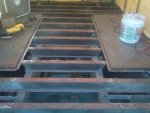
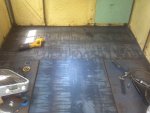
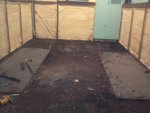
Thanks to some help from a good friend, I was able to make the camping trip in a truck with a brand new plywood floor, with a completely new 14 gauge metal pan beneath it. I've never hated spot welds more in my entire life. I've also never seen so much loose rust at once, either - I swept up 8 gallons of it underneath the old oak flooring! Thankfully, the structure beneath the floor pan was intact so that was as far down as I had to go.

At this point I wasn't taking many pictures because I had a lot to do and not much time! I primed and painted the sheet metal before redoing the spot welds at the edges and installing a new plywood floor where the oak had been.
2013-07-04_17-29-37_542.jpg2013-07-08_21-58-24_719.jpg2013-07-13_21-08-36_437.jpg2013-07-13_13-35-16_859.jpg
 

cbrTodd

Well-known member
Steel Soldiers Supporter
268
483
63
Location
Indianapolis, Indiana
With the floor in place, I started cleaning up the exterior of the van body. Because I could see a few spots where the most recent coat of CARC was peeling away, and I had a few areas where there appeared to be rust under the paint, I elected to strip the paint off of one side of the van body at a time, repairing rust as I found it, and priming in preparation for a new coat of camo paint (which still hasn't happened yet, but hopefully will this Spring). I did the roof first, and quickly discovered that the most effective method for me to remove the old paint was by using "Aircraft Paint Remover". It feels like liquid pain if you get it on your skin, but it does its job quite nicely. The roof had a few areas that needed to be cut out and patched with repair panels, but nothing out of the ordinary.

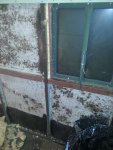
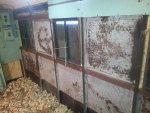
It was when I started on the driver's side that things got interesting. From the outside, things looked to be in pretty good condition. But I found a few spots where there was a tiny rust pinhole, that when I poked it with a putty knife, it opened up into a bigger rust hole. I removed the remaining interior panels that I hadn't already done, and started scraping out some of the spray foam insulation that it had installed at some point during its life. What I found was a bit disturbing... those roof leaks that had been left untreated had wicked moisture into the walls all that time, and the open cell spray foam insulation had held it like a sponge, allowing the exterior walls to rust from the inside out. That meant that I had to remove every last bit of the spray foam and grind away rust, neutralize it, and prime over it to seal the surface and prevent it from coming back. The only tool I ever found that would effectively cut away the spray foam was a Harbor Freight oscillating tool with a smooth blade on it. It would cut away a chunk about 2" square at a time. I removed three huge trash bags full of this stuff over the course of the project. So if you ever see me advising against the use of spray foam, you know why!
I insulated the walls with R10 foam board, which is what I could find locally. It wasn't as easy to install as the foil backed insulation that I have seen others use, but when trimmed to a press fit with a sharp knife, it held well into the gaps, and it was reasonable to work with. It works, too - I can keep it reasonably warm inside with just a 1500 watt electric heater in the winter time.

20131230_160900.jpg20131230_160909.jpg20131230_195959.jpg
 

cbrTodd

Well-known member
Steel Soldiers Supporter
268
483
63
Location
Indianapolis, Indiana
With the inside sheet metal repair essentially done, I started the modifications to actually make it into an RV. The first order of business was mounting the air conditioner. I bought a 6k btu window unit from Menards and made a bracket out of angle iron to mount it to the front wall where the window used to be. I included a downward tilt on the unit towards the outside, which makes the condensate drip outside instead of coming back inside with you. I closed up the remaining opening with a simple sheet metal panel and some polyurethane caulk - nothing special.

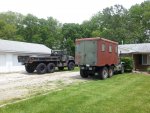
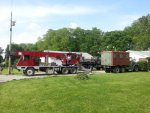
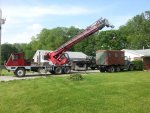
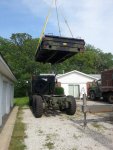
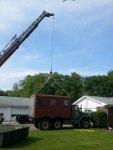
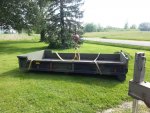
With the air conditioner mounted and work ongoing on the outside paint strip / priming job (yes, I juggled all of these tasks at about the same time instead of doing one at a time), I got a call back from the crane operator asking if that day would work for him to come and swap truck beds for me. Since this was just going to be a side job for him, I agreed, and he did about an hour's worth of work to move an M109A3 body where a 14 foot dropside bed used to be and vise versa. I'll let the pictures do the talking here. It was as smooth of a process as I could have imagined, and was worth absolutely every penny it cost.

2013-08-22_18-36-00_540.jpg20140519_202943.jpg20140527_141329.jpg20140527_171750.jpg20140527_171838.jpg20140527_172932.jpg20140527_173707.jpg20140527_173157.jpg20140527_192752.jpg20140527_195459.jpg
 

cbrTodd

Well-known member
Steel Soldiers Supporter
268
483
63
Location
Indianapolis, Indiana
That box lined up real well on there. Seen them mounted on the tractors but not the cargo trucks. Good work.
Thanks! I laid out the wheel wells and mounting points in CAD before actually doing the swap so I could see how things would line up. I put the center of the tandems in the same position with the van body as what it had been on the M109, so each of the wheel openings is off by the same amount. It put the front of the van body about 4" back from where the front of the cargo bed had been, which doesn't look too bad. Sadly, none of the mounting points lined up, so I had to drill all new ones. It wasn't necessarily a hard process, but it took a while with the transfer punch, multiple drills, and lots of Norseman brand drill bits. It turned out to be faster to use a separate drill for each size rather than swap bits. Oh, and if you ever spin a bit too fast once and work harden the metal, you learn really quick why that isn't a good idea! Reasonable drill speeds with plenty of force on the drill was the key.

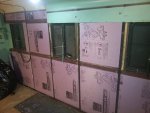
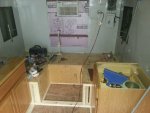
Anyway, on to the RV specifics. I knew that I wanted to have a bed, a place to eat, a fully functional bathroom, and plenty of storage. I read several folks' camper threads saying that the bed didn't work well along either of the sides, so that meant it had to be in the front. Because of the unequal door opening at the back, that pretty much forced the bathroom to be on the rear of the driver's side. Keeping the length of plumbing as short as possible meant that the kitchen sink needed to be on the driver's side as well. The rest just fell into place, with a bunch of cabinets on the passenger side. Here are some pictures of earlier in the build. Please excuse the mess!

20140607_122511.jpg20140707_065734.jpg20140728_210906.jpg20140709_215823.jpg20140709_213131.jpg20140707_065757.jpg20140702_221142.jpg20140630_194959.jpg20140815_135541.jpg20140815_135602.jpg
 

cbrTodd

Well-known member
Steel Soldiers Supporter
268
483
63
Location
Indianapolis, Indiana
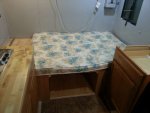
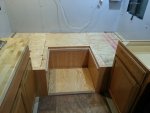
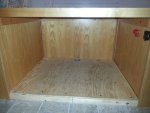
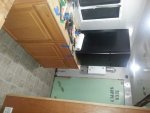
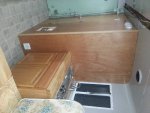
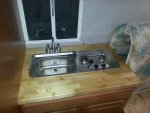
As you can see in my last post, I did the pressure side plumbing with PEX. For durability and ease of installation, it seemed like the obvious choice to me. I sized the areas under the bed / kitchen seats such that I could fit a 46 gallon fresh water tank under each side. Currently I've only got one installed, but it is under the driver's side seat. I am using butcher block counter tops from Menards for the counter tops and for the kitchen table / bed insert. The mattress in the pictures is just a temporary solution until I get the real mattress (cut into pieces to also be kitchen seat cushions) made to fit. The cabinets themselves are cheap Menards pieces that fit the budget but had decent oak fronts. The oak paneling for a wall covering... well, that's because I didn't want it to look any cheaper than RV stuff typically does. I'm not exactly worried about the weight, either, since a little extra heft will just help the ride quality. The passenger side counter top is plywood here because that's all I had time to get done before my last camping trip in the fall.

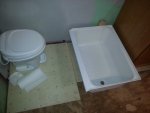
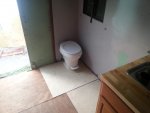
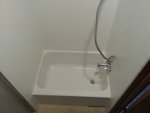
Inside the bathroom, I am covering the walls with FRP. It is cheap and durable and easy to work with. I had originally planned to use a simple shower basin, but every option I found put the drain directly over top of the left rear tire, which definitely wasn't going to work. The 24" x 32" tub that I ended up buying has a drain that is just inboard of the frame rail, so it's protected from whatever the tires might sling up. I figured it would also help keep water off the floor if the truck wasn't parked on a level spot, since leveling jacks aren't part of the plan, either.

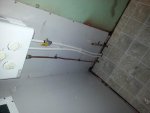
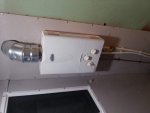
Hot water comes from a tankless propane water heater mounted on the rear of the truck. You can also see a capped off propane quick disconnect at the rear of the truck; it's for the catalytic safety heater that I bought to use if electricity isn't available or if the electric heat just wasn't enough. It will absolutely ROAST the camper, and only at 3000 btu! You can also see the carbon monoxide and propane detector near the floor by the sink. With propane in an enclosed space, it's a hard requirement for safety!

I don't have any pictures of the house battery location, but it is in the front passenger side tool box. That way it is outside the passenger compartment and vented. I've got a circuit breaker on the positive feed and a large fuse on the negative, so if something happens and it shorts it won't blow. I also have a master disconnect inside the camper, along with charging lugs and fuse box so each circuit is individually fused. I don't take chances with electricity, either!

20140927_115752.jpg20150208_180309.jpg20150208_180300.jpg20150208_180142.jpg20150208_180125.jpg20150208_180115.jpg20150208_180101.jpg20150208_180051.jpg20141008_213128.jpg20150208_180336.jpg

Sorry for some of the pictures being sideways. I don't know how to rotate them here, and they were right side up on my computer!
 

cbrTodd

Well-known member
Steel Soldiers Supporter
268
483
63
Location
Indianapolis, Indiana
After what's shown in my last post, you're up to date with the work in the RV area.

This past Summer, I had a sheriff's deputy come over and inspect the truck to prove that it met Indiana's criteria for a recreational vehicle - that it be equipped solely with living quarters. The deputy was very helpful, thought the truck was cool, and gave me his business card in case I had any trouble at the BMV. Everything went through smoothly, and the truck now has a 100% legal RV title with RV insurance. So it is no longer subject to any commercial vehicle requirements, as spelled out in the motor vehicle code. Thorough pre-trip checks and a hefty dose of common sense are still required to meet my own personal criteria though! :-D

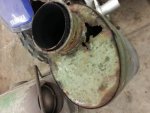
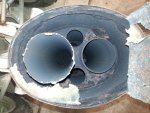
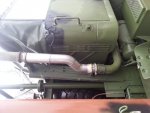
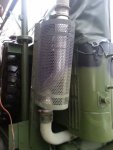
The only other significant modification that I have done done is one that I also consider to be safety related. I had been hearing the hiss of a leaky muffler, and after reading posts about exhaust leaks on M939 series trucks leading to melted air brake hoses, I knew that I had to fix it. Having the air tanks drain suddenly and applying the spring brakes at highway speed could definitely be unsafe! Hopefully you guys will approve of my method for fixing it...

I have many other upgrades planned, but with it being winter here and having to work on this particular truck outside due to its size, progress will be slow for a while.

20150103_133217.jpg20150103_134638.jpg20150103_155445.jpg20150103_161301_9718.jpg
 

cbrTodd

Well-known member
Steel Soldiers Supporter
268
483
63
Location
Indianapolis, Indiana
Great looking work so far. Is there any concern that water will get in at highway speed thru the air conditioner?

Bert
Thanks! Yes, water entry is a concern, but it hasn't been a problem so far. The way the A/C unit is mounted, it would direct any water all the way through instead of letting it get inside the wall, which would be worse in my mind. I've driven it through some decent rain this past year and not found any water inside.

Longer term plans include a home made hard top with a sheet metal spoiler on top. I figure I can do that cheaper than what hard tops seem to be going for right now, it's just getting time to do it that is the hard part! The thought is that it would create negative pressure in front of the A/C unit at road speed and allow me to cool it on a generator while driving if I should ever be so inclined.
 

Andrmorr

Member
274
7
18
Location
Burlington, NC
Kudos on the DMV win! Paint the sides camo or green but paint the top black to pull in the heat in the winter and build a fly cover for the summer...or put a solar panel on top and LED lights inside...small changes but have a big return...this is a bucket list item now!
 

73m819

Rock = older than dirt , GA. MAFIA , Dirty
Steel Soldiers Supporter
In Memorial
12,195
325
0
Location
gainesville, ga.
We now have TWO 909s, Souts and yours, MR. S built his two years ago.
 

cbrTodd

Well-known member
Steel Soldiers Supporter
268
483
63
Location
Indianapolis, Indiana
We now have TWO 909s, Souts and yours, MR. S built his two years ago.
I found a few pictures of Zout's work on here as well as several useful pieces of information. I think he intentionally didn't post much about his build, which I understand and respect his decision to do so. I did use MS Paint and a side shot of his truck to get an idea of how my truck would look since I placed the van body a little differently. [thumbzup]

Kudos on the DMV win! Paint the sides camo or green but paint the top black to pull in the heat in the winter and build a fly cover for the summer...or put a solar panel on top and LED lights inside...small changes but have a big return...this is a bucket list item now!
I'm planning to paint it back the 3 color camo (hopefully this Spring) once I get the rear toolbox / mini porch fabricated and installed. You're spot on about the LED lights, too. I replaced the 120V lights in the original buckets with LED 60 watt equivalent bulbs. They won't get damaged from vibration, they are rated for use inside an enclosed fixture, and they use very little power. I can't see a down side! All of my 12V lights in the camper are LED too. No reason to waste precious battery power on incandescent light! I do have one small solar panel kit, but it's not going to get installed until after the truck gets painted.

Thanks again for the kind words, everyone!
 

cbrTodd

Well-known member
Steel Soldiers Supporter
268
483
63
Location
Indianapolis, Indiana
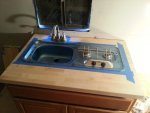
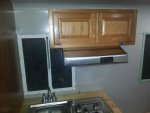
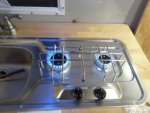
I've not done much on the truck in the last couple weeks but I thought I'd show what I have managed to accomplish. I mounted the first of the upper cabinets a few days ago. This one overlaps the window a bit in front of the kitchen sink, but it's where I wanted it in order to hold the range hood for the stove. The range hood is just a cheap unit from Ebay, and I've not cut the vent hole through the wall yet or wired it in. But it looks decent, right? I've also got the butcher block counter top for the passenger side cabinets cut, corners rounded with the router, and stained. Hopefully I will get to install it this weekend. It interferes with two of the bolts that go through the walls so I've got a little trimming to do there.

20150303_211308.jpg

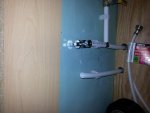
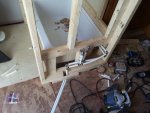
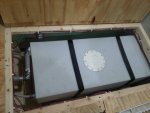
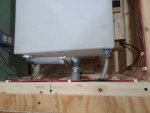
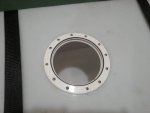
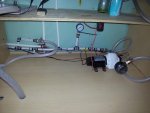
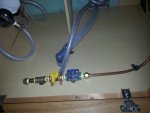
Here are a couple pictures from the water system setup in case anyone is curious. The pump is an on demand RV water pump with a 50 psi internal preset. I wanted more consistent water pressure than what the system provided as delivered, so I took a hint from an RV upgrade website I found and added a 2 gallon well pressure vessel. It's actually removed right now - I took it out during the winterization. Instead of having the pump come on every time you open a faucet, it takes a couple cups of water before it comes on, and then it runs a bit longer to pressurize the whole system back up. Maybe that will make the pump last a little longer, too, who knows.

20150302_205225.jpg20150302_205230.jpg20150302_205253.jpg20150302_205404.jpg20150302_205411.jpg
 
Top
AdBlock Detected

We get it, advertisements are annoying!

Sure, ad-blocking software does a great job at blocking ads, but it also blocks useful features of our website like our supporting vendors. Their ads help keep Steel Soldiers going. Please consider disabling your ad blockers for the site. Thanks!

I've Disabled AdBlock
No Thanks