• Steel Soldiers now has a few new forums, read more about it at: New Munitions Forums!

  • Microsoft MSN, Live, Hotmail, Outlook email users may not be receiving emails. We are working to resolve this issue. Please add support@steelsoldiers.com to your trusted contacts.

WSUCougarx's M561 Gama Goat Acquisition and Build Thread

wsucougarx

Well-known member
6,951
67
48
Location
Washington State
Detroit Diesel Thermostat OEM Replacement 03038144

Well, I took my thermostat out of the truck and tested it. It worked great. I reinstalled it in the truck and then realized I wanted to flush the coolant system really well first. Well.... during the uninstall phase, I put too much upward pressure on the thermostat housing. The thermostat got caught and snapped in half. I have no idea where the bottom half went. It got lost in the abyss of the tub. I located a direct Detroit Diesel thermostat replacement. The parts manager ran my engines serial number and the only match was for part number 03038144. Reliable Industries had to special order this thermostat as they didn't have any in stock. I ended up paying $64.56 shipped for this $10 part. But supply and demand was the issue.

Project Cost:
1) Thermostat $64.56 shipped


uploadfromtaptalk1446313888077.jpg
 
Last edited:

wsucougarx

Well-known member
6,951
67
48
Location
Washington State
Radiator Setback

Tonight after work I was motivated to get the cooling system put back together. I got the NOS M561 Radiator out of the box and was ready to install it. Before getting everything in place, I decided it would be a good idea to do a quick look around to make sure everything looked good. I didn't want to muscle this thing into place only to muscle it back out and waste a bunch of coolant. Boy, I'm glad I did!!! I discovered I had a nice 1.25 inch crack in the radiator housing edge. Looked like it was dropped at one point or another. Anyways, hopefully I can get this issue squared away quickly so I can get going on this truck.

uploadfromtaptalk1446525917986.jpg
 
Last edited:

Gamagoat1

Active member
746
44
28
Location
Kiowa, Colorado
Be sure to let Saturn know of the condition. That will solder up easy............
Tonight after work I was motivated to get the cooling system put back together. I got the NOS M561 Radiator out of the box and was ready to install it. Before getting everything in place, I decided it would be a good idea to do a quick look around to make sure everything looked good. I didn't want to muscle this thing into place only to muscle it back out and waste a bunch of coolant. Boy, I'm glad I did!!! I discovered I had a nice 1.25 inch crack in the radiator housing edge. Looked like it was dropped at one point or another. Anyways, hopefully I can get this issue squared away quickly so I can get going on this truck.

View attachment 591824
 

wsucougarx

Well-known member
6,951
67
48
Location
Washington State
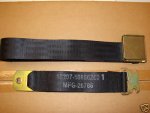
Carriage Seat Belts Part # 10866260-1 (Beams 50" Seat Belts)

Today, went to my favorite site and completed my seat belt quest. I found the USGI seat belts found in the M561 carriage. I ended up buying 10 sets instead of 8. Thought it would be a good idea to have a couple spare sets. My carriage already has the U-bolts that these seatbelts mount to. Once I get her painted, I'll get them mounted. I found these on a popular website E***. I bought these for $10/set. They are brand new. So I paid $109 shipped for the 10 sets. At last glance, they were down to the last 7 seat belts out of 100 that they originally started with.
On another note, Saturn Surplus sent out another radiator. Should have it by Friday.

Project Cost:
1) Carrier Seatbelts (10 sets total) $109 shipped
 

Attachments

Last edited:

wsucougarx

Well-known member
6,951
67
48
Location
Washington State
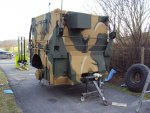
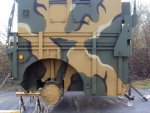
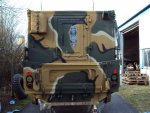
Paint scheme options-MERDC

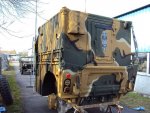
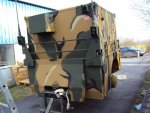
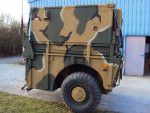
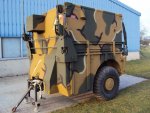
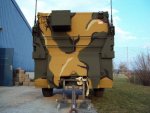
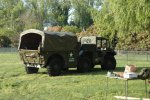
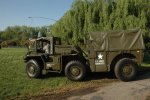
I'm just pondering a color scheme for this Goat. My truck is currently painted in MERDC but there's something about this particular MERDC pattern I really like. Not sure if it's the shade of brown (looks like Earth Yellow FS30257) or the sharp camo lines vs blended. Just posting pics for future reference.
For the MERDC in Winter Verdant the paint codes are:
FS34079- Forest Green (Primary Green color)
FS30118- Field Drab (Brown Tone)
FS30277- Sand
FS37038- Black

Also attached is the Camouflage Pattern Painting Report. Page 69 specifically addresses the Gama Goat Neoprene Coated Tarps.
 

Attachments

Last edited:

wsucougarx

Well-known member
6,951
67
48
Location
Washington State
Paint scheme options-24087 Semi-Gloss OD Green

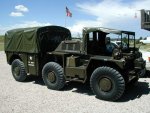
Then there's the classic MV look with the semi-gloss 24087 OD Green. For sure the interior and engine compartment will be 24087, but I'm torn with the exterior. I'm keeping the 24087 on the interior in keeping with the nostalgia more than anything else. I pondered doing forest green for the interior of the cab at least but I like the semi-gloss 24087.
Some things I thought about was the dark green with the small cramped interior. I'm not claustrophobic or anything but the cab is pretty cramped as it is. But thinking the semi-gloss may "open" up the interior a bit coupled with the big windshield before my eyes. Another thought was clean up in the tub. Being an enclosed tub, I can no longer simply hose out the cab like I do with my deuces and 5 tons. With the steering box before on the floor and the propensity for water going in the box, the semi-gloss will at least afford the ability to wipe the interior down somewhat.
 

Attachments

Last edited:

m38inmaine

Well-known member
Steel Soldiers Supporter
2,118
67
48
Location
Maine USA
If it was mine I would not re paint it, I think it looks great as is, I love the original paint look.
 

wsucougarx

Well-known member
6,951
67
48
Location
Washington State
Carriage Seat Belts came today!

Never been so excited about seat belts before. Just got these today. Now I can have the family in the carrier for parades and whatnots. As with most parts for the Gama Goat, they are few and far between. When you see a part come up, you've got to snatch it up ASAP. I hadn't plan on throwing $100 for seat belts, as I have a ton of maintenance type parts I need to buy. But got to get them when the opportunity presents itself.
Today, I spent the better part of the afternoon pump GL-1 90W into all three differentials. Man, what a tedious job that was! Glad I got it done. I also installed my new belts on the DD. I'm getting everything ready so I can install my radiator tomorrow. Hopefully, the radiator comes undamaged this time.


uploadfromtaptalk1447374415277.jpg
 
Last edited:

wsucougarx

Well-known member
6,951
67
48
Location
Washington State
Got my replacement radiator today. Got a bit of a scare as I saw damage once again. I went out to the garage and for my air hose. Had my son plug off the two main inlet and outlet holes while I plugged off one of the small once while holding the air hose up to another small hole. I put some soapy water over the damaged area, held my breath, and put some air pressure into the radiator. I didn't hear any hissing nor did I are any bubbles....whew!!! Looks like we're finally good to go! Got to freshen up the radiator with some gloss black and I'll get her put in tonight.
 

wsucougarx

Well-known member
6,951
67
48
Location
Washington State
Got my replacement radiator today. Got a bit of a scare as I saw damage once again. I was unable to see any perforations in the water channels but you never know. I went out to the garage and got my air hose. I put the air nozzle on with a rubber spout to create a nice air tight seal. Had my son plug off the two main inlet and outlet holes with his palms while I plugged off one of the smaller ones while holding the air hose up to another small hole. I put some soapy water over the damaged area, held my breath, and put some air pressure into the radiator. I didn't hear any hissing nor did I see any bubbles....whew!!! Looks like we're finally good to go! Got to freshen up the radiator with some gloss black and I'll get her put in tonight. The thought of having to make another UPS claim and waiting another week or so freeked me out initially. Glad things worked out.
Tonight I made a trip to Home Depot and secured a gallon can of Behr Exterior Semi-Gloss in the "correct" Vietnam Era 24087 OD Green. Pretty excited to get to some painting.
 

Attachments

Last edited:

wsucougarx

Well-known member
6,951
67
48
Location
Washington State
Detroit Diesel 3-53 1st Run After Changing All Fluids, Filter, Hoses, and Belts

Just completed changing ALL Fluids (Engine, Transfer Case, Transmission, Differentials), Filters, Hoses, Belts, and Radiator. This was more or less a test run to make sure everything looked good and free of leaks. She sputtered initially for a couple seconds. It was probably due to changing the fuel filters. I'm pretty happy to report there were no issues. The radiator had zero leaks and everything looked good...for the moment anyways.
The interior is stripped as I am in the middle of getting things squared away. Trying to figure out where to run the VIC-1 cables and mounting the C-10456 and AM-1780 among other things.
I did discover the I was getting an oil drip about every 1:10 minutes out of the airbox drain tube. However, no water was coming out. Just some very black oil. Must be some residual oil from the old oil.
https://www.youtube.com/watch?v=iX-rniHFYdc
 
Last edited:

wsucougarx

Well-known member
6,951
67
48
Location
Washington State
VRC-12 Radio Set Installation Kits w/Mounts

Tonight I was perusing the classified ads and saw a complete VRC-12 Radio Installation kit for the RT-246/RT-524 and R-442. It was complete with NOS MT-1029 and MT-1898 mounts. I know I'm going to be installing some radio equipment in the carriage and felt I had to jump on it. I got this kit for $80 plus shipping. I have most of the VIC-1 components but lacking a couple cables possibly. I still need to secure the carriage corner mounted antenna mounting brackets.
 

Attachments

m38inmaine

Well-known member
Steel Soldiers Supporter
2,118
67
48
Location
Maine USA
There is also a base plate that mounts to the carrier bench, which in turn the radio mounts attach to. Can't seem to find the picture in the file but you can see a picture of it in my thread. Must be a radio install manual available as well. It would be interesting to see if they came up with a way to intercom from back to front.
 

wsucougarx

Well-known member
6,951
67
48
Location
Washington State
Thanks for the heads up! Should have known there was a sponson that went with these mounts. Hopefully, the sponson was used on other MV applications as well. If not, I'll have to throw is on the Priority One list of unobtanium Gama Goat parts.
 

wsucougarx

Well-known member
6,951
67
48
Location
Washington State
Detroit Diesel SAE 40W Oil Requirement (MTU Manual)

Well, I recently changed my oil to Rotella T1 30W. Apparently, 30W is an acceptable oil weight provided it's only used short term. Under another thread, JDToumanian provided a MTU manual stating 40w CF2 should only be used in the DD. I don't to start a debate on which oil is better and hear how "I've used this oil for X years and I've had no problems". I just want to provide this manual for those who want to be informed. Is 30W ok? Probably, but knowing the 40w recommendation in the back of my head will drive me nuts while running 30w.
On that note, 40w is no where to be found in my area. I found a case of 3 gallons online for $44.95 shipped!
 

Attachments

Top
AdBlock Detected

We get it, advertisements are annoying!

Sure, ad-blocking software does a great job at blocking ads, but it also blocks useful features of our website like our supporting vendors. Their ads help keep Steel Soldiers going. Please consider disabling your ad blockers for the site. Thanks!

I've Disabled AdBlock
No Thanks