• Steel Soldiers now has a few new forums, read more about it at: New Munitions Forums!

  • Microsoft MSN, Live, Hotmail, Outlook email users may not be receiving emails. We are working to resolve this issue. Please add support@steelsoldiers.com to your trusted contacts.

Galvanized Deuce Wheels

rustystud

Well-known member
9,280
2,987
113
Location
Woodinville, Washington
Well I finally had it with rusting wheels ! I took off all my wheels and some spares I had laying around (21 total) and busted them down. I kept the good tires and tossed the rest.
Then I took my wheels and rings and had them sand blasted. Then I took them to
"Seattle Galvanizing" in Arlington WA. to get "hot dipped" galvanized.
For years I always thought you could not galvanize the tire "rings" since they are hardened. So I researched this and found out the wheels and rings are made from
"AISI 1023" low carbon steel. The annealing point for this steel is 1400F . Hot dip galvanizing only uses 800F to melt the Zinc, so galvanizing the wheels and rings was totally acceptable !
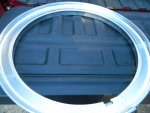
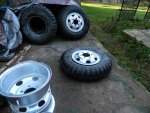
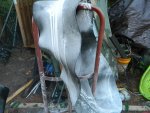
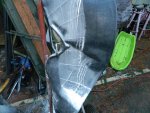
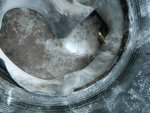
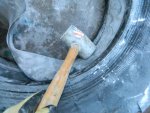
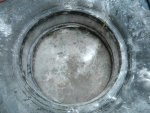
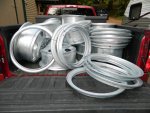
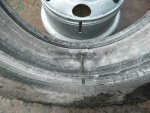
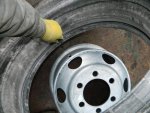
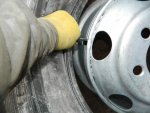
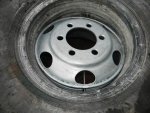
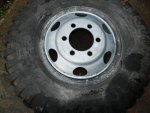
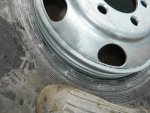
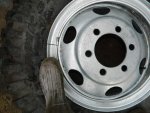
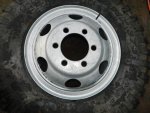
I got the first batch back today. They look pretty good ! Tomorrow I'll start putting my new 11.00X20 tires on these freshly galvanized wheels I bought for the Deuce and see how it handles.
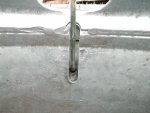
Here's some pictures of the galvanized wheels.
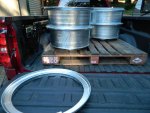
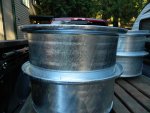
004.jpg006.jpg005.jpg

The total cost to sand blast and galvanize each wheel was $100.00 ea. I know that makes doing all ten wheels a good chunk of change, but now they will not rust for the rest of my life and quite possibly the life of my son too.
I will buy some "Galv-a-Coat" paint and paint the outside of the wheels and then I can apply some good "flat Black" or "Olive drab" paint to them.
"Galv-a-Coat" sticks to any galvanized surface and allows any enamel paint to adhere to it.
I still have 14 wheels at the galvanizer. They will be done next Wednesday hopefully.
Then I will take all ten wheels off my 1954 M35A1 and have them blasted and galvanized too. My M105 trailer will be next after that.
 

marchplumber

Well-known member
Steel Soldiers Supporter
3,800
2,828
113
Location
Peoria, Illinois
RS,
ya gotta mount em up and send a pic with the galv showing on the deuce!! It'd be a "bling machine" for sure! LMBO

GOOD research as always and a good (not cheap) solution to a common and reoccurring problem we all face. Curious, are the surfaces smooth and "tit" free? As a plumber I used to see a TON of galvanized parts that were rough.
 

NDT

Well-known member
Steel Soldiers Supporter
10,457
6,530
113
Location
Camp Wood/LC, TX
If you don’t live anywhere near a galvanizer, zinc rich epoxy primer works almost as well. Still have to sandblast to white metal. Don’t leave rust pits or re-rusting will occur.
 

Bulldogger

Well-known member
Steel Soldiers Supporter
1,330
586
113
Location
Quantico VA
They look great. Not cheap but a good investment to protect the reliability of your truck.
I second the request to see a pic with a “blinged” deuce :)
Bulldogger
 

Valley Rock

Big wheeler cat peeler
Steel Soldiers Supporter
445
836
93
Location
Orygun
Those look cool, almost like a mag wheel !

I think I'd have a hard time painting those OD, I can paint crappy rusty old rim OD and it will look about the same as every other OD rim

To think that all that time and money and labor would be hidden under paint seems like it'd be unrewarding to me
 

CMPPhil

Well-known member
536
376
63
Location
Temple, NH
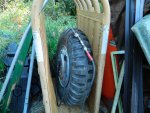
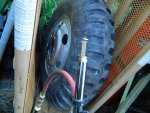
Like the remote air hose and the cage

... I'm pretty sore now too !
....One interesting fact though. The tires don't "pop" when inflating. They just slowly slide on the galvanizing until fully seated.
Here's some pictures.

View attachment 781799View attachment 781800View attachment 781801
Hi

Your showing the use of a remote air hose connection and a Inflation Cage is of course an important object lesson for all of us work with big tires. Even if the tire smoothly slides to seat. Thanks for showing.

Cheers Phil
 
Last edited:

davidb56

Well-known member
1,020
1,237
113
Location
Bonners Ferry Idaho
@ Rusty...are you going to "lower" it next and put some hydraulics on it? I got some fuzzy dice I can send you.... hahahaha. it really looks good. I have a galvanized boat trailer made in seattle that has held up great. Good Idea.
 

rustystud

Well-known member
9,280
2,987
113
Location
Woodinville, Washington
Those look cool, almost like a mag wheel !

I think I'd have a hard time painting those OD, I can paint crappy rusty old rim OD and it will look about the same as every other OD rim

To think that all that time and money and labor would be hidden under paint seems like it'd be unrewarding to me
If I don't paint them then the "Zombies" will see me coming down the road and eat me ! :wink:
 

rustystud

Well-known member
9,280
2,987
113
Location
Woodinville, Washington
@ Rusty...are you going to "lower" it next and put some hydraulics on it? I got some fuzzy dice I can send you.... hahahaha. it really looks good. I have a galvanized boat trailer made in seattle that has held up great. Good Idea.
I like the idea of seeing how high I can make it "bounce" ! Of course that would take some serious hydraulics to perform that feat !
 

Valley Rock

Big wheeler cat peeler
Steel Soldiers Supporter
445
836
93
Location
Orygun
If I don't paint them then the "Zombies" will see me coming down the road and eat me ! :wink:


A 100 bucks says worse things have happened in your life, besides once the zombies get you then you become a zombie and we can see what lasts longer, you or your bling rims !
 

rustystud

Well-known member
9,280
2,987
113
Location
Woodinville, Washington
A 100 bucks says worse things have happened in your life, besides once the zombies get you then you become a zombie and we can see what lasts longer, you or your bling rims !
HaHaHa You win !
Even though I already bought a carton of "Cold Galvanizing Spray Paint" and two gallons of "Flat Black Paint" , I'll hold off painting them for awhile.
 

rustystud

Well-known member
9,280
2,987
113
Location
Woodinville, Washington
Since it is getting harder and harder to find a shop that will work on our tires I thought I would give a short little "tutorial" on tire mounting for those who have never done it. Later I will show how to bust down a tire once I start on my other deuce.

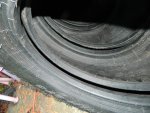
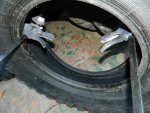
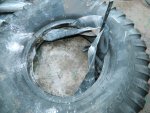
Deuce Tires 002.jpg If you ordered new tires they will come strapped down to a pallet. This crushes the tires together and they need to be opened up to clean them and install the tubes. Since these tires have over 1" thick sidewalls that will take a bit of doing. I bought some reversible clamps so I could spread the tires open.

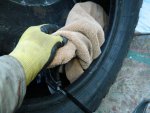
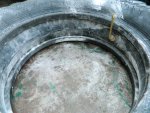
Deuce Tires 003.jpg Once the tires are open you can take a towel and cleaner if needed and scrub out the insides. You need them to be perfectly clean inside ! Any foreign object can be the one that ends up puncturing your inner-tube.
Mine had a bunch of dirt and water inside form shipping across the nation.

Deuce Tires 004.jpg

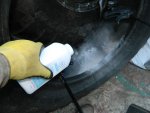
Once the tires are clean inside, apply some baby powder to the inside of the tire and also to the inner-tube and boot.

Deuce Tires 007.jpgDeuce Tires 014.jpgDeuce Tires 009.jpg

Now you can install the inner-tube. You will of course need to remove the clamps. I remove them one at a time so the tire doesn't collapse on me.

Deuce Tires 010.jpg

Once the tube is in, you will inflate it until the tire moves out about 5" to 6" . This will allow you enough space to install the boot.

Deuce Tires 013.jpg You can take your rubber hammer and center the inner-tube in the tire.
Now you know the reason to use baby powder in the tire and the inner-tube and boot. It allows the inner-tube to "shift" position without binding and causing a future tear and leak, and makes it so much easier to install the boot.

Deuce Tires 015.jpg Start installing the boot at the valve stem, you will need to work your way around the tire tucking in the boot. By evenly working around the valve stem (a little left and a little right) you prevent the boot from "pulling" on the stem which can cause problems later down the road. You can also use your rubber hammer to nudge the boot into place. Actually you can whack it pretty good !
Just be sure you don't allow the boot edges to "roll". They need to be firmly tucked around the inner-tube. The baby powder really helps with this step.

Deuce Tires 017.jpgDeuce Tires 019.jpg

At this point the tire is ready to mount to the wheel.
When I get my next batch of wheels from the Galvanizer I'll show that process.
 
Last edited:

SCM35A2

Well-known member
Steel Soldiers Supporter
2,053
2,949
113
Location
Florence, SC
Nice, reminds me of when I stripped my wheels down to the bare metal! Can't wait to see them on your truck.
 

Jeepsinker

Well-known member
5,399
456
83
Location
Dry Creek, Louisiana
I actually found that some of mine were originally galvanized under 13 layers of paint when I stripped and painted my truck and rims. Not all, but a few. Surprised me.
 

rustystud

Well-known member
9,280
2,987
113
Location
Woodinville, Washington
I actually found that some of mine were originally galvanized under 13 layers of paint when I stripped and painted my truck and rims. Not all, but a few. Surprised me.
I found that originally the first M35's came with galvanized wheels ! Some of my 1954 M35 wheels with the rivets underneath all the paint and crus where galvanized. Totally surprised me to ! Then I looked up the original NSN # and data chart and found they came galvanized from the factory as per military contract.
 

rustystud

Well-known member
9,280
2,987
113
Location
Woodinville, Washington
Well to continue my little tutorial on mounting tires, here I'm installing the assembled tire unit to the wheel.

wheels 2 004.jpg Align the valve stem with the wheel cut-out and lower the tire down at an angle.

wheels 2 005.jpg

Then push down the valve stem towards the cut-out and slowly push the tire into the wheel.

wheels 2 006.jpg

Once the valve stem is inside the wheel you can then lift the tire up (behind the valve stem area) and it will slid right down on the wheel. This is another reason to use the baby powder. It prevents the friction you normally have with rubber.


wheels 2 008.jpg wheels 2 009.jpg

Make sure the valve stem is centered in the wheel cut-out. If it isn't then you can rotate the tire until it is. This is an important step, as it prevents the stem from becoming damaged due to rubbing against the wheel. I've seen many tires leak from this simple problem.

wheels 2 011.jpg

Now walk on the tire and make sure it will drop down below the ring mounting groove. If it doesn't you will need to let out some air from the tire. This step makes it so much easier to mount the ring.

wheels 2 013.jpg

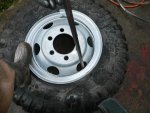
Now your ready to install the ring. Make sure the rings gap is opposite the valve stem. With your foot, hold down on the rings end making sure it is in the ring groove. Using a hammer tap the rings outer edge, working it around the wheel until it goes down into the groove.


wheels 2 015.jpg wheels 2 016.jpg On my wheels I used a pry bar and a rubber mallet as I didn't want to mar my galvanized finish.
Once the ring is on, go around it again with the hammer making sure the ring is fully seated in the groove.

At this point I usually add a little bit of air to make sure the tire is held in place so the valve stem doesn't get moved out of position, then I place it in my tire cage to air up.
Now I know most people don't have a tire cage, so the best and safest way to air up a tire is to mount it back on the truck with the ring facing inwards towards the truck body. You only need two lug nuts to hold the wheel on.

Once the tire is fully seated and aired up to the proper pressure I remove it and lay the tire back down on the ground and remove the Schrader valve letting all the air out. This allows the inner-tube to fully relax so it does not create any over-lapping creases in the rubber which can cause a blow-out latter on when the wheel gets hot from driving. If the tire stays in contact with the rim after you let the air out, you can safely air the tire back up without the tire cage. If the tire does come loose from the rim you must put it back in the tire cage or remount it to the truck to safely re-inflate it.
I know many people don't go to all these measures to mount a tire, but it is one of the best ways to prevent any inner-tube issues later on. I know many truck tire shops use "tire gels" to mount the tires. I don't like using any "liquid" on my tires as I don't want to make it any easier to rust the wheels then is necessary.
The baby powder system has worked well for me and other mechanics for decades now. Plus it is easier to paint the wheels later on without having to wash off the tire goo. Just take a air blow gun and blow away the powder.

wheels 2 017.jpg
 
Last edited:
Top
AdBlock Detected

We get it, advertisements are annoying!

Sure, ad-blocking software does a great job at blocking ads, but it also blocks useful features of our website like our supporting vendors. Their ads help keep Steel Soldiers going. Please consider disabling your ad blockers for the site. Thanks!

I've Disabled AdBlock
No Thanks