• Steel Soldiers now has a few new forums, read more about it at: New Munitions Forums!

  • Microsoft MSN, Live, Hotmail, Outlook email users may not be receiving emails. We are working to resolve this issue. Please add support@steelsoldiers.com to your trusted contacts.

Advice needed - new guy with MEP004A

Back-in-Black

Well-known member
296
277
63
Location
Louisiana
.

Wondering now when you plan to paint the power plant.
Never :)

It has to sit behind my house so it needs to look pretty good on the outside. Add that to stopping the rust on the case and it adds up to 2-3 months of WORK. The power plant ain't rusting and you can't see it without opening doors.
 

Mullaney

Well-known member
Steel Soldiers Supporter
Supporting Vendor
7,716
19,765
113
Location
Charlotte NC
Never :)

It has to sit behind my house so it needs to look pretty good on the outside. Add that to stopping the rust on the case and it adds up to 2-3 months of WORK. The power plant ain't rusting and you can't see it without opening doors.
.
Agreed.
I was just testing to see if you have OCD.
 

Back-in-Black

Well-known member
296
277
63
Location
Louisiana
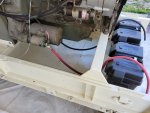
Started on the battery cables. Can't finish them until I go buy2 new batteries. Been using one out of my marsh boat and one out of my tractor up till now but they are both wrong size or wrong posts for this thing. Putting off battery purchase as long as possible.

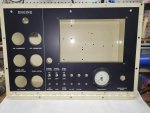
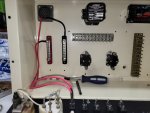
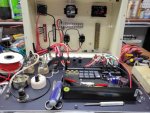
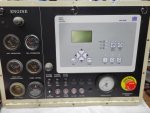
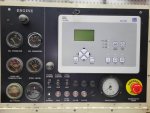
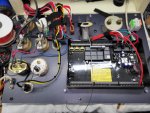
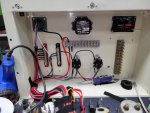
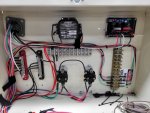
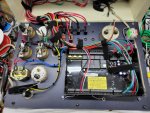
My control panel arrived this afternoon. About time too. I was getting REALLY tired of paint work and with all the dang trees budding out for spring there's crap falling in my wet paint faster than I can get it out. Time to take a break from painting.

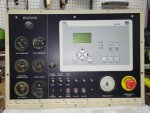
Now that I've done most of the easy part of the control panel, I get to spend hours and hours wiring it up....

20220320_154222.jpg

20220322_201912.jpg

20220322_214452.jpg
 

Mullaney

Well-known member
Steel Soldiers Supporter
Supporting Vendor
7,716
19,765
113
Location
Charlotte NC
Started on the battery cables. Can't finish them until I go buy2 new batteries. Been using one out of my marsh boat and one out of my tractor up till now but they are both wrong size or wrong posts for this thing. Putting off battery purchase as long as possible.

My control panel arrived this afternoon. About time too. I was getting REALLY tired of paint work and with all the dang trees budding out for spring there's crap falling in my wet paint faster than I can get it out. Time to take a break from painting.

Now that I've done most of the easy part of the control panel, I get to spend hours and hours wiring it up....

View attachment 862340

View attachment 862341

View attachment 862342
.
Again I say - Dang this thing is looking almost brand new! If she runs as well as she looks, you should be one happy guy...
 

Back-in-Black

Well-known member
296
277
63
Location
Louisiana
.
Again I say - Dang this thing is looking almost brand new! If she runs as well as she looks, you should be one happy guy...

Like you, I hope it runs and makes power dependably. Lot of damn work...

Only been at it for a couple hours today and my back is already killing me from leaning over this thing on the bench.

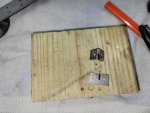
Had to relocate the endpoints for the lanyards that keep the control panel from falling all the way open. I knew I was going to have to do this but it was easier with the new panel mounted than trying to figure it out in CAD. The DGC (controller) is in the way for where the original tie-points were and while it clears the original hook brackets when closing, it wouldn't clear when the lanyard was attached to the bracket. The old brackets were spot welded to the box and I wasn't going to mess with that so I just made 2 new brackets and located them further outboard so the DGC would clear. Likewise on the control panel end of the lanyards. Had to move the mounting points outboard some to clear the DGC. Actually, the mounting points on the left side were fine as setup originally but wanted to keep everything bilateral.

Original upper tie-point.
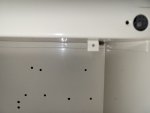
20220323_122220.jpg

Making new ones.
20220323_122310.jpg

Wasn't gonna break out the spray gun to paint them tan so I just hit 'em with a rattle can.
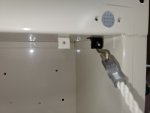
20220323_141317.jpg

Been mounting stuff back in the box. It's all loose right now. Think I'm gonna move the AVR up some....
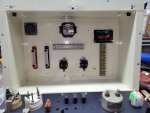
20220323_164035.jpg


The paint looks surprisingly good for Rustoleum cut with acetone for spraying..
 

Back-in-Black

Well-known member
296
277
63
Location
Louisiana
Do not use the original door locking turn locks. They are too soft and if loose, the vibrations will destroy them. I hated replacing them.

I got new ones and I tried to mount them last night but I need a better rivet gun. Got one on the way. Plan to use the same gizmo on the radiator cap door. Not sure these are any better but there just ain't a lot of choices out there for this kind of stuff.
 

Back-in-Black

Well-known member
296
277
63
Location
Louisiana
Yes, the one for the radiator cover and one of the control panel "latches" were missing in action on this one.

Hopefully I won't be running 24/7/365. Doubt I could afford to buy the diesel these days. I don't drive my truck much these days compared to what I used to do but I filled up with diesel about 2 weeks ago and what cost me about $40 in 2020 was a cool $100, 2 weeks ago. I might consider putting pedals on it so I could save money on fuel by pedaling but food cost more than diesel these days.
 

Back-in-Black

Well-known member
296
277
63
Location
Louisiana
Not much to report except that the sandblasting is ALL done and all parts are either primed and painted of at least primed. Still working on the control wiring too.
 

Mullaney

Well-known member
Steel Soldiers Supporter
Supporting Vendor
7,716
19,765
113
Location
Charlotte NC
Not much to report except that the sandblasting is ALL done and all parts are either primed and painted of at least primed. Still working on the control wiring too.
.
I'm sure that part of the project being complete feels really good...

I couldn't afford a building large enough, but up the road from us is a monument shop. They use the rubber mats and "engrave" granite tombstones in a building with a MONSTER sandblasting setup. The larger nozzle is about one inch in diameter.

I have taken them a few sheets of glass over the years. They lightly fog the glass on one side to diffuse the light on "light tables". An almost lost technology, but they are useful here just to see the old and new sheets of paper - one on top if the other.

ANYHOW, what this tale was all about was how cool it would be to have a mega blaster like what the monument place has.
 

Back-in-Black

Well-known member
296
277
63
Location
Louisiana
.
I'm sure that part of the project being complete feels really good...

I couldn't afford a building large enough, but up the road from us is a monument shop. They use the rubber mats and "engrave" granite tombstones in a building with a MONSTER sandblasting setup. The larger nozzle is about one inch in diameter.

I have taken them a few sheets of glass over the years. They lightly fog the glass on one side to diffuse the light on "light tables". An almost lost technology, but they are useful here just to see the old and new sheets of paper - one on top if the other.

ANYHOW, what this tale was all about was how cool it would be to have a mega blaster like what the monument place has.

Apparently, the guy who helped me by taking some of the pieces to his work has several blasters available there. 2 are cabinets that are big enough to get these pieces in and one is a "room" that has some kind of conveyor / auto-feed system that recycles the media. I think they are using aluminum oxide as media. But yes, the blaster I rented had a ~1" nozzle with a 184 cfm, diesel compressor and it was great while I had it but even with a 1" nozzle, with the thickness of the paint, it would have taken FOREVER to blast that much surface area simply because you had to do it inch by inch and it was taking 30 seconds to a minute for it to eat through the paint in each 1 inch circle. The guy who helped me out resorted to several different methods after realizing what he got himself into. He threw a couple of the heavy pieces made of channel into a fire and burned most of the paint off. On some of the bigger panels made of sheet metal, he buried them in paint stripper and covered them with visqueen to keep them wet and left them for days. I had to go over every piece with my blaster and clean them up but he saved weeks - probably months of work. Pieces that didn't have layers and layers of paint on them were pretty easy. Even with my blaster. I did the 2 side panels of the fan shroud the other day. Doing both side of each panel took only a few minutes because I was able to back away from the panel with the blaster nozzle so it was probably hitting 3-4 square inches at a time and I was able to move the nozzle back and forth at a pretty fast speed. It was almost like wiping the paint away with a rag.

Anyway, thanks to him, it's all done now. I've had that compressor for about 4 years now and when I started the blasting part of this project it only had about 6 hours on it - and I had used it to blast several times on other projects.. It's got over 20 hours now.
 
Top
AdBlock Detected

We get it, advertisements are annoying!

Sure, ad-blocking software does a great job at blocking ads, but it also blocks useful features of our website like our supporting vendors. Their ads help keep Steel Soldiers going. Please consider disabling your ad blockers for the site. Thanks!

I've Disabled AdBlock
No Thanks