JasonS
Well-known member
- 1,664
- 192
- 63
- Location
- Eastern SD
I know that the title is a big claim but I really do think that this worked out well.
Let me know if you have any questions or comments.
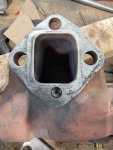
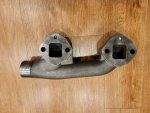
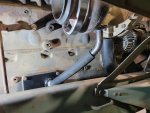
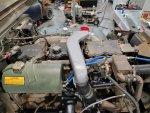
- I used of a factory Cummins crossover tube (142248 ) and intake manifold. This particular intake retains the flame heater. While the turbo outlet and crossover inlet don't exactly line up this is easily fixed with two 23 degree silicone elbows and an inline coupling between the two.
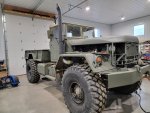
- I initially tried to simply bend the hood crossmember out of the way of the crossover tube but this didn't quite make it. In the end, I did have to slightly relocate the hood crossmember. Simply drill out the spot welds, move back one bolt hole and reweld. There was plenty of slop to enable the slight move. There was a slight bump out on the side of the hood where the factory bent the hood to make the crossmember fit. Your hood may be different.
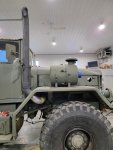
- The coolant reservoir was moved slightly up and to the rear; remounted on a steel plate. I removed the original brass elbow on the coolant reservoir, welded on a new 90 degree, then 45 degree silicone hose, then aluminum pipe to connect to the engine coolant return. New parker hose and fittings reconnect to the radiator and coolant manifold.
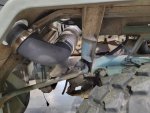
- The exhaust is aftermarket from PAI for a big cam. Part numbers rear to front: 3062568, 3062566, and 3065024. I am using the turbo in a "low" location, not all aftermarket exhaust manifolds have the dowel holes or enough flange to allow for the dowel holes to be drilled.
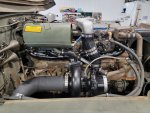
- BHT3B turbo with 26cm housing, 167050.
- The turbo drain line started with a stock multifuel flange/ pipe which was re-clocked to meet with a 1" 45 degree hose barb threaded into a 1" NPT bung welded into the original block cover plate.
- The stack is from Amazon and hung with brackets from Amazon. There is a 45 degree elbow to fit through the fender, then a 90 degree, then a bellows from Summit Racing, another 90 degree elbow, straight section, then a flange to the turbo. I did have to cut the 90 degree fitting coming off the 45 at a slight angle to get things to line up. I used a quick connect flange to separate the stack between the 45 and 90 degree elbow.
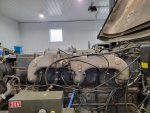
- I am using a 5.5" to 5" reducing elbow, then 5" pipe, then a 90 degree to the air filter. This part is not fully complete yet.
- Unfortunately, I have not heard it run. It has been -13F and I have been unable to take it out or run it yet.
Let me know if you have any questions or comments.
Attachments
-
 3.5 MB Views: 42
 -
 1.6 MB Views: 48
 -
 4 MB Views: 46
 -
 3.1 MB Views: 50
 -
 3.8 MB Views: 51
 -
 3.3 MB Views: 52
 -
 3.6 MB Views: 47
 -
 1.2 MB Views: 45
 -
 1.2 MB Views: 38
 -
 1.6 MB Views: 37
 -
 1.7 MB Views: 13
Last edited: