• Steel Soldiers now has a few new forums, read more about it at: New Munitions Forums!

  • Microsoft MSN, Live, Hotmail, Outlook email users may not be receiving emails. We are working to resolve this issue. Please add support@steelsoldiers.com to your trusted contacts.

Axle Boots

Recovry4x4

LLM/Member 785
Super Moderator
Steel Soldiers Supporter
34,012
1,808
113
Location
GA Mountains
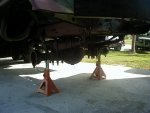
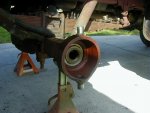
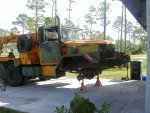
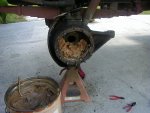
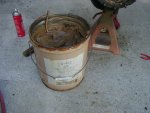
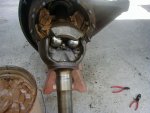
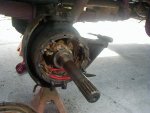
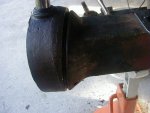
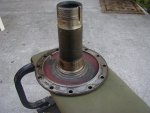
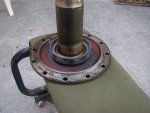
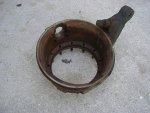
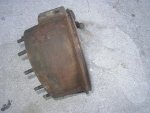
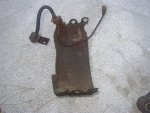
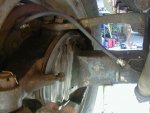
Yesterday I set out to replace the wheel cylinders on the M108 with units I previously rebuilt. Since I was down to the backing plates I decided to pull it down the rest of the way and do the boots since there was almost nothing left. On of the band clamps was broken from a poor installation so now I'm sitting waiting on parts. I also found that one set of the boots that I had just don't ft. They fit the housing OK but are just a bit too large for the steering knuckle. They also had zippers with really big teeth so I'm assuming they are the cheap copies. Anyway, didn't take pics along the way but here are a few of the way the truck sits now.
 

Attachments

Towerguy1

New member
405
1
0
Location
Central Maine
Installed a set on mine a month ago, the new ring clamps were poorly made for the boots and they broke during installation!! I reused the old ones which were better made and still in good shape with no problems.
 

Recovry4x4

LLM/Member 785
Super Moderator
Steel Soldiers Supporter
34,012
1,808
113
Location
GA Mountains
Mike, where did you get your ring clamps so I know where not to get mine? Also, check the TM section for manuals starting with TM 9-4940 Those are the manuals for the bed on your M1028 contact maintenance truck.
 

houdel

Active member
1,563
9
38
Location
Chase, MI
I got my boots and clamps from Saturn. The clamps seem ok except the bolts appear to be metric and are not self locking. Took the bolt down to the hardware store & bought a US (SAE) bolt & nylock nut. I'll post pics when I get around to replacing the inner clamp for the third time. I make the mistake of installing the inner clamp (twice) the way it shows in the TM, with the bolt to the front. If you read the text closely, it says to install the bolts at the TOP. Otherwise the knuckle will hit the inner clamp bolt and push it and the boot off the axle end. Second tip - do NOT cut off the end of the zipper. If you do cut off the zipper and then need to refit the clamps, the zipper will want to unzip on you. Also, my boots from Saturn appear to be Neoprene and do NOT turn inside out, as shown in the TM, to install the inner clamp. It took a bit of fiddling around to get the inner clamp properly seated but I managed. I just hope the Saturn boots are more durable than OEM, this is not a fun job!
 

Towerguy1

New member
405
1
0
Location
Central Maine
I got mine from Memphis Equipment. The boots were good quality but the clamps were weak where the "wire" is folded back and welded to itself to form the loop to hold the bolt. During tightening I snaped 2 of them right off behind the weld. I hadn't really snuged them hard. Oh well, cant win them all......
 

Recovry4x4

LLM/Member 785
Super Moderator
Steel Soldiers Supporter
34,012
1,808
113
Location
GA Mountains
I finished putting the left side together. Installing the boots with the steering knuckle off is so much easier than doing them with everything in the way. Lots more work but I get to do some maintenance while I have everything apart. You can see in the pics that I was able to pack the axle joint and the steering knuckle before assy negating putting 4 tubes of grease through one zerk. All I have to do is a few pumps in the kingpin zerks and that side is done. Completed the brake hose upgrade as well. Will be in a holding pattern until I get a small ring clamp for the other side.
 

Attachments

cranetruck

Moderator
Super Moderator
Steel Soldiers Supporter
10,350
75
48
Location
Meadows of Dan, Virginia

Recovry4x4

LLM/Member 785
Super Moderator
Steel Soldiers Supporter
34,012
1,808
113
Location
GA Mountains
That PS section you've done Bjorn is a valuable resource. I'm in there all the time. Thanks!
 

m35a2cowner

Member
369
2
16
Location
Columbus, Ohio
Question

I am getting around to doing something similar to what you are doing and I am wondering how hard it is to get the spindle off of the axle pins. Also, I am guessing that there is a retainer plate in the axle housing that keeps the axle in place? Or does the spindle assembly hold it in? What is the purpose of the grease? Does it lubricate or does it help to seal the axle? I was wondering because it looks as if you are putting what we use to call short fiber wheel bearing grease. It was pretty stiff and stayed put. I have noticed that over the years wheel bearing has become a lot thinner. I once asked an oil distributor and was told that this is do to the fact that a thinner grease flows through and thus lubricates the moving parts better. What are your thoughts on this? Thanks.
 

Recovry4x4

LLM/Member 785
Super Moderator
Steel Soldiers Supporter
34,012
1,808
113
Location
GA Mountains
RE: Question

Well, I'll start with the grease. There are probably better greases available. That stuff short fibre lithuim IIRC. At any rate its surplus GAA (grease automotive & artillery). I have several buckets of the stuff and worked all those years for the Gov't so I use it. Axle shaft retention is the job of the bushing inside the spindle. It supports the shaft and there is a thrust surface on the inside of the spinde.The steering knuckle itself isn't hard to get off. On the top and bottom there are 4 bolts holding the plate that retains the kingpin bushing. Once the upper and lower are removed, you can remove the knuckle. Gotta take the boot loose first and drop the tie rod. When looking at it you'll think there's no way it will come off. At the top there is a notch on the back side that allows it to clear the kingpin. The grease is for lubing the axle joint. Not quite as much on u-joint axles but with the ball type axles on the old wrecker you need to pack that shaft. There are 2 site plugs in the back of the ball on the housing. Grease should be up to that level. A thinner grease would work better on the ujoint axles but may be more prone to leakage. Have plenty of time and lots of rags and it should go well.When I put the other side together I'll try to do more detailed pics.

Edit; ring clamps are on the way, should see them Wed.
 

m35a2cowner

Member
369
2
16
Location
Columbus, Ohio
Thanks

Thanks for the tips. Looking at the TM is helpful but there is no substitute for words of wisdom from a real person. I have had good luck with the boots from Rapco.
 

Recovry4x4

LLM/Member 785
Super Moderator
Steel Soldiers Supporter
34,012
1,808
113
Location
GA Mountains
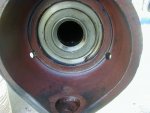
OK gang, I put the left side together already but I'm going to do step by step pics of right side assy. Here are a few pics of some things leading up to assy. The fisrt pic shows the ball on the end of the housing. You can clearly see the groove that goes around it. It is crucial that this groove is clean and dry before assy. I had to use a pick then a wire brush to clean this out. The second pic is a closeup of the inside of the ball. In the center there is an axle shaft seal. These had no evidence of leaking so they stayed. They can be a pain to get out as the seal is in a retainer that needs to be popped out before you can swap the seal. Also visible in this pic is the 2 holes that usually have pipe plugs in them. This is to where the level of grease should be when the uni is assembled and ready. I'll add a few more tonight when I get home.
 

Attachments

Recovry4x4

LLM/Member 785
Super Moderator
Steel Soldiers Supporter
34,012
1,808
113
Location
GA Mountains
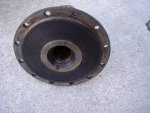
Here are a few more pics before assembly begins. The first one is the backside of the spindle. If you look in the bore you can see the bronze bushing that the axle stub shaft rides on. Also note the thrust surface that keeps the axle in place. Thisnext pic is the front of the spindle. Always re install it with the keyway on the top. That keeps the visible weep channel on the botton. The 3rd pic shows the seal sitting on the spindle prior to being pressed on. 4th pics is of the steering knuckle. From this angle you can see how the casting is notched at the top kingpin to facilitate its removal. Next is another shot of the steering knuckle and the groove on it for the boot. Again, keep this area very clean and dry for re-assembly. The last 2 pics are of the old and updated brake lines. There is a section in TM 9-2320-361-20 dealing with this mod. You have to modify the bracket on the housing a bit. Missing on mine is a little tap that bolts on one of the kingpin bolts and has a spring to the brake hose to keep it clear. The older one used a combo of a short hose and a steel line. More to follow.
 

Attachments

Recovry4x4

LLM/Member 785
Super Moderator
Steel Soldiers Supporter
34,012
1,808
113
Location
GA Mountains
No worries Mike. Not that you need any help but I'm available. BTW my pickup truck is dead so I'm not getting around too good.
 

m35a2cowner

Member
369
2
16
Location
Columbus, Ohio
Question

Thanks again for the very informative pictures and write-up. Do you perchance have a picture of the axle seal and where the axle seal (as opposed to hub seal) actually goes?
Do you fill the differential up to the fill plug? I have a lot of trouble with leaks (even with sealing with new piece of cork and sealer) I looked under the truck the other day and there was another axle leak that I swear wasn't there the other day.
 

Recovry4x4

LLM/Member 785
Super Moderator
Steel Soldiers Supporter
34,012
1,808
113
Location
GA Mountains
RE: Question

Scroll back up and look at pic P180002s. The seal is right there inside the tube. I don't have a seal to out to photograph. I will when I do the tractor so stay tuned. Now remember, these seals are only on the front drive axle not the rears. I do fill my diffs up to the level of the fill plug. Might I suggest you removing the little vents from alll your axles and see if you can blow through them. A little + pressure in the axle and the oil will scoot right by the seals.
 
Top
AdBlock Detected

We get it, advertisements are annoying!

Sure, ad-blocking software does a great job at blocking ads, but it also blocks useful features of our website like our supporting vendors. Their ads help keep Steel Soldiers going. Please consider disabling your ad blockers for the site. Thanks!

I've Disabled AdBlock
No Thanks