scottmh
New member
- 84
- 0
- 0
- Location
- Houma, LA (bottom uda boot)
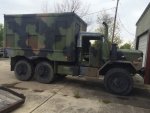
I've had a fiberglass hardtop sitting in the back of my deuce for a long time now, so nice decided to stop making excuses and get to work. And hopefully this will help anyone thinking of going this route. I bought my top off of eBay from clintdigger97 he has a ton of deuce parts. I believe I paid close to $800 including the shipping for this top. The first step was to get it up there and see what needs to be done.

I had to remove this l shaped brace that ran along the back side of the cab. I also had to remove the seat belt supports from the cab rail to the seat belt mounts. This was a bit of a pain because non of the nuts are welded in place so snaking open end wrenches was the only option to get the bolts out


The next step was removing the button head on the windshield frame so the top could sit down

Once that was removed and little smacking, cussing and twisting got the top down where it needed to be.


It's not a perfect fit. The holes where the soft top poles would be are partially exposed

I am going to have to plug them or risk water damage. I will weld them or seal them in a way that is removable. I have not decided yet.
Also the small ventilation door on the van won't be able to be opened completely but looks like it will open enough to do its job.

The next step is to mark the holes for mounting the top. I am going to use the holes that are already there so I traced them with a sharpe

I am going to put two bolts in the front corners of the top so I traced the top on the truck and the truck on the top
I then took the top back off the truck and drilled the holes for the mounting bolts
.


I am also going to put two bolts from the top into the windshield frame but have not decided exactly where or how yet.
That's all I've got for today! More to come soon.


I had to remove this l shaped brace that ran along the back side of the cab. I also had to remove the seat belt supports from the cab rail to the seat belt mounts. This was a bit of a pain because non of the nuts are welded in place so snaking open end wrenches was the only option to get the bolts out


The next step was removing the button head on the windshield frame so the top could sit down

Once that was removed and little smacking, cussing and twisting got the top down where it needed to be.


It's not a perfect fit. The holes where the soft top poles would be are partially exposed

I am going to have to plug them or risk water damage. I will weld them or seal them in a way that is removable. I have not decided yet.
Also the small ventilation door on the van won't be able to be opened completely but looks like it will open enough to do its job.

The next step is to mark the holes for mounting the top. I am going to use the holes that are already there so I traced them with a sharpe

I am going to put two bolts in the front corners of the top so I traced the top on the truck and the truck on the top
I then took the top back off the truck and drilled the holes for the mounting bolts
.


I am also going to put two bolts from the top into the windshield frame but have not decided exactly where or how yet.
That's all I've got for today! More to come soon.


Last edited by a moderator:


