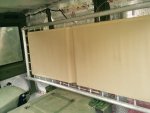
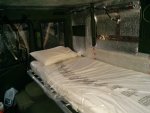
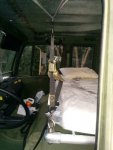
Yep! Now that I've ate and I'm recharged I'll share the details...
The bed measures about 75x30". The frame is made from 1 1/4" schedule 80 aluminum pipe. You only needed a single 20ft piece. I used standard aluminum joints and flanges from Grainger. Right now its put together with 2x 90 degree, 2x T, and 2x flanges.
Buy a folding cot with mattress from amazon. They come in different sizes so make sure you get one thats 75" or less in length. This is the one I bought:
https://www.amazon.com/gp/product/B00DDUEZC8/ref=oh_aui_detailpage_o00_s00?ie=UTF8&psc=1
You don't need the whole cot, but I wasn't able to find a place to buy a replacement canvas (you can buy the foam mattresses by themselves though and Grainger sells cot springs). Buying the whole cot and trashing the frame seemed like the easiest/cheapest solution. If you have access to sewing equipment it may be cheaper to DIY the whole thing.
Start by sizing the rear support tube. In my case 78" was a near perfect fit. Place the T's and end flanges on the end of the tube to use as a guide to size the front tube. Next put an elbow on one end of your uncut front pipe and line up the elbow with the T on one end of the back tube. Line up the other elbow with the other T and use it to eyeball where you need to cut the front pipe. Once the front pipe is cut, assemble it with the elbows and use it and the back pipe to size the side pipes. You should be able to get the width of the frame to exactly match the original cot dimensions, but you probably won't be able to do the same with the length. My original cot was 74.5" spring hole to spring hole and my frame ended up being around 70.5". This is why you see the sag in the fabric in the middle. I plan to take this to an upholstery shop and have them sew a fold in the canvas to take up the slack.
Once you have the frame pieces cut and assembled its time to drill the spring holes. We're not sending this cot to the moon, so measurements can be approximate. I just held up the canvas to the pipe and transferred the hole pattern to the pipe. I recommend starting at each end and working to the middle. This ensures all the sag will be in the middle and that the ends of the canvas will not need to be modified.
After I drilled the holes I learned the angle of the dangle of the springs wasn't quite right for the spring to pop in, so I ended up going back and drilling them at an angle. This fixed the issues and allowed the springs to install. Pop the springs in and you can install the canvas.
You'll also want to install some lifting eyes on the elbows so you can support the front of the cot from the ceiling. As you can see, I'm using ratchet straps connected to the "Oh ****!" handles.
Time to install it in the cab! If you have a middle seat you'll definitely want to take it out. It is incompatible with this mod. I'm not sure if the boxes will fit under this or not. My gut feeling is they will not. You'll also want to take the rear cab panels off if you have them. This will provide you space to slip on and off the flanges while you locate them on the cab walls.
I ended up aligning the flanges horizontally with recess on cab's side. Mark the holes with a sharpie, pull off the flanges, center punch and drill. I used M14 hardware. Slip the flanges back on the pipe, and bolt that sucker in. You're done!
I'm not sure how well the schedule 80 will hold up to the loading without support in the middle...only time will tell. The original plan called for a support in the middle of the rear tube and another lifting eye in the middle of the front pipe, but I got tired. If I start to see the pipes bending after some use I will add these support in.


