• Steel Soldiers now has a few new forums, read more about it at: New Munitions Forums!

  • Microsoft MSN, Live, Hotmail, Outlook email users may not be receiving emails. We are working to resolve this issue. Please add support@steelsoldiers.com to your trusted contacts.

M1078A1 "Pandora" Build | 2024-??? | ***Picture Heavy***

InvictusDecretum

Active member
107
206
43
Location
NC
Greetings SS community !

I wanted to start a build thread before I got too far behind the power curve. I'll be posting updates here and on my website (Aviator4x4.com).

Table of Contents
PPD & Cabling - (Forum Posts #3-5)
Battery Box - (Forum Posts #31-32, 40-49, and finished #58)
Manual Hydraulic System - (Forum Posts #81-117+)
Alternator Discussion - (Forum Post #33-37)
Alternator Mounting - (Forum Posts #50-57)

History
Last December, my wife and I ("we") purchased a 2002 M1078A1 we call "Pandora" (for a multitude of reasons haha). Like several others on here, we plan to turn this into an offroad camper. Some of the things that attracted me to the LMTV were:
  • <26,000GVWR
  • Non-DEF diesel engine
  • Analog voltage control via relays/fuses
  • Can be worked on by pretty much any [semi-]truck mechanic, diesel mechanic, or Caterpillar mechanic.

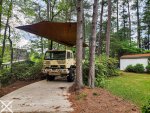
This is our most recent photo of her:

20240419_175032 export.jpg
CAO 10 MAY 2024


Intent
I enjoy exploring the back country and primitive camping in different places (I think this is called "overlanding" but eh, who cares). When I retire from active duty, I want to take the trip of my dreams over 10,000mi from my home in North Carolina to the Red Woods of California, up to Denali in Alaska, and back home via back country trails and National Parks. If you have any suggestions for trails to take, places to camp, or things to see, I'd love to hear about them !

1715376500596.png

This is the day I got her home, after a 1200mi drive from TX to NC. Big shout out to my wife for letting me galivant off to Texas to buy an LMTV right before Christmas.

So I bought an LMTV… Pt. 1 - Aviator4x4
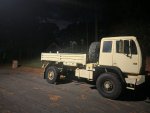
20231223_225727.jpg
23 Dec 2023

Priority
1715376274340.png
There is a lengthy list of things we want to do, 23 Dec 2023

This list is comically longer now:
1730768455602.png
 
Last edited:

InvictusDecretum

Active member
107
206
43
Location
NC
This was the first time I laid eyes on her. Fairly rust free, dry cab, really no dents in the body, and had the serpentine belt "mod".
20231213_082639 export.jpg
20231213_162927 export.jpg

I purchased some NOS Goodyear MV/Ts to put on it since the XMLs were from 2006:
20231213_135611 export.jpg

And then went about replacing every single fluid in the truck as well as purchasing a cartload of basic tools from Harbor Freight (since I had flown to another state to look at/buy the truck).

20231213_193148 export.jpg20231214_093631 export.jpg

Unfortunately the day after I wrote the check for it, the rear driveshaft went and took the trans with it. The plan was to have the driveshafts rebuilt before the drive home, I just thought I would have more than a day.

20231214_125435 export.jpg

The seller took excellent care of me and I have nothing but respect for them. Honestly, they could sell this as an "experience" haha.

20231218_134652 export.jpg
An engine and trans on a pallet they had purchased from DRMO.

20231218_161323 export.jpg
Lifting the bed off after cutting the huk bolts.

20231218_171422 export.jpg
Lifting the rear of the truck to roll it over the old trans. You can see how badly cracked the bellhousing was.

20231218_172954 export.jpg
"New" transmission on this neat aluminum L track pallet he had sitting around. Wish he would have sold me the pallet ! haha. If anyone knows what this pallet is part of, or where I could find one, let me know !

After 8 days (that were somewhat stressful), she had a "new" transmission in and successful test drive. To summarize, in 8 days this was what I had learned, been forced to learn, and/or do:

  • Drain and replace all fluids
    • Engine oil
    • Transmission oil
    • Rear Diff
    • Front Diff
    • Front hubs
    • Coolant
  • What huk bolts are, and how to remove them with an angle grinder cutoff wheel
  • What transmission codes are and how to display them on WTEC3
  • How to remove/replace (R2) the entire transmission with a couple forklifts
  • How to remove the entire exhaust length
  • That the driveshaft angle and RPMs on these trucks is extreme (EcoHubs awaiting install).
  • That the truck's systems are pretty straightforward, unlike having a BCM that outputs PWM or CANBUS like my current truck.
  • That I still loved owning a military vehicle


After all that, I drove 1,200mi home from TX to NC... at 45-50mph. We had a concrete pad poured by a contractor and I ran some steel cabling to put up canvas on. Not really anything "LMTV" exciting about that so no pictures...
 
Last edited:
InvictusDecretum

Active member
107
206
43
Location
NC
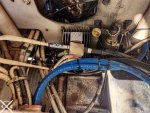
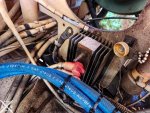
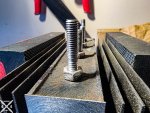
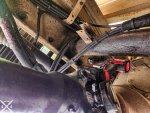
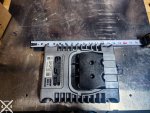
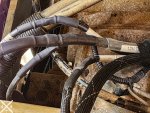
Aside from getting rid of the four old XML tires in the bed, the first thing I wanted to do was at least look at, if not remove/bypass, the PPD. I'm not sure why the PPD or ABS modules are outside in the elements, but the truck was old enough to drink and I have read enough on here about PPD or LBCD issues to be wary of them. I wouldn't say mine was in terrible shape, but I am pretty sure that top lug sheared/twisted slightly about halfway between the nut and end of the stud. I decided I was going to be removing/bypassing it.


20240422_174809 export.jpg

20240422_181146 export.jpg

I used my multimeter in continuity mode to trace out where each cable went (24V batt, 24v alternator, 24v inlet heater, 24v cab, and similar on the 12v side).

20240422_182250 export.jpg

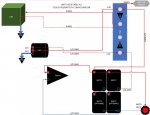
As far as I can tell, this is how it is cabled and with what gauge of cabling.
Stock A0 and early A1.jpg

I am an excessive labeler. A bit of 1 inch Clear Heat Shrink helped attach these to the 1/0AWG cables.

Even though I ended up removing these labels/cables later, it was still helpful to not have to re-trace them with multimeter.
20240422_184639 export.jpg

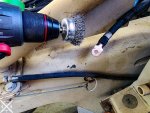
I took a cue from Helicool and used a drill wire brush to clean up the ends a bit.
20240422_185326 export.jpg20240422_185506 export.jpg

20240422_192233 export.jpg

After about 3hrs and a smorgasbord of tools, I had the PPD out. Despite the top stud twisting slightly, the bottom 12v in stud actually was worse, and I don't even think I did it.

20240427_190629 export.jpg

Still not sure what I'm going to do with it, but it is functional and cleaned up decently. Putting two nuts on the bottom stud makes it completely functional, so I'll probably hold onto this for a bit and then offer it for sale with full disclosure/high res pics. I'm also CAD designing a plate to mount where this goes with hole patterns for some junction posts to mount if anyone else wants to bypass their PPD, but not run bus bars in battery box like I am planning to. I'll post up the drawing file, or send the DXF, to any SS members who promise not to sell it for ridiculous markup/rip off other LMTV owners.

20240428_131810 export.jpg

After all that, enjoyed a nice cigar while it was drizzling on the bed
20240426_200004 export.jpg
 
Last edited:
InvictusDecretum

Active member
107
206
43
Location
NC
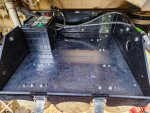
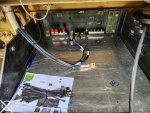
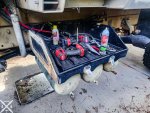
I've slowly been making my way from the alternator to the battery box. At this point I have:

  • Made a new 24v alternator cable (2/0AWG to future proof for a bigger, 28SI commercial alternator)
  • Removed the old battery tray
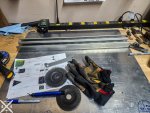
  • Roughed out a piece of 1/8" 5052 aluminum to be new tray bottom
  • Hydraulicly crimp spliced the 24v and 12v cab cables to extend them
  • Hydraulicly crimped the 12v alternator and 12v battery cable together
  • Ordered diodes that I will put under the in-cab PDP to replace the PPD
  • Designed a 1/8" 5052 aluminum mount for a Vanner 80-100CAN 24v->12v converter/battery balancer
  • Designed a 1/8" 5052 aluminum mount for 2x 600A busbars (GND and 24v w/ MRBF Fuses in Block Terminals ), 1x 150A busbar and 2x BSS 285 series 50A thermal breakers for cab 12v/24v.
  • Banged my head, scraped my knuckles bloody, revised simple CAD designs 257812815 times, but still enjoying it.
Left to go:
  • Design a mount for both a Blue Sea Systems 5510E e-Series Dual Circuit Battery Switch (for a complete battery disconnect) and ML-RBS (for winch disconnect. I am in the "disconnect" camp vs a huge fuse/thermal breaker. Originally for superstitious "if it's not connected I wont need it" reasons but also for run-a-away winch safety or preventing vampire drain).
  • Mount said busbars to the backplate (two pictures below) and crimp the remaining cables
  • Cut/mount unistrut
  • Figure out if I want to use the Vanner as a balancer or straight converter... or if I can do both.
Screenshot 2024-05-09 172517.jpg
24v->12v Vanner mounts to the top of this. The battery charger/tender mounts under it.

1715380727577.png
This is the backplate the bus bars and thermal breakers will mount to. The short side mounts to the bottom tray, and the long side goes up against the bolts attaching the box to the frame.

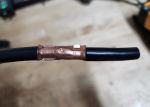
I've never used this big of a butt splice before, but these 4AWG Copper crimp splice actually turned out soooollliiid. I used them in 1/0 AWG as well for the 12v cable from alternator to battery box. On the left is done with a 10 Ton Hydraulic Wire Crimper, on the right Bolt Cutter Style Battery Cable Crimper. Both created a nice solid pressure weld when I cut them open, but the hydraulic crimper has been my preferred method for a few years now. You can see the "excess material" of the bolt cutter style is smooshed on one side due to the V shape opened vs the hydraulic crimpers which distribute it better (can make a difference for terminal blocks/bus bars)

1715381225246.png

20240506_172118 export.jpg
Hydraulically crimped cable splices worked pretty well for where the PPD used to be.

20240427_144612 export.jpg


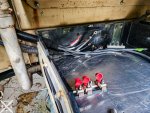
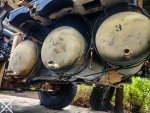
I drooped the tanks but used some long zip ties to support them so they didn't break any brittle 20yo air lines (which will eventually be replaced... but not today ! ... I hope)
20240427_150611 export.jpg

20240427_144641 export.jpg

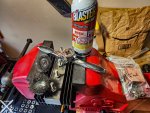
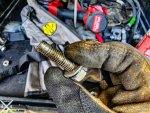
The bolts holding the "skids" or deflector plates to the front side of the battery box did not come off well... no amount of Pb blaster or heat was helping... so had to give 'em the beans and replace.

20240427_181831 export.jpg

20240506_130705 export.jpg
I have put a couple more holes in the battery box, where there were existing cutouts in the frame or battery box frame. A LENOX 1 1/8" Hole Saw fit perfectly.

20240506_141825 export.jpg
 
Last edited:
Keith Knight

Well-known member
Steel Soldiers Supporter
961
1,818
93
Location
Wauchula, FL
Oh I feel your pain. I remember replacing my transmission and the beginning of my build that I posted on here.
Soooo worth the trouble we are currently traveling in ours for about 10 months out of the last 13 months and traveled over 18,000 miles in our 2003 LMTV. If you have questions feel free to reach out to me.
 

GeneralDisorder

Well-known member
Steel Soldiers Supporter
2,005
5,135
113
Location
Portland, OR
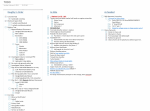
Cant read your list - image is too small.

If you haven't considered it. Being the year it is and being the 3126b - based on my experience I would recommend the following as well:

Engine oil pump:


HEUI high pressure filter kit. (https://ifskit.com/)
Bypass oil filtration.
Thermostats.
All the transducers (oil pressure, boost pressure, atmospheric pressure, Injection Actuation pressure).

If it looks like it's ever been apart (and maybe even if not) - pull the oil cooler and check it for flatness / have it surfaced.

Change transmission over to ATF.

You'll probably want to do the 330 HP tune to go with the ECO hubs. PM me if you need assistance with that - I can bench flash the ECM if you send it to me.
 

InvictusDecretum

Active member
107
206
43
Location
NC
Oh I feel your pain. I remember replacing my transmission and the beginning of my build that I posted on here.
Soooo worth the trouble we are currently traveling in ours for about 10 months out of the last 13 months and traveled over 18,000 miles in our 2003 LMTV. If you have questions feel free to reach out to me.
Thanks Keith, I will for sure. We were actually looking at your transmission swap pictures while doing it ! Glad to hear your rig is working out so well. I was stoked to see you start a youtube channel. If you find yourself in NC, I'd love to see yours in person.
 

InvictusDecretum

Active member
107
206
43
Location
NC
Thanks for the write up and sorry that happened. Oh and diggin' your Colorado, I am looking at getting one too.
No problem. I have gleaned a lot from these forums, Coloradofans, and wranglerfans among others so I want to give back.

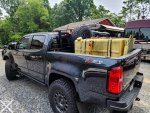
And thanks ! I'm actually selling mine. I loved building it, and it's pretty ideal for what I use[d] it for, but need the garage space and funds unfortunately. Wife didn't approve two trucks in the budget :)

2016 Diesel Chevy Colorado Z71- 67k miles - King Suspension, 35s, skids, winch, snorkel | $28.5k OBO | Expedition Portal
 
Last edited:
InvictusDecretum

Active member
107
206
43
Location
NC
Cant read your list - image is too small.

If you haven't considered it. Being the year it is and being the 3126b - based on my experience I would recommend the following as well:

Engine oil pump:


HEUI high pressure filter kit. (https://ifskit.com/)
Bypass oil filtration.
Thermostats.
All the transducers (oil pressure, boost pressure, atmospheric pressure, Injection Actuation pressure).

If it looks like it's ever been apart (and maybe even if not) - pull the oil cooler and check it for flatness / have it surfaced.

Change transmission over to ATF.

You'll probably want to do the 330 HP tune to go with the ECO hubs. PM me if you need assistance with that - I can bench flash the ECM if you send it to me.
Dude, thank you. So much. I was tracking some of this, but not all of it. (the ifskit, bypass oil filtration, and a general desire for more gauges but not specifics). The list is pretty long, and I couldn't find a good way to post it all (plus it's going to change so I just took a ridiculously zoomed out screenshot). I will definitely be in contact about 330HP. Can you also enable cruise control and update the speedo ? I am also a big fan of picoscopes. Especially for when I'm traveling !

Here are some better screenshots:

1715443360080.png
1715442896031.png
1715442921545.png
 

InvictusDecretum

Active member
107
206
43
Location
NC

InvictusDecretum

Active member
107
206
43
Location
NC
@Ronmar, @hike, @MatthewWBailey, I think this might be a more "on topic" place to continue the alternator discussion. I'm sorry for the inconvenience, and hopefully the mods aren't too upset about going a bit off topic in the PPD thread.

ok, perhaps some of your numbers are off.

1. A starter rarely pulls its full power rating except briefly initially getting things turning, and only a fraction of that thereafter even when cold.
2. Pulling large amounts of current out of a battery throws basic AH calculations out the window due to Mr Pukert and his loss calculations
3. The full power light load of an A0 M1079(lots of incandescent lights) is only 33A… Upper 20’s for a M1078, so ~15A@24V if you are all incandescent. LEDs cut this in half.
4. I think the 20A@24v is a little fat, even with the blower running.
5. The issue with AGMs compared to wet cells is they are looking for 45% of the AH rating when they are thirsty. If you are contemplating 4ea @70AH in a series/parallel(140AH@24), the batteries all by themselves will be looking for nearly 70A Workable at 100A alt output…

The recharge rate is solely determined by the battery chemistry, providing the alternator has the output capacity to support that draw(45%AH for AGN, 25%AH for wet cells). That is why charging lI direct from an alt is an issue as their low internal resistance/high draw rates can overwhelm and damage an alt… I am sure it will take longer that 4 minutes to recover from a cold start, but it should do it fairly rapidly as the batteries allow…
Thank you, something seemed off about 4mins. No ego in this for me, just trying to learn.

8. Battery capacity and Peukert exponent (victronenergy.com)
(Currently reading this, thanks to your suggestion of Mr Peukert)

I'm making a 12v/24v ELA spreadsheet right now that I'd love your input on when I have finished building out amp draws.

Others are best at the math, though we have decided to mount a rooftop 24v AC unit on the cab which adds a 'new' 70a at max.

[@GeneralDisorder and I have had several conversations upon this and I understand his points well. If we find a complete RedDot Gen2 kitted unit I'd likely purchase it, though spending the time to source all the bits and pieces and installing the separate items, adding another idler to the main shaft just doesn't add up with my skill set and time available right now. Using an electric rooftop unit is not likely the best choice for most folks here.]

Since the cab and chassis need (and CAT specs) only two batteries we are splitting the four into two 2-series banks separated by a Victron Cyrix unit. That way the cab and chassis 2-series bank is maintained 'first' and the added accessory 2-series bank is maintained with the excess the cab and chassis bank does not draw. The Cyrix also allows the second bank to be used at start, if needed. This way we have a 'back up' bank of batteries with us at all times to run the main systems.

Maintaining four batteries with only a 100a alternator is likely fine when the batteries are fresh, though when they are drawn down significant our understanding is they bring us too close to the alternator's limit for the kind of travel we typically do.

I thought I had photos with a tape measure for the Neihoff, though not finding them. I believe it is a long J180 and the tabs are offset, not 180° from each other.

View attachment 923334

View attachment 923335

We did need to modify the bracket and add a rigid upper arm. The original length serpentine works without adjusting the tension pulley.

View attachment 923336

View attachment 923337

View attachment 923339

@MatthewWBailey went with a pad mount and I like that idea very much.

View attachment 923340

Hopefully that helps—
As I'm trying to make my new ELA, I'm seeing the beautify of your 2 banks of batteries more and more. It seems like I'm trying to do something similar to you. I have @MatthewWBailey post saved and his, plus your, pictures are excellent. Seems like there are some pad mount alternators out there, but not sure they go above the 100A continuous 130A peak that he installed in 24v output.

I was able to find all the pieces (I hope) to a 2nd gen AC setup driven off the engine, but in place of your 70A AC unit, I'm going to run a "small" 600W Pure Sine Wave inverter in the cab, a 24v marine audio system, a radio or two (GMRS, CB, Ham, whatever), some USB outlets, and maybe a 12v fridge.
 

InvictusDecretum

Active member
107
206
43
Location
NC
A note on alternator ratings, they are rated via SAE J56 spec, which is 72 degree stabilized temp 6,000 alt shaft speed what it makes goes on the name plate.
so in general on most diesels the alt spins 3 to1 of engine, engine idle say 700 rpm is 2100 alternator shaft speed. so a 100 amp alternator will only make 100 amps at about 2000 engine rpm 6000 alt shaft speed. what you need to look at is the idle output that's where the truck will spend most of its time. Unless you like doing highway speed or fast idling the truck all the time.
And this is why I run a 300A Niehoff 12/24 for my (4x) 6TAGM system. In interest of redundancy when off-grid I prefer to keep the four battery system. If I lose a battery I can reconfigure to two. Can't get 24v from a single so the 2x system has no available redundancy.
@mechanicjim & @GeneralDisorder I'm trying to shift general build stuff to this thread, I'm sorry for de-railing the PPD thread.

And thank you. I feel like I've said that in every post I've replied to for weeks now, but y'alls knowledge is impressive. I've never had to spec an alternator for a vehicle before, so learning a lot.

MatthewWBailey posted this photo here of his 28SI Delco making ~100A at 2000RPM with a peak of 130A around 6k.

I'm making my ELA now and will spec my alternator based on that, but planning on using the batteries in the battery box for only starting and running truck systems with separate batteries in the habitat.
1715614589094.png
 

InvictusDecretum

Active member
107
206
43
Location
NC

Attachments

hike

—realizing each day
Steel Soldiers Supporter
528
832
93
Location
Texas Hill Country
This is my ELA so far... not in love with the formatting but gotta start somewhere. This is also worst case, full draw on everything... seems like a 200A alternator is more in my future.

Would this be the the pad mount version of the J180 @hike put on ? (Hike installed a A0014740JB)

Genuine Prestolite Leece Neville New A0014974PA New Alternator, 4000 Series, PAD Mount type, 24V, 200A - 4974PA (prestolitesuperstore.com)

View attachment 923343
As I recall I was struggling to get the dimensions for that Leece-Neville pad mount unit and found very few examples of a CAT 3126b using a pad mount so stuck with the J180 version. My biggest concern was aligning the alternator's pulley with the serpentine belt route. Likely a better question for Matthew regarding the pad mounts.

Your loads (electric load analysis) are similar to ours. We don't plan the DC/AC converter or fridge/freezer in the cab, just the in habitat's separate system. Cab will have GMRS radio, stereo, map lights, 12v power outlets, sides and rear cameras, power locks and windows, the AC, etcetera—
 

InvictusDecretum

Active member
107
206
43
Location
NC
ELA= Elephant Lap Arthroscopy?? Earn Loss Analysis??, Electrical Lavatory Aggregates?? Engine Linear Accelerator orrr???
:LOL: I like yours better, but Electrical Load Analysis.

As I recall I was struggling to get the dimensions for that Leece-Neville pad mount unit and found very few examples of a CAT 3126b using a pad mount so stuck with the J180 version. My biggest concern was aligning the alternator's pulley with the serpentine belt route. Likely a better question for Matthew regarding the pad mounts.

Your loads (electric load analysis) are similar to ours. We don't plan the DC/AC converter or fridge/freezer in the cab, just the in habitat's separate system. Cab will have GMRS radio, stereo, map lights, 12v power outlets, sides and rear cameras, power locks and windows, the AC, etcetera—
I have those same concerns... The 28SI alternator is 154mm/6" in diameter vs the 7.75" advertised for yours... which doesn't say if it includes the mounting brackets or just the body.

I might end up trying to CAD design an alternator bracket similar to the style we both have, but with J180 mounts for commercial non-offset. I imagine 1/4" 4130 chromoly steel with cutouts for alignment/welding would work since that's what it appears the current bracket is
 
Last edited:
MatthewWBailey

Thanks for this site. My truck runs great now!
Steel Soldiers Supporter
805
1,453
93
Location
Mesa Colorado
ELA= Elephant Lap Arthroscopy?? Earn Loss Analysis??, Electrical Lavatory Aggregates?? Engine Linear Accelerator orrr???
1st 5-10 pages of every procedure at the bomb factory was/is the definitions of acronyms. I was going to postulate that ELA meant English Language Arts but then I remembered what forum I'm on. 🙃
 
Top
AdBlock Detected

We get it, advertisements are annoying!

Sure, ad-blocking software does a great job at blocking ads, but it also blocks useful features of our website like our supporting vendors. Their ads help keep Steel Soldiers going. Please consider disabling your ad blockers for the site. Thanks!

I've Disabled AdBlock
No Thanks