- 553
- 1,041
- 93
- Location
- Cool, CA
A few weeks ago, as I was replacing the emergency and service gladhand hoses on my M1082 trailer. Once I hooked up the trailer and gave it air, I found the spring brake valve on the trailer was leaking. I pulled it off and made a post about whether anyone had rebuilt one or not. After getting some replies and doing some research, I found there is a common rebuild kit for this valve. Only $35 so it beats spending $75 plus for a new one. I did find a NOS one fairly cheap, so I ordered that first and decided to rebuild the old one for a spare (or sell if someone else needs one). The NOS one worked perfect. The rebuild kit came in yesterday and I had some time today to get it done. I didn't do a video but took a lot of pictures. The rebuild was very easy so this is one that any level of mechanic can do. Literally just pull apart each side of the valve and replace o-rings, a few small springs and it is done.
Here is the kit:
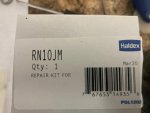
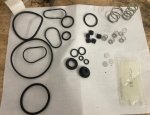
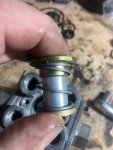
I started on the back where the tee fitting attaches, but forgot to take pictures. The brass fitting has an o-ring around it.
Next, I move to the top:
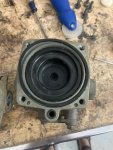
Again, easy to remove and identify the proper large o-ring for this one.
Next, I just started moving around to each of the 3 sides. The only broken o-rings I found where the oblong shaped ones (there are 3 total, two of mine where broken). Again, just remove the screws and with some pressure on the cover as they all have springs inside. Once you pull it open, very easy to identify the replacement o-rings and springs. The biggest challenge was getting the small rubber squares to seat inside the small loop on the small springs. Otherwise, simple remove and replace.
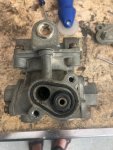
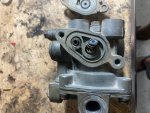
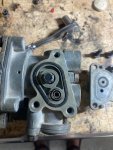
After completing the sides, I tackled the bottom where the dump valve is.:
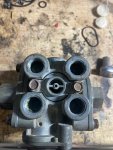
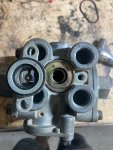
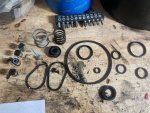
After I was all done, the picture below was all of the parts I replaced (minus oner of the oblong gaskets as I had taken it off a few days ago when I was diagnosing the leak). Altogether, it took me about 30 minutes from start to finish. Very easy project. Link below to where I bought the kit. (the blue arrow is pointing to the gasket that was broken, two of the three in the valve were no good)
RN10JM by HALDEX - RT4 Multifunction Trailer Valve Repair Kit (finditparts.com)
Here is the kit:


I started on the back where the tee fitting attaches, but forgot to take pictures. The brass fitting has an o-ring around it.
Next, I move to the top:

Again, easy to remove and identify the proper large o-ring for this one.
Next, I just started moving around to each of the 3 sides. The only broken o-rings I found where the oblong shaped ones (there are 3 total, two of mine where broken). Again, just remove the screws and with some pressure on the cover as they all have springs inside. Once you pull it open, very easy to identify the replacement o-rings and springs. The biggest challenge was getting the small rubber squares to seat inside the small loop on the small springs. Otherwise, simple remove and replace.


After completing the sides, I tackled the bottom where the dump valve is.:


After I was all done, the picture below was all of the parts I replaced (minus oner of the oblong gaskets as I had taken it off a few days ago when I was diagnosing the leak). Altogether, it took me about 30 minutes from start to finish. Very easy project. Link below to where I bought the kit. (the blue arrow is pointing to the gasket that was broken, two of the three in the valve were no good)

RN10JM by HALDEX - RT4 Multifunction Trailer Valve Repair Kit (finditparts.com)


