BadMastard
New member
- 392
- 5
- 0
- Location
- Duvall, Wa.
Ok, not so much a question, as a new thread about changing tires and my lovely experience with them.
First off, bought 8 395's out of texarcana mounted on 10 lug hemmt wheels. The goal is to have these tires on my m35a3 for two reasons. One, improve top speed about 5 mph. It will make driving here on the roads slightly less aggravating to those behind me, and let me cruise the interstate at a slightly lower RPM. Two, they look REALLY good!
Decisions- chose to use m35a3 rims to mount the tires rather than recenter hemmt. That might change, but I want to see the results of mounting on the a3 wheels first.
Chose to try "Field Expedient Tire Changes"- meaning I do have a 1/2 inch air impact wrench. Backup is a 1/2 inch electric impact, and a crowbar (tire iron) and many sockets. You need 15/16ths on the rim nuts for the hemmt wheels. You need 1 1/8 for the rim nuts on the m35a3 wheels. You will probably need a 4 foot breaker bar and a friend or two somewhere down the line. I tried to use minimum tools, as if it was a field tire change.
Job one- separate the hemmt wheels from the tires. First off, my air compressor wouldn't turn the rim lugs. Not even a little, and it's a 12 gallon 8.9 cfm 4 hp at 125 psi. Nothing. Gun rated at 500lbs, suspect it's more like 250. Out goes the air wrench. Turned a couple by hand. Needed a 2 foot breaker bar, but it works. Note to self, self locking nuts are tight to break loose, and stay tight. Tried wd-40, PB blaster and pure silicon spray. Not much help. Tried wire brushing studs. Not much help, but some. Especially on the carc covered studs.
Ok, you CAN loosen the rim nuts by hand. Went to electric wrench rated at 365 ft lbs. That turns them, barely. Plan on cooling it down every 2-3 nuts.
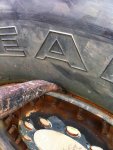
So, first tire, rolled into position, and I hear water sloshing around in it. Yep, 10 gallons of it, as measured later. Makes the heavy tire even heavier. tTre is propped against other tires at a 45 degree angle, and remove all rim nuts. Done. Now, break seal on tire. This is simple, if muscle intensive. Take tire iron and work it ALL the way down between the tire from bead area on rim. Push and pull a bit on the iron, it will move "slightly". Move 4 inches further, repeat. and repeat. And repeat. Add copious amounts of soapy water, I just hung a rag soaked in it on the edge of the tire dripping down into the bead area. Wheel will "pop" and move freely. Lift off first piece of wheel.
Flip tire over and lean at angle against other tires. Repeat tire iron trick until the rim pops off tire. Now is the hard part, you have to evenly remove the rim until you get it to bind on the tire valve, which it will. You can either wiggle it past (sometimes) or you can take your tire iron and lift the edge just a fraction and it will slide out. You have now removed a tire from a wheel.
Warnings- Every single part of this operation involves something heavy. Please use caution.
Make sure your tire iron had no burrs or sharp edges- it will scratch things you don't want to scratch.
Locking nuts do NOT release easy, your impact wrench is getting a workout, or your arms are. Up side is after removing the nuts, there really isn't any corrosion left on the studs. It's been scraped off by the nut.
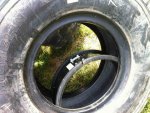
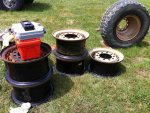
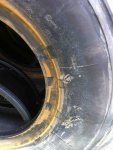
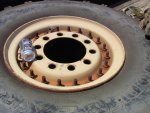
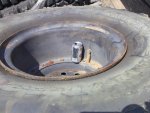
Pics- Tire with tire iron marks- see how far you have to put your iron. Tire iron placement- where the iron starts. Bead locker- what it looks like inside your tire- tools and rims- job done, tools used, mostly.
Part two starts with the a3 wheels.
Attachments
-
81.9 KB Views: 433
-
99.2 KB Views: 467
-
101.8 KB Views: 462
-
81.2 KB Views: 429


