• Steel Soldiers now has a few new forums, read more about it at: New Munitions Forums!

  • Microsoft MSN, Live, Hotmail, Outlook email users may not be receiving emails. We are working to resolve this issue. Please add support@steelsoldiers.com to your trusted contacts.

M720 pump replacement or rebuild

asajay

New member
23
8
3
Location
Spokane, WA
I obtained an M720 at auction a couple years ago and it sat idle until today when I wanted to hook it up to an S280 shelter I have. However, I found both hydraulic pumps to be non-operational, so I didn't dare lower it to the ground to start with. Both pumps move easily without ever building any pressure (yes, the pump valve is in the Pump position). My knee-jerk reaction is that the seals are probably bad.

Question:
What is consensus on the best way to fix this? Can the pumps be rebuilt? Are there suitable replacements available?

Thank you,
Asa Jay
 

asajay

New member
23
8
3
Location
Spokane, WA
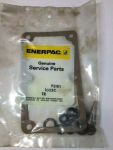
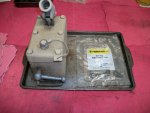
So a kit like this might help?:
M720 pump rebuild kit.png

Do you have any experience rebuilding these? If so, how easy would you say it is? I've done plenty of mechanical rebuilds, so I feel this falls in my wheelhouse; just looking for any "gotchas." :)
Thank you,
Asa Jay
 

asajay

New member
23
8
3
Location
Spokane, WA
I ordered up a couple of kits. I've got next week off work and this looks like a good project for a day or two. :) I'll try to post my rebuild here.
Asa Jay
 

Coug

Well-known member
Steel Soldiers Supporter
2,975
4,355
113
Location
Olympia/WA
Most hydraulic pumps I've ever worked on were very simple. There really isn't a whole lot to most of them, so hopefully these are the same.
Good luck, take your time, and pay attention to what direction the seals are facing when you take it apart.
 

asajay

New member
23
8
3
Location
Spokane, WA
I'm finally getting to the teardown of the first pump. I have it all apart at this point. Next job is to try and remove three coats of CARC from the housing, two of which are flaking off badly. I'm not sure if I should sandblast or use heat and a scraper. Any recommendations?

I had an evil thought of taking the housing down and have it anodized or ceramic coated, instead of just trying to paint it.
Any thoughts about that?

I'm taking lots of photos, and a few notes. I'll be posting more hopefully in the next week as I find time to continue.
Asa Jay
 
Last edited:

Coug

Well-known member
Steel Soldiers Supporter
2,975
4,355
113
Location
Olympia/WA
I'm finally getting to the teardown of the first pump. I have it all apart at this point. Next job is to try and remove three coats of CARC from the housing, two of which are flaking off badly. I'm not sure if I should sandblast or use heat and a scraper. Any recommendations?

I had an evil though of taking the housing down and have it anodized or ceramic coated, instead of just trying to paint it.
Any thoughts about that?

I'm taking lots of photos, and a few notes. I'll be posting more hopefully in the next week as I find time to continue.
Asa Jay
Carc is some pretty nasty stuff, so scraper would probably be safest, though I normally pressure wash it to keep the dust down. If it stays on after a few good passes of high pressure, I leave it alone unless it's got obvious bubbles under it where it's trying to come off, then I use a plastic scraper and pressure wash it some more.

Whatever method you choose to use make sure to wear breathing protection, CARC is some nasty stuff, and you really do NOT want to breath in any of the dust.
By breathing protection I recommend full face type respirator, not just a cheap dust mask and glasses.
yes, it IS that nasty.
 

asajay

New member
23
8
3
Location
Spokane, WA
Thank you for the pointers about CARC.

I got to looking at the kit of parts last night real quick and noticed the kit for the Enerpac P51K1 is not exactly right. Some parts in the kit are correct, other parts aren't for this pump, and parts from this pump that are needed, aren't in the kit.

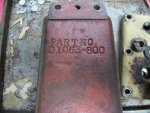
There is a large number cast into the bottom housing but I'm not sure it's for the overall assembly or not. It's "Part No. D1063-800." I'll be doing more research today when I have a chance. I'll get back to the pump on Thursday night, and I'll try to post photos either late tonight or tomorrow night.

Edit: a bit more research this morning. Looking through the TO, I found a reference on page 5-10 to a KU2000 parts kit for this pump. Now to see if I'm able to find one and see what's in it versus the p51 kits I got earlier.

Asa Jay
 
Last edited:

asajay

New member
23
8
3
Location
Spokane, WA
Investigation results.
Looking up kit part number of KU2000 on NSN sites, I found the kit was made by a couple of different manufacturers. The NSN is
4320-00-304-3925

The manufacturers are:
Actuant Corp.
Komatsu America Corp.

I left a message with Enerpac which is/was Actuant Corp or a division thereof, I forget. I was concerned that the NSN description did not call out all the necessary ball bearings and seals. Enerpac actually got back to me quickly. They identified the pump as a derivative of the Enerpac P307-2. They said the kit part number should be KH2505 and is still a good part number. They referred me to their distributor page to find someone who might sell me one. I contacted a local pump rebuilder in Spokane to see if they had one but it was close to closing so I expect I might hear back tomorrow. I otherwise have been unable to get a full description, but I did write Enerpac back asking for exactly what's in the kit. I have a concern the Enerpac piston is larger than what I have and the top seal/nut isn't the same. That being the case, I may have to simply take the old worn out parts to a local supply, like a Grainger maybe and see if I can piece the parts together.

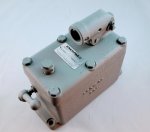
Here is a photo I found on the Internet of the P307-2 with a part label affixed:
P307-2 hydraulic hand pump 1.jpg

Here you can see the huge piston size:
P307-2 hydraulic hand pump 2.jpg

Here is a photo of the victim I'm disassembling; note the much smaller piston size here:
100_3380.JPG

Here are all the parts that came out. Note the large slotted nut on the left with two packing rings to the right of it. These came out of the top case where the piston goes in. This appears to be a different size than the Enerpac model:
100_3397.JPG

I have an email out to Komatsu (the other manufacturer listed in NSN). Maybe they'll show me something different. I found new Enerpac P51 models sell for upward of $600 each. At that price I can find alternatives (not the same shape or size) for a third of that, with even more psi capabilities. Although I'd like to return this model to working condition, I'm not against just replacing it all if inexpensive enough.

I'll update as I find out more.
Asa Jay
 
Last edited:

asajay

New member
23
8
3
Location
Spokane, WA
In what I thought might be a fortuitous turn of events, I found a tag on the second pump. After careful heating and scraping of two coats of CARC and one coat of paint, I was able to find printing and an embossed part number.

These pumps are POWER-PACKER (now Enerpac) HP6001-5108, 6000 psi. Armed with that new information, I contacted Enerpac. They told me it was an obsolete model (duh) and they'd be happy to find replacement pumps for me.
:cautious:

Sooo.... at first they seemed willing to help me find a kit number that would work, but once I had a firm part number, they switched on Sales-mode instead. I had hoped to at least get specs I might take around to find parts, but nooooo. They'd now rather sell me new pumps. I can't blame them, if I were them, I'd probably want to sell new product too. I'm just a bit disappointed standing on -this- side of the counter. A new P51 is nearly $600 even though some used ones can be found for a few hundred.

Good thing I'm not in a rush. ;)
Now, when I get the chance, I'll simply take the used parts (copper washers, packing washers) in to Grainger and see what we can come up with. Hopefully we find something of a suitable size. But if the right size packing (sealing) washer can't be found, maybe we can find something a bit larger OD with maybe a bit narrower ID and I can trim to tight-fit the piston and valve lever. The rest of the parts, cylinder, piston, balls, etc. are in pretty good shape, at least on this pump. I still have to take the other one apart.

If nothing else, I -can- use some of the parts from the other kits, which I most likely will. But the packing washers I will need to find on my own now.

I'm busy this weekend, but when I get better photos of the piece-parts and dimensions, I'll post them here.
Asa Jay
 

asajay

New member
23
8
3
Location
Spokane, WA
An actual Sales person from Enerpac got in touch with me today and apologized for the lack of experience in the tech and service department. He also explained that Enerpac had a big data purge in 2015 when they moved facilities and wouldn't have the info on that old of a pump. However, he did point me to a place in Seattle that may be able to help and may actually still have the technical drawings on the pump I have, as well as the parts. I have reached out to them (it's after hours now) and we'll see if they are able to come up with the old specs and maybe have the parts. My faith in the vendor may be restored.

I did take the old washers around to a few places here in Spokane and wasn't able to find replacements. Grainger didn't have anything close but a local hydraulic hose fitter did have some copper washers that were -close- but not exactly right. Nobody had the fiber/rubber packing washers for the pump cylinder or the pump/release rod.

Yes, still waiting on me to post photos.
Asa Jay
 

asajay

New member
23
8
3
Location
Spokane, WA
Probably my last update on this.
No joy at finding the proper packing washers for the piston, so I had to improvise. The place in Seattle was good enough to work with, but they had no drawings anymore or any reference material and couldn't match up my dimensions. So I found some all-rubber spacer washers from something I can't remember in my tool box as excess parts so they were repurposed here.

To get an idea of the problem, here is a photo of the top case, the original packing washer on the right and the hard-case seal from the P51 kit in the center. As you can see, there was no way I could use that piston seal.
IMG_20200214_081714529.jpg

I didn't have to trim the inside diameter of the rubber washer I found, but I did have to trim the outside. To do that, I put the 3/8" thick washer on a pencil and spun it against a grinding wheel, which neatly burnished off the necessary diameter so it would fit into the hole and still accept the piston. Nearly all the rest of the parts from the P51K1 kit were correct enough to use, with the exception of one check ball as I recall.

I reassembled everything and bench tested it. The fluid pumped without any external leaks, so I was satisfied.

However, upon returning it to service, it would not raise the mobilizer once attached to the shelter. I could faintly hear it leaking internally. Dang!

Out it came. I figured I got the pressure relief set too light so I took off the top and adjusted it down, still no joy. I adjusted it all the way to put as much pressure on the relief as possible, still it was leaking, but I did discover it wasn't from the pressure relief. I checked for cracks and couldn't find any. Eventually I took it apart and found one of the machined surfaces for a check ball was corroded and wouldn't allow the check ball to seat properly. It was just enough that it could pump fluid without any real pressure needed, but once it needed a lot of pressure, it would bypass through that chip.

Well darn.... now I need to find a place to machine that ledge smooth again. I'm not sure I'll be able to have that done.

In the interim, I found several of these exact same pumps on ebay and purchased a handful. Interesting enough, most of them came from my Air National Guard unit, and had signatures on the inspection tags from people I used to know. That was a neat coincidence.

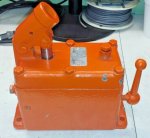
IMG_20200321_153946470.jpg IMG_20200321_154307292.jpgIMG_20200321_154336308.jpg

I have two of these shelter dollies (mobilizers), each taking two of these pumps. I now have enough spares to replace all of them. However, I'm in the midst of rebuilding a second one (from my first mobilizer) and then I'll see if I can get this bad housing fixed and complete the rebuild on it again.


Summary
The P51K1 kit has -most- parts needed for this pump, but most importantly it does NOT have the packing washers for the piston. I happened to have a rubber washer about 3/8" thick and a tight fit on the piston that I had to trim down to the proper outside diameter. That fit in the hole with the piston through it and the locking nut tightened in place. No leaks from that, but we did find an internal leak past a corroded check-ball land.

Thanks to the folks here, I took on this project and was pleased by the outcome, even if in the end I needed a new pump anyway.
Asa Jay
 
Last edited:

asajay

New member
23
8
3
Location
Spokane, WA
For those interested, here is the photo montage of disassembly.

The original pump and the P51K1 kit
100_3375.JPG

The top removed. Six bolts and it comes off easy enough. The check valve is the smaller assembly behind the huge piston cylinder. I also found the inlet filter to the pump had come off; you can see it lying in the bottom to the right and back of the piston cylinder.
100_3384.JPG

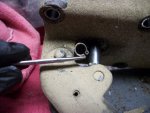
The piston won't come out until we can remove the lever, this requires removing a snap-ring.
100_3385.JPG

Snap-ring removed. Now just push out the pin and manipulate the lever to slide it off the top of the piston, then remove the piston, then the nut and packing washers beneath it.
100_3386.JPG

The pressure relief assembly. I took this completely apart, but have no tools to make sure I get it adjusted properly once reassembled; though I can get it close based on the number of threads it was recessed.
100_3387.JPG

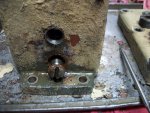
I had to use heat in order to remove some of the external plugs and nuts. This is where the rod goes through for the Pump and Release lever. I first removed the lever and the removed the rod. I applied heat to get the nut out so I could get the packing washers out.
100_3389.JPG

The top port is the outlet. It had a simple pipe plug reducer to a T-fitting. It came out easy enough. The plug holds two check-balls (one larger than the other), see next photo. This was a bear to get out. I eventually had to use an impact driver after heating the housing. When reassembling, I used the new plug from the kit.
100_3391.JPG

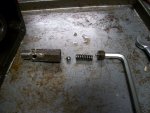
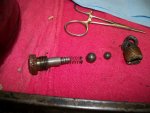
The primary check balls and spring on the left. The nut and packing washers to the right are from the Pump/Release rod.
100_3394.JPG

The part number cast into the bottom housing.
1596917907659.jpeg

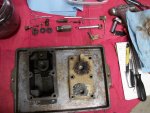
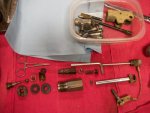
All the parts disassembled.
100_3398.JPG

Cleaned everything, stripped the paint from the housing, cleaned, primed and repainted, then used as many new parts as possible and reassembled.
 
Top
AdBlock Detected

We get it, advertisements are annoying!

Sure, ad-blocking software does a great job at blocking ads, but it also blocks useful features of our website like our supporting vendors. Their ads help keep Steel Soldiers going. Please consider disabling your ad blockers for the site. Thanks!

I've Disabled AdBlock
No Thanks