- 246
- 943
- 93
- Location
- Eagle Twp, MI
I've been slacking on posting up many of the small updates I've been doing to my big, beautiful girl over the last couple of years so I'll blast several of them out at once.
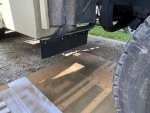
I added small mud flaps for the front tires. My intent was to control some of the rock-slinging from the front G177's and to keep the mud and crud from building up on the bottom of the tool boxes and fuel tank. I was not trying to keep the running gear clean, but a side effect has been the amount of mud caking on the rear axles, rear brake cans, etc. is reduced as well.
I call them "Underbrows" as they are the opposite of the "Eyebrow" mud flaps used on tractor rears but are approximately the same size . They are only about 7" long as I did not want full-length flaps on the fronts and this was the right length for my purposes.
The forward brackets for the steps and tool boxes are just right to hang a flap and already have most of the holes drilled for the flap hanger brackets from the factory.
I cut the size I wanted from an old mud flap I had laying around, quickly fabbed up some hangers from flat stock and angles and Voila!
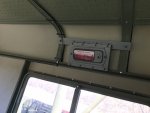
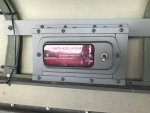
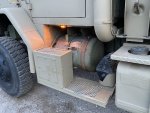
In the interest of safety (too many late night returns to the pitch black farm guessing where the cab steps are) I added a combo marker light/step light to both sides of the cab.
They are actually amber-colored LED license plate lights from Amazon so they illuminate both down to light up the steps and the ground but also are visible on the side as additional marker lights. I originally wanted to use mil-spec side markers but they don't work for both side and down illumination. I didn't want to drill holes to mount them so I used 95lb pull magnets to secure them and used Y connectors to splice them in so I did not cut any of the harness.
You can also see (in the first picture below) a spare jerry can holder I mounted long ago to store my wheel chocks when not in use - another small but helpful thing having them on the driver's side and quickly accessible so no need to dig through the tool boxes or storing them up in the cab...
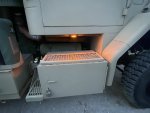
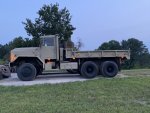
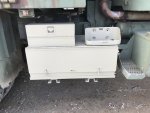
I purchased a surplus tool box off Ebay and mounted it on the large toolbox aft of the jerry can holder to provide a quick-to-access storage for cargo straps, binders, etc. Added a hasp for a padlock (not installed yet in the pic) and good to go. These also happened to be the first parts of the truck I painted Sand Camo way back when...
I added small mud flaps for the front tires. My intent was to control some of the rock-slinging from the front G177's and to keep the mud and crud from building up on the bottom of the tool boxes and fuel tank. I was not trying to keep the running gear clean, but a side effect has been the amount of mud caking on the rear axles, rear brake cans, etc. is reduced as well.
I call them "Underbrows" as they are the opposite of the "Eyebrow" mud flaps used on tractor rears but are approximately the same size . They are only about 7" long as I did not want full-length flaps on the fronts and this was the right length for my purposes.
The forward brackets for the steps and tool boxes are just right to hang a flap and already have most of the holes drilled for the flap hanger brackets from the factory.
I cut the size I wanted from an old mud flap I had laying around, quickly fabbed up some hangers from flat stock and angles and Voila!

In the interest of safety (too many late night returns to the pitch black farm guessing where the cab steps are) I added a combo marker light/step light to both sides of the cab.
They are actually amber-colored LED license plate lights from Amazon so they illuminate both down to light up the steps and the ground but also are visible on the side as additional marker lights. I originally wanted to use mil-spec side markers but they don't work for both side and down illumination. I didn't want to drill holes to mount them so I used 95lb pull magnets to secure them and used Y connectors to splice them in so I did not cut any of the harness.
You can also see (in the first picture below) a spare jerry can holder I mounted long ago to store my wheel chocks when not in use - another small but helpful thing having them on the driver's side and quickly accessible so no need to dig through the tool boxes or storing them up in the cab...


I purchased a surplus tool box off Ebay and mounted it on the large toolbox aft of the jerry can holder to provide a quick-to-access storage for cargo straps, binders, etc. Added a hasp for a padlock (not installed yet in the pic) and good to go. These also happened to be the first parts of the truck I painted Sand Camo way back when...


