• Steel Soldiers now has a few new forums, read more about it at: New Munitions Forums!

  • Microsoft MSN, Live, Hotmail, Outlook email users may not be receiving emails. We are working to resolve this issue. Please add support@steelsoldiers.com to your trusted contacts.

M936 Wrecker - Better Plumbing Guide for Hydraulics?

Mullaney

Well-known member
Steel Soldiers Supporter
Supporting Vendor
7,716
19,766
113
Location
Charlotte NC
Seems that the answer to everything is to look it up in the TM's. Maybe I don't have everything... I have the -10, the four volumes of the -24 and two volumes of the -24P and I am here to tell you - either I am stupid or there are no decent drawings of where the hydraulic lines go on this M936 .

Attached are the only two pictures I could find of what the TM calls a "Swivel Assembly" (in crane world it is called a Rotation Manifold"). I can't for the life of me find a reference to the lines that feed the "Swivel Assembly". Am I missing the big book of fixin your wrecker by chance?
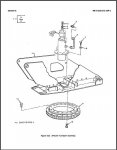
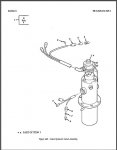
TM Page365.jpg TM Page367.jpg
 

simp5782

Feo, Fuerte y Formal
Supporting Vendor
12,125
9,384
113
Location
Mason, TN
Seems that the answer to everything is to look it up in the TM's. Maybe I don't have everything... I have the -10, the four volumes of the -24 and two volumes of the -24P and I am here to tell you - either I am stupid or there are no decent drawings of where the hydraulic lines go on this M936 .

Attached are the only two pictures I could find of what the TM calls a "Swivel Assembly" (in crane world it is called a Rotation Manifold"). I can't for the life of me find a reference to the lines that feed the "Swivel Assembly". Am I missing the big book of fixin your wrecker by chance?


View attachment 803327 View attachment 803328
Tim,

There is no diagram. There are some pics in this thread. https://www.steelsoldiers.com/threads/rescued-m816-wrecker.132200/page-19#post-1995354
 

Mullaney

Well-known member
Steel Soldiers Supporter
Supporting Vendor
7,716
19,766
113
Location
Charlotte NC
Thanks Wes.

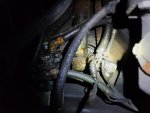
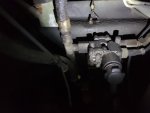
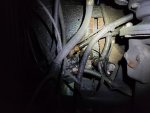
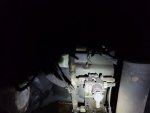
I was just sure I had to be overlooking something. The link you sent confirmed what I needed to know about lines. The rest I will get with a little more "seat time". It seems strange the way the air and the hydraulic lines are weaved under my truck.

One of the things I was hoping to see was the electrical connection through the swivel assembly to supply power for the spotlights. Guessing if there are brushes inside maybe? If so, it doesn't appear to be a part that can be ordered... The swivel in the TM appears to be a "complete replacement" part?

I think time and degreaser will help me find a few things hidden in the muck.

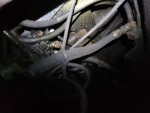
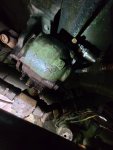
Between The Axels - 01.jpg Between The Axels - 02.jpg Between The Axels - 05.jpg Between The Axels - 06.jpg Between The Axels - 07.jpg
 

simp5782

Feo, Fuerte y Formal
Supporting Vendor
12,125
9,384
113
Location
Mason, TN
Thanks Wes.

I was just sure I had to be overlooking something. The link you sent confirmed what I needed to know about lines. The rest I will get with a little more "seat time". It seems strange the way the air and the hydraulic lines are weaved under my truck.

One of the things I was hoping to see was the electrical connection through the swivel assembly to supply power for the spotlights. Guessing if there are brushes inside maybe? If so, it doesn't appear to be a part that can be ordered... The swivel in the TM appears to be a "complete replacement" part?

I think time and degreaser will help me find a few things hidden in the muck.

View attachment 803344 View attachment 803345 View attachment 803346 View attachment 803347 View attachment 803348
Good rain suit. Goggles with face shield. And a steam cleaner.
Crawl under and not care how dirty you get

Or leave it be and it will never rust
 

Mullaney

Well-known member
Steel Soldiers Supporter
Supporting Vendor
7,716
19,766
113
Location
Charlotte NC
I need to figure out how to redirect some of that oil up onto the sides of the bed... Make that rust stop! That look is definitely improving lately though. Slag gun like you would use for welding chips paint almost as well. Mask, Hat, Gloves...

Steam rather than a pressure washer would definitely be the trick. Wonder if those can be rented? I guess they rent everything else so why not? Never needed one before - but that would definitely be the trick!
 

Mullaney

Well-known member
Steel Soldiers Supporter
Supporting Vendor
7,716
19,766
113
Location
Charlotte NC
I am painting my M925 and I washed the underside two times and man did I get dirty!!
Any particular magic other than what Wes suggested? Rain Suit, Goggles and a Face Mask? Did you rent a steamer - or already own one? Any particular kind of cleaner that you used?

We print for a guy with a compnay named X-treme Clean. He has a degreaser called "Red Roost" and that stuff is amazing for normal cleaning. I haven't tried it on my truck yet - but that might be a heck of an idea... It just melts the crud off our printing machines.

RedRoost.jpg
 

M35A2-AZ

Well-known member
Steel Soldiers Supporter
3,222
392
83
Location
Tonopah, AZ
Any particular magic other than what Wes suggested? Rain Suit, Goggles and a Face Mask? Did you rent a steamer - or already own one? Any particular kind of cleaner that you used?

We print for a guy with a compnay named X-treme Clean. He has a degreaser called "Red Roost" and that stuff is amazing for normal cleaning. I haven't tried it on my truck yet - but that might be a heck of an idea... It just melts the crud off our printing machines.

View attachment 803391
I just used a power washer and some degreaser. The Red Roost may work great.
 

Mullaney

Well-known member
Steel Soldiers Supporter
Supporting Vendor
7,716
19,766
113
Location
Charlotte NC
New News on my M936: I have replaced the 1 inch hose from the valve body on the passenger side (rear winch controls) that connects to the hydraulic pump. JIC fittings on each end. One male, one female. I used a piece of rope zip tied to the hose to pull out the old - and the same piece of rope pulled the new hose back into the same path.

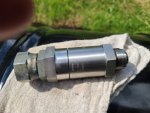
Discovered a check valve attached to that hose. Picture Attached.

@ Pump 03.jpg

@ Pump 04.jpg

Picture just above these words is the check valve in place, affixed to the pump. Nice and clean and shiny... So, I am operational again!
 
Last edited:
Top