• Steel Soldiers now has a few new forums, read more about it at: New Munitions Forums!

  • Microsoft MSN, Live, Hotmail, Outlook email users may not be receiving emails. We are working to resolve this issue. Please add support@steelsoldiers.com to your trusted contacts.

MEP-803A and water, a rebuild story...Hopefully!!!

Bluevic443

Active member
83
189
33
Location
Lake Jackson, Texas
Caution, don't look at the GP site on your cell phone and then decide to through and bid on a generator that is going for a $1000.00 less than ones that they show running:
Been putting 803's on my watch list and watching them go for mid $2500.00, all had a tier reset and had video of them running. Fast-forward to June, my email alerts me of one of my watch list is coming up for auction. Auction time is right as I am getting off work. Get to my truck, fire up the website and this one is hanging around $1200.00. "That's still in my price range!!!" "What the hell, $1300.00" submit bid. Take off for home knowing that I will be out bid soon enough as these have been going for a lot more. On the road home, my email goes ding. I know it is the email that you have been outbid, O' well. There will be another. Pull in the driveway and park. Get out my cell phone and look to see what this one finally went for. "Congratulations! You are the winning bidder in a GovPlanet auction for the following item: :naner:
Went inside to fire up the big computer and big monitor. "Let's see what I just bought for $1300"
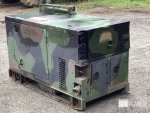
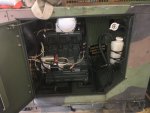
Gov Planet (5).jpg
Not to bad.

Gov Planet (1).jpg
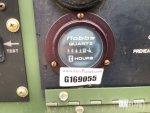
Hours are not insane.
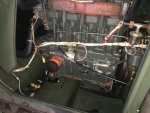
Gov Planet (2).jpg
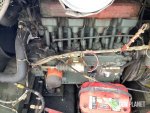
Sweet, it has both "Red Top" batteries!!!
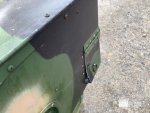
Gov Planet (4).jpg
What the hell is this little door for?!
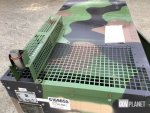
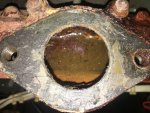
Gov Planet (6).jpg
Oh :poop:!!!! NO FLAPPER ON THE EXHAUST!!!!!!!
Go back to the Inspection Report:
Limited function check: Engine Seized.
aua
No one to blame but myself on this one!!! Transferred the money and made the arrangements to take delivery. 4-5 hour drive to the Texarkana border and a night in a Hotel to add another $120 to my shame. The recovery went smooth, Just loaded it in the back of my F-350. Hit Highway 59 South and the roads are so tore up that it sent my 2013 Ford F-350 Lariat with just under 70,000 miles into "THE DEATH WOBBLES FROM HELL"!!!!!!!! Had to keep it under 40mph the entire trip back!!! But that is another story.
 

Bluevic443

Active member
83
189
33
Location
Lake Jackson, Texas
Update: Unit at the house.
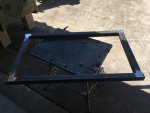
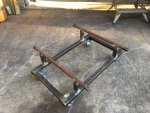
Unloaded the unit at one of our shops with a fork truck and stored inside (probably the first time in 16 years). With the size of the 803a in the bed of a 4x4 truck, my engine hoist is just not tall enough. Really need to get me an A-frame!!! Stole the batteries to see if they will recover and left it there for the rest of the week. Slapped together a quick frame out of scrap steel and new steel casters.
IMG_5812.JPG
IMG_5814.JPG
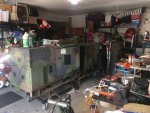
Ready for the patient.

Got the unit to the house via a U-Haul trailer and spent some time and a lot of Simple Green to clean it up some.
IMG_5820.JPG
IMG_5821.JPG


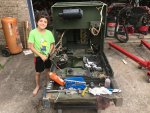
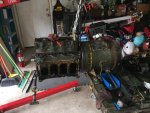
Into the O.R. it went with my functional 802. Damn it makes the 802 look small.
IMG_5822.JPG
 

Chainbreaker

Well-known member
1,782
1,937
113
Location
Oregon
Looks better with the clean up! Who knows, you might get lucky and get by with just a cylinder hone and new rings! Fingers crossed for ya!

What's interesting is that that caged exhaust extension does not appear to have any soot inside judging from you photo at the open end...like it was never run with that extension on.
 

Light in the Dark

Well-known member
Steel Soldiers Supporter
3,795
5,834
113
Location
MA
I will not even entertain sets with missing or damaged exhaust lids. Just the kind of hassle I don't want to willingly bring into my life.

Good luck in getting this puppy worked over and operational though!
 

Bluevic443

Active member
83
189
33
Location
Lake Jackson, Texas
I will not even entertain sets with missing or damaged exhaust lids. Just the kind of hassle I don't want to willingly bring into my life.

Good luck in getting this puppy worked over and operational though!
Wish I had caught that missing flapper too. Would be interesting to know if the other bidder from Texas is on this forum. Just to see if they caught that little note of it being seized. My bed now!!!
 

Bluevic443

Active member
83
189
33
Location
Lake Jackson, Texas
Update: Water extraction.
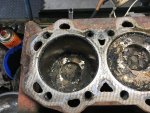
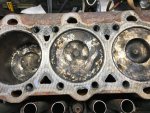
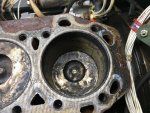
Sucked out the water out of the #3 and #4 cylinders and cleaned out #1 & #2. Filled with ATF and let it sit overnight. At this point the engine is still locked up with the faintest of wiggly at the crank pully.
#1
IMG_5842.JPG
#2
IMG_5848.JPG
#3
IMG_5849.JPG
#4. It is amazing how fast cast iron will flash rust!!!
IMG_5850.JPG

It is obvious that the pistons are going to have to come out.:rolleyes:
 

Bluevic443

Active member
83
189
33
Location
Lake Jackson, Texas
Update: Time for the NASTY!!!🤢🤮
IMG_5837.JPG
IMG_5838.JPG
IMG_5852.JPG
IMG_5855.JPGSkin of Evil.jpg I looked about the same afterward too.
skinofevil_hd_341.jpg

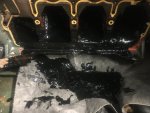
Scraped out about 3/4 of a gallon jug full with this sludge. Could have been a full gallon, but a lot got thrown out with each pig mat.

Good news is that I was able to get the engine freed up so I could rotate the engine to get to the connecting rod ends 👍
 

Guyfang

Moderator
Staff member
Moderator
16,668
23,813
113
Location
Burgkunstadt, Germany
Now, I am going to tell you, "OH YEA OF LITTLE FAITH"! it aint over till the fat lady sings. Take your time. But I think you still have a keeper. Gonna take some work, but I think you still are going to save this hummer. Take the injectors and IP's out and toss them into some "stuff" to clean them up a bit, and take them apart and finish up the job.
Or go find another engine. But I think this is doable. The pictures make you want to vomit. But try and look beyond that. There are a wagon full of guys here in the forum who have done the same thing, and all of them are tuned in to help you.
 

Bluevic443

Active member
83
189
33
Location
Lake Jackson, Texas
Now, I am going to tell you, "OH YEA OF LITTLE FAITH"! it aint over till the fat lady sings. Take your time. But I think you still have a keeper. Gonna take some work, but I think you still are going to save this hummer. Take the injectors and IP's out and toss them into some "stuff" to clean them up a bit, and take them apart and finish up the job.
Or go find another engine. But I think this is doable. The pictures make you want to vomit. But try and look beyond that. There are a wagon full of guys here in the forum who have done the same thing, and all of them are tuned in to help you.
Encouragement from the Master is always welcome :grin:. I still have more to show. Stuck at work on 12 hours shift with minimal work.
 

Bluevic443

Active member
83
189
33
Location
Lake Jackson, Texas
Update: Tired of pussy footing with this thing!!!
Lets gut this like a fish!!!

Removed #2,3,&4 pistons. The top rings were stuck on them all, but there was no scaring on the pistons or the cylinder walls. Hell, you can still see the cross hatch from the honing. Cylinder #1 looks pristine. #2 could use a re-hone. #3 and 4 have lite rust build up at the base, need to hone to see if it will need to be bored over size. Crank has to come out.
IMG_5870.JPG

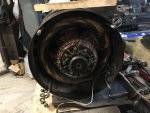
Need to divorce the "dinosaur squeezing's" converter from the "Angry Pixie" producer. I watch way too much YouTube!!! AVE has some of the best analogies.

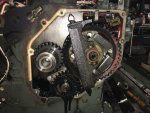
Bearing support removed. Bearing still smooth, but it is on the list to replace at this time.
IMG_5872.JPG

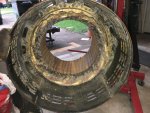
Stator "looks" good. Very dirty, but no rub marks or signs of burnt windings. Will Ohm check soon.
IMG_5874.JPG

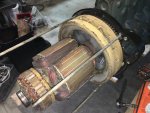
Rotor, the same.
IMG_5876.JPG

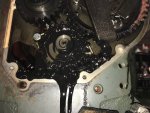
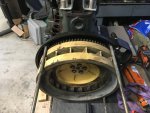
Fly wheel. Starter teeth look good. No signs of the pickup coil rubbing.
IMG_5879.JPG

My ever present helper.
IMG_5871.JPG

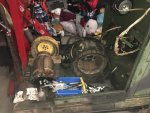
All stashed away for cleaning and inspection once the engine it determined to be rebuildable. All I have to say is that that is a lot of mass to be spinning at 1800 rip-ums. No wonder they shear the 5 fly wheel to crank bolts when they suddenly come to a stop due to a failure.
IMG_5883.JPG
 

uniquify

Active member
228
223
43
Location
Sioux Falls, SD
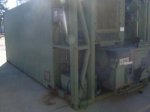
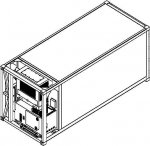
I've seen pictures of this variation of 803 before mounted to a refrigerated shipping container.
MEP-803A_RefregeratedShippingContainer.jpg
TM-55-8145-221-14P_19_1.jpg
Refrigerated Container System, Model RCS800:​
The refrigerated container system is designed to be used with the Refrigeration Unit, Model F9000RE, and the Generator Set, Model MEP-803A, mounted on the container frame.​
Model Number and Equipment Names: Container System, Refrigerated, Model RCS800.​
Purpose of Equipment: The refrigerated container system provides storage and transport of perishable material.​
 

Chainbreaker

Well-known member
1,782
1,937
113
Location
Oregon
I'm impressed, you didn't waste much time getting this puppy disassembled! I think your gonna end up with a runner considering the light damage you described from the water that was sitting in the cylinders & exhaust manifold.

Take your time, do it right and you will have a unit worth at least twice what you paid for it.
 

Chainbreaker

Well-known member
1,782
1,937
113
Location
Oregon
Don't beat yourself up too much by not seeing the exhaust flapper. There is not one to be seen when a refrigeration unit generator is removed from refrigeration unit or is not placed in the stowed position in the refrigeration container. It has a vertical exhaust pipe that mates to the elbow on your generator, the exhaust flapper sits up top on the extended exhaust pipe attached to the refrigeration unit and is NOT part of the generator.

So the flapper that sits up top on the refrigeration unit must have been damaged and didn't close or was somehow knocked off but you would never see that without a photo of the refrigeration unit the generator was pulled from. The only clue you missed was what you already mentioned earlier about the auction note: "Limited function check: Engine Seized". Regardless, the pictures would all look the same (no exhaust flapper to be seen) from any unit removed from a refrigeration unit.

PDF Pg # 172 in the below linked manual describes the connection procedure of exhaust extension in the stowed position.

https://www.liberatedmanuals.com/TM-55-8145-221-14-and-P.pdf

Also, note that the generator was always run in the 208v 3 phase configuration to run the refrigeration unit. So, be sure to set the AC reconfiguration switch to the 120/240v 1 phase setting whenever you load test the unit.
 
Last edited:

Bluevic443

Active member
83
189
33
Location
Lake Jackson, Texas
Thanks for the kind words. With all the Covid-19 panic keeping everything in flux, I just turn off the TV news and go to the garage. Turn on one of my favorite Pandora stations and start working. Job schedule keeps getting changed to were I had to be up by 3:30a which led to some every early wakeup times on my days off. With the Texas Gulf Coast heat coming on strong, I'm done by 3-4p 🥵 Having a fairly well setup garage helps too.
 

Bluevic443

Active member
83
189
33
Location
Lake Jackson, Texas
Update: Clean up day

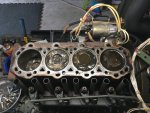
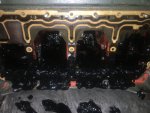
After scooping as much of the black ooze out as I could, into the parts cleaner tank it went. Flushed what I could reach with the low pressure spout. When rigged up an air nozzle with a siphon hose to draw up parts cleaner, then with low pressure would blow the ooze off the rest of the block.
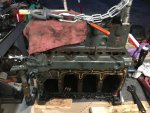
Went in looking like this:
IMG_5886.JPG
Will post a pic of the clean block later.

By the time most of the ooze was out, the parts cleaning solution looked like black printer's ink and it looked like I was spraying black paint on the inside. When finished I drained the tank, scraped the sludge that settled, and bottled it up for the recycler. Next will be the head.
 

fosgittr

New member
23
14
3
Location
Midland, MI
Update: Clean up day

After scooping as much of the black ooze out as I could, into the parts cleaner tank it went. Flushed what I could reach with the low pressure spout. When rigged up an air nozzle with a siphon hose to draw up parts cleaner, then with low pressure would blow the ooze off the rest of the block.

Will post a pic of the clean block later.
If you could, would also love to see what you are using for a parts cleaner. Looking to do something similar and ideas are appreciated!!!
 

Bluevic443

Active member
83
189
33
Location
Lake Jackson, Texas
Update: Head Clean up.

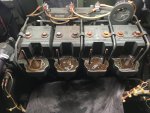
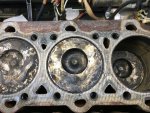
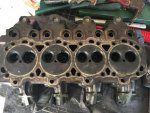
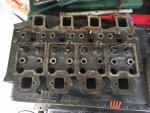
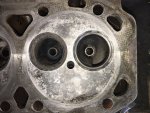
Put a fresh gallon of parts cleaner for the head. Each exhaust port was loosely packed with exhaust soot. Hate to see what is still in the muffler!!! The intake side was fairly clean.
IMG_5890.JPG
IMG_5891.JPG

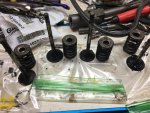
What the valves looked like
IMG_5893.JPG

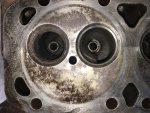
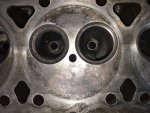
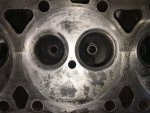
After the valves were out, the head went back into the parts washer. The exhaust seats on all 4 will need to be addressed.

#1
IMG_5899.JPG

#2
IMG_5900.JPG

#3
IMG_5901.JPG

#4
IMG_5902.JPG

Now need to find a machine shop to work the heads. New valves, guides, seals. Needs a good hot dip to get in the areas that I could not reach.

The injectors on 3 and four had rusted tips, so 4 new injectors.

The cam lobes do not show any signs of scaring or wear.
The crank bearing journals are not scared and none were spun. Connecting rod journals are not scared and none were spun. There is slight rust staining on 3 and 4 journals but feel smooth. Will mic them to be sure.

Work now has me working 3/12's 4 off, 4/11's 3 off. Going to take the kids on a 4 day mini vacation. Will be 1-1/2 weeks before I can work on it again.
Till then....
 
Top
AdBlock Detected

We get it, advertisements are annoying!

Sure, ad-blocking software does a great job at blocking ads, but it also blocks useful features of our website like our supporting vendors. Their ads help keep Steel Soldiers going. Please consider disabling your ad blockers for the site. Thanks!

I've Disabled AdBlock
No Thanks