Back2Wyo
Member
- 55
- 19
- 8
- Location
- Torrington Wy
Back in January, I went to the AZ Military Vehicle Show in Tempe. One of the vendors was selling military seats that could be used in the Deuce. I don't know the name of the vendor, (he may be on the site and see this) but he introduced me to D who had installed these in his truck. So after seeing how they were mounted, I bought the last seat he had at the show that day. The seat has a thicker and denser foam that the stock seat.
An adapter plate had to be fabricated to mount the new seat to the existing springer base. At the office we were throwing away equipment shelving for computer racks, so I grabbed on to use as the base. Cut the plate down and drilled out the holes. With this seat, it is longer than the original so you end up with about 2-3 inches of adjustment. Due to the way I mounted the seat, I had to drill 2 holes in the back cross bar on the seat to clear the rear nuts on the springer base. I had to space the adapter plate up to clear the seat adjuster mechanism. Sorry I did not take photos when I did the build.
The original seat belt looked like it had seen better days and I did not like the thought of something happening and planting my head on that big 20 inch steering wheel. So I started looking at putting in a 4 or 5 point harness.
Disclaimer:
4 and 5 point harness are NOT DOT approved.
Using them in a vehicle without a roll cage can lead to serious injury or death.
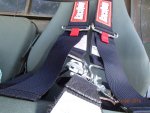
Simp5782 had listed a 5 point harness and I bought it from him. This harness uses a latch to connect all the straps together.
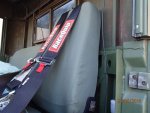
Side view of the seat and harness.
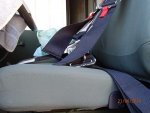
The lap belt was bolted to the same location as the original seat belts.
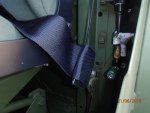
The submarine belt was bolted to the adapter plate for the seat. I cut 2 3 inch square plates and drilled them. They are used to stiffen the area where the belt is mounted.
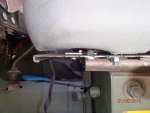
The shoulder straps posed another challenge. They could not be mounted to the cab wall and were too short to reach the floor. The straps were long enough to reach down past the upper bold on the seat brackets. So I got a 1/8th by 1.5 inch strip of steel and had it bent to fit across the back of the seat and bolt up using longer top bolts.
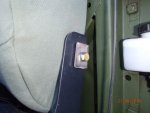
The complete harness looks like this
I have to pull the bracket off to paint, so I'll get photos and post them.
An adapter plate had to be fabricated to mount the new seat to the existing springer base. At the office we were throwing away equipment shelving for computer racks, so I grabbed on to use as the base. Cut the plate down and drilled out the holes. With this seat, it is longer than the original so you end up with about 2-3 inches of adjustment. Due to the way I mounted the seat, I had to drill 2 holes in the back cross bar on the seat to clear the rear nuts on the springer base. I had to space the adapter plate up to clear the seat adjuster mechanism. Sorry I did not take photos when I did the build.
The original seat belt looked like it had seen better days and I did not like the thought of something happening and planting my head on that big 20 inch steering wheel. So I started looking at putting in a 4 or 5 point harness.
Disclaimer:
4 and 5 point harness are NOT DOT approved.
Using them in a vehicle without a roll cage can lead to serious injury or death.
Simp5782 had listed a 5 point harness and I bought it from him. This harness uses a latch to connect all the straps together.
Side view of the seat and harness.

The lap belt was bolted to the same location as the original seat belts.

The submarine belt was bolted to the adapter plate for the seat. I cut 2 3 inch square plates and drilled them. They are used to stiffen the area where the belt is mounted.

The shoulder straps posed another challenge. They could not be mounted to the cab wall and were too short to reach the floor. The straps were long enough to reach down past the upper bold on the seat brackets. So I got a 1/8th by 1.5 inch strip of steel and had it bent to fit across the back of the seat and bolt up using longer top bolts.

The complete harness looks like this


I have to pull the bracket off to paint, so I'll get photos and post them.


