• Steel Soldiers now has a few new forums, read more about it at: New Munitions Forums!

  • Microsoft MSN, Live, Hotmail, Outlook email users may not be receiving emails. We are working to resolve this issue. Please add support@steelsoldiers.com to your trusted contacts.

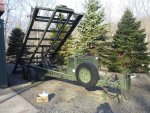
Schutt Industries 1CSL0-SLC-T-1000 Self Loading Trailer

aheilmann68

Member
228
1
18
Location
North NJ
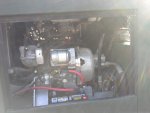
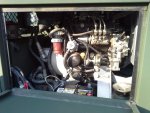
Finally got the 1CSL0-SLC-T-1000 Self loading trailer in from Rock Island and man this thing is stout and thought out. Right off the bat the batteries were dead, replace them and go to start, nothing. Took starter off and apart and its plugged solid with rust, attempted to clean it but only slight improvement and barely got it to work right. Opened it back up again and the brushes and the retainer springs are toast and there is no path to ground so now I am stuck looking for a 24V 11 tooth starter that fits this engine with an undocumented bell housing adapter. Ill try to get pictures uploaded later and as work progresses. Ordered 2x6 oak to create a deck and close up the openings.
 

aheilmann68

Member
228
1
18
Location
North NJ
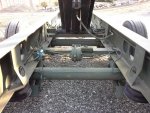
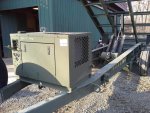
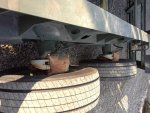
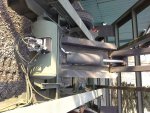
20140419_080602.jpg20140419_080611.jpg20140419_080513.jpg20140419_080550.jpg20140419_080545.jpg20140419_080536.jpg20140419_080523.jpg20140419_080506.jpg20140419_080455.jpgNew starter came in and started right up. Diesels are great like that, higher likely hood of starting after sitting for years. Lubed the trailer, ran the hydraulics, put a new remote battery in and reproggramed it and it was good to go. A couple of things to note I found first off the starter is a imi203 starter that is hard to find but trupar.com in pittsburg has it, batteries are simple lawn mower batteries, the relays are 24v relays and I had two wired incorrectly, and the service and emergency lines are plumbed to the wrong sides on the trailer so if guys are not having the bags inflate and the system come up in air try swapping lines.
 

PATRIOT1

Member
88
0
8
Location
Southeastern Ohio
Great post - thank you. I see two models- the IMI-203 and the IMI-203HD. I think both are the same one, correct? Also, how did the winch and remote work out? Again,thanks.
 

aheilmann68

Member
228
1
18
Location
North NJ
The 203 starter should be 24v and the set up in the unit was 24v to the starter. Remote worked great, new batter needed then needed to reprogram the remote. Start unit and hold the green button on the remote for 10 seconds, you only have the first 20 seconds after the hpu starts
 

Artisan

Well-known member
2,761
227
63
Location
CDA Idaho
I just received my trailer yesterday, shipped to me to L A.

INCREDIBLE! These things are awesome. $77K the DOD paid for them!

I wrote Perkins and asked for all literature.
They may charge for it, I saw prices that might make it all $150.00.
If someone buys it all I would happily share $ if good scans are made.

I found a phone number for Perkins USA, 1-888-PERK-ENG

I will share all info I get here w/ you guys, please reciprocate.

NUMBERS OFF MY ENGINE
TYPE GH6600J
SN 362346T
OIL FILTER is a "Denso" #140517030
Raised Cast iron Numbers on the block = PQ 28
ENGINE FAMILY 9 H3XL 761E3V
.761 Liters.

I own a glass bead blaster, I will pull my starter, maybe the
blaster will help some? I can see my flywheel is all rusty too.

My batteries are toast.

So we have 3 owners here? If you find other owners try to get them to
join this club. More info is good.

I might pull the brake rotors and glass bead blast them too after I get the engine
handled.

Did you see what I think is a work light switch at the rear?

There is a Crank Handle mounted to the frame inboard on the frame by the spare
tire for the two rear stabilizer legs.

I believe I have figured out how the two big triangular parts are used.
They are GUIDES that help to center the container between
the trailers side rails as you load it and keep
it from gouging the side rails as your pulling the can onto the trailer
plus they give you a place to connect the bridle too.
LAY THEM FLAT W/ THE LOOPS MADE OUT OF ROUND BAR UP
PUT THE ROLLERS ON THE OUTSIDE (making an arrow of sorts)
CONNECT EACH TO THE CONTAINER LEFT AND RIGHT BOTTOM CORNERS USING THE TWIST LOCKS
CONNECT THE BRIDLE's CHAIN HOOKS TO THE LOOP MADE OF ROUND BAR ON TOP
PULL! (My theory anywho)
 

Julian

Member
39
-5
6
Location
Spartanburg, SC
Neat looking machine! I don't understand how they are supposed to work- Why does the bed have to raise so high? I can visualize how you would load a container, but not how to unload it?? Is it meant to only ferry unloaded containers? Is it supposed to load anything other than standard enclosed containers?
 

PATRIOT1

Member
88
0
8
Location
Southeastern Ohio
Great info, Artisan - thx very much. Julian, See additional photo with container on it, below, they are fitted to ISO 20 foot standards, with ISO corner locks. I contacted Steve Schutt at the company, and he was kind enough to send me this info., attached. NOTE: He indicated that the 18 or so trailers at Rock Island were prototypes made for the Marines, and that there were never TMs made for them, or manuals for operation, which was disappointing. FYI, I ordered the same IMI-203HD starter as aheilmann68 (above) and it does not match its replacement. It is off alignment by about 1/16" and has two holes instead of three for mounting. Still contacting the company about that change to the model. More to come. ~ BrianView attachment 912514-Product Datasheet-74125-SRS 18-A-73 CE.pdfView attachment SLC-T#3_IntegratedManifoldSchematic.pdfPALLET_4.jpgView attachment Proposed Schematic w-new relay.pdfView attachment SLC-T.PDF
 

Artisan

Well-known member
2,761
227
63
Location
CDA Idaho
I will be backing mine into its hole today, if someone has time
please take a look at this PDF and try to determine just what
motor we have, if possible. This PDF may be one less we have to buy.

Rayzer,

It is a hair bigger than a 20' shipping container.


Julian,

You raise it to offload it, yes that high.
It will haul 15,000 pounds PLUS the trailer itself I believe.
A container weighs about 5000 pounds so it will haul a container
w/ about 5 tons of crap in it.


I have not had it in my possession long enough to engineer modifications
to it ( and I most certainly will ) but initial observations say that there
is no reason why a guy can not deck that thing (maybe leaving access
holes to service some parts) and use that trailer for ANYTHING.

It is an incredible piece of machinery. The engineering is second to none.
Those boys at Schutt Co are on-it. I can tell it was designed in a
CAD program, it is too perfect. This was not built w/ a cutting torch,
it was built w/ a water-jet or laser cutter.
 

Artisan

Well-known member
2,761
227
63
Location
CDA Idaho
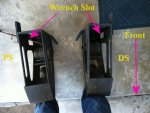
I took another look at those GUIDES this AM and I may have
been wrong in my assumption. I now think they may actually
mount Vertically and are to ease the transition from the
container flat on the ground to the bed tilted in such a manner
that the rollers actually touch the DECK and not the side rails.

schutt-guides.jpg
 
Last edited:

Artisan

Well-known member
2,761
227
63
Location
CDA Idaho
The gladhand air lines should be disconnected at the front of the trailer
and use an air hose and blow the spider egg nests out.

The air tank on the trailer should be flushed as well.

So far so good w/ mine for trailer-ability. All air bags inflated and
all LED lights work. Looks like a civilian power cable can be used as well.
I assume the little running light on the 24V X 12V box tells you
the 12V system is working? I did not see the little running
light on the 24V X 12V box illuminate using MV 24V power.
 
Last edited:

Artisan

Well-known member
2,761
227
63
Location
CDA Idaho
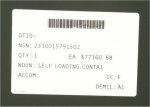
Here is a picture of the label on what I would call the bellhousing.

Looks like the bellhousing and perhaps the pump is a Kubota.

I wish the whole deal was Kubota but the good part is a guy
could probably easlity swap in a Kubota 3-banger like out
of a BX25 if this Perkins turns into a Pukeins.

bellhousing.jpg
 

Artisan

Well-known member
2,761
227
63
Location
CDA Idaho
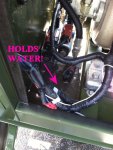
Under the Bellhousing is a hydraulic pressure valve of sorts.

It has a couple of VERY SMALL and totally inadequate drainage
holes. There are some tiny shells in there, as in shells from
a body of water. They plug those holes! I drilled in several
.4" or so drainage holes and all is well now.

THIS ONE ERROR in design could possibly have cost Schutt the contract.
Now I see why there is so much rust, it rains and water gets into
this holding pond and it sits for months...The rust is what killed
these engines from what I see so far.

Batteries are batteries...

holds-water.jpg
 
Last edited:

Artisan

Well-known member
2,761
227
63
Location
CDA Idaho
PS, I am not trashing SCHUTT Industries "AT ALL" . There products are
simply beautiful. Just calling a spade a spade in the holding water deal.
 

aheilmann68

Member
228
1
18
Location
North NJ
Ill have to fully read this and reply accordingly but I'm super busy. The starteri have was a 2 blot and the new one was a 2 bolt. I had to grind a little section since the block sticks out at the worst spot. Fit right in and starts great. Batteries are lawn mower batteries.
 

Artisan

Well-known member
2,761
227
63
Location
CDA Idaho
OK I found a picture showing the GUIDES as I call them in use.
I was correct on my last assumption, you can see, albeit blurred
that these connect to the container, rollers down, loops in and you
connect the chains to the loops.

guides-loaded.jpg
 
Last edited:

Artisan

Well-known member
2,761
227
63
Location
CDA Idaho
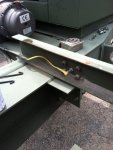
As you know on either side of the front of the bed is a latch
that keeps the bed secure in the full down position. What you
probably have not noticed if that latch is WIRED.

I pulled the protective sheet metal covers in that area looking at
what that shielded wire was for and there it is. It is kinda
delicate, as you see it has 3 pins to the tiny connector.


If you pull the protective shields the odds of several of the 10-24
screws breaking on removal are great. Ask me how I know. Yep,
I drilled them out and extracted the carcass and re-ran the tap,
TWICE! I shall be replacing those screws w/ SS screws but...........

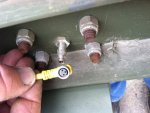
sensor-1.jpg sensor-2.jpg


The reason I pulled them to begin w/ is I am looking for a place
to carry the GUIDES. I think I see a simple way to do it, just add
a .5" steel plate to either side up front and make holes in them
duplicating the hole in a containers corner, weld it down and then
just toss the GUIDE up there, fit and secure the twist lock and
add a clip on safety chain / locking device and call it good.

Stay Tuned... :)

Sure do wish we could find some more owners for more input!
 
Top
AdBlock Detected

We get it, advertisements are annoying!

Sure, ad-blocking software does a great job at blocking ads, but it also blocks useful features of our website like our supporting vendors. Their ads help keep Steel Soldiers going. Please consider disabling your ad blockers for the site. Thanks!

I've Disabled AdBlock
No Thanks