- 2,970
- 4,351
- 113
- Location
- Olympia/WA
EDIT: I'm doing this mostly because I haven't seen much of anything about doing this type winch with the milemarker plate. Most of what I read basically stated that you either need the A2 plate and the extensions to do an electric winch, or other stuff like that. Figured I'd document what I did/found in order to help out the next guy.
As the title says, I'm installing the 24V version of the SEC12 milemarker electric winch into the mounting plate for the hydraulic winch.
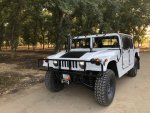
My truck is a model M1123, so an A2 truck.
I skimmed through the hydraulic winch install instructions, and the main pieces of information I found there relevant to this install is that the lower control arm bolts need turned around so the nut is facing forward, and that to accomplish this the driver's side brake caliper and brake rotor have to be removed. Not a huge deal; anyone that owns one of these trucks should have been under there to at least check torque on the halfshaft bolts.
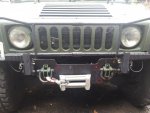
I'm not done with the install yet. So far just have it mounted to the plate and the plate installed.
Tools used so far" 1 1/8" wrench and socket for lower control arm bolts.
15/16" wrench and socket for the bumper bracket bolts.
3/4" wrench and socket for the front shackle/bumper bolts.
9/16" wrench for brake caliper bolts.
10mm 12 point socket for the Blue Hummer locking halfshaft bolts I have installed. If you have regular bolts there you'll need to buy a new set of them and red locktite as they are single use only (torque to yield tightening method)
8mm allen wrench for the winch mounting bolts (it came with some grade 8.8 bolts; I decided I'd rather have grade 12.9 and the local hardware store only had them as socket head cap screws.
Torque wrench (3/8 drive) for the halfshaft bolts and winch bolt tightening.
27/65 drill bit (and several smaller sizes as well, but size not critical on them)
1/2x13 tap.
snap ring pliers to remove the end rollers, not actually necessary for install just made life a little easier.
work light
flashlight
Hardware I bought:
4 10x1.5 by 35mm allen head cap screws in grade 12.9 for winch mounting.
4 hardened 10mm washers (grade 12.9, left over from another project)
2 1/2x13 bolts and nuts. Nuts stacked on the bolts to reduce reach. I think the bolts are 1" long, might only be 3/4" Will be changing them out for 1/2" long bolts if I can find them and washers for the spacing.
Main things that I've had to modify so far.
Driver's side front mounting bracket. The winch has one little bolt head sticking out just enough to cause issues. Solution is to grind/cut a little bit of the lower corner of the bracket off. Takes at most a couple minutes.
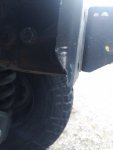
NOTE: when installing the brackets, the angled brace faces up. It will NOT fit the winch if it's facing down (true of any winch install)
Next issue, using the original mounting holes, the body of the winch is right up against the front plate. There is zero room for bolts/nuts to mount the roller fairlead plate on there.
Solution: the roller fairlead came with 2 sets of holes. Some 10mm or 3/8" sized holes that are a little offset, that match up with the original holes in the mounting plate for the roller fairlead, and a second set of holes centered in the plate 1/2" diameter.
My solution was to drill and tap a set of 1/2" holes for mounting it. I don't have any bolts short enough at the moment, but the ones I'm using seem to fit perfectly.
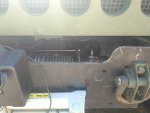
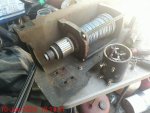
picture of the backside where the sinch body would be; you can see the bolts just barely stick through.
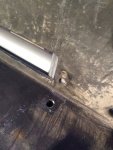
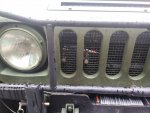
Front side, not tightened down yet, and actually the roller fairlead is upside down in the picture as the smaller holes match up to holes already in the place nearer the edge.
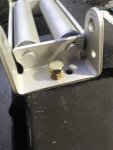
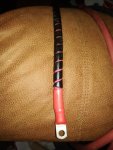
So that is where I am at for the moment. Tomorrow's job will be to sort out the wiring to the winch. I'll also try to take a few pictures of what it looks like installed. There is plenty of room to fit my hand in there to work the clutch lever. Just have to figure out a good place for the control box mounting. At the moment it's getting installed on the outside of the winch plate until I get a good cable crimper to make some longer cables.
As for cost, so far the winch (15% discount right now from milemarker) was just under $800, and another $90 for shipping.
the 24V are apparently special order, even though they stock them, so they cost a little more than the 12V version.
The mounting plate and brackets were hand-me-downs from one of the other guys in this area. I got really lucky with that.
As the title says, I'm installing the 24V version of the SEC12 milemarker electric winch into the mounting plate for the hydraulic winch.
My truck is a model M1123, so an A2 truck.
I skimmed through the hydraulic winch install instructions, and the main pieces of information I found there relevant to this install is that the lower control arm bolts need turned around so the nut is facing forward, and that to accomplish this the driver's side brake caliper and brake rotor have to be removed. Not a huge deal; anyone that owns one of these trucks should have been under there to at least check torque on the halfshaft bolts.
I'm not done with the install yet. So far just have it mounted to the plate and the plate installed.
Tools used so far" 1 1/8" wrench and socket for lower control arm bolts.
15/16" wrench and socket for the bumper bracket bolts.
3/4" wrench and socket for the front shackle/bumper bolts.
9/16" wrench for brake caliper bolts.
10mm 12 point socket for the Blue Hummer locking halfshaft bolts I have installed. If you have regular bolts there you'll need to buy a new set of them and red locktite as they are single use only (torque to yield tightening method)
8mm allen wrench for the winch mounting bolts (it came with some grade 8.8 bolts; I decided I'd rather have grade 12.9 and the local hardware store only had them as socket head cap screws.
Torque wrench (3/8 drive) for the halfshaft bolts and winch bolt tightening.
27/65 drill bit (and several smaller sizes as well, but size not critical on them)
1/2x13 tap.
snap ring pliers to remove the end rollers, not actually necessary for install just made life a little easier.
work light
flashlight
Hardware I bought:
4 10x1.5 by 35mm allen head cap screws in grade 12.9 for winch mounting.
4 hardened 10mm washers (grade 12.9, left over from another project)
2 1/2x13 bolts and nuts. Nuts stacked on the bolts to reduce reach. I think the bolts are 1" long, might only be 3/4" Will be changing them out for 1/2" long bolts if I can find them and washers for the spacing.
Main things that I've had to modify so far.
Driver's side front mounting bracket. The winch has one little bolt head sticking out just enough to cause issues. Solution is to grind/cut a little bit of the lower corner of the bracket off. Takes at most a couple minutes.

NOTE: when installing the brackets, the angled brace faces up. It will NOT fit the winch if it's facing down (true of any winch install)
Next issue, using the original mounting holes, the body of the winch is right up against the front plate. There is zero room for bolts/nuts to mount the roller fairlead plate on there.
Solution: the roller fairlead came with 2 sets of holes. Some 10mm or 3/8" sized holes that are a little offset, that match up with the original holes in the mounting plate for the roller fairlead, and a second set of holes centered in the plate 1/2" diameter.
My solution was to drill and tap a set of 1/2" holes for mounting it. I don't have any bolts short enough at the moment, but the ones I'm using seem to fit perfectly.
picture of the backside where the sinch body would be; you can see the bolts just barely stick through.

Front side, not tightened down yet, and actually the roller fairlead is upside down in the picture as the smaller holes match up to holes already in the place nearer the edge.

So that is where I am at for the moment. Tomorrow's job will be to sort out the wiring to the winch. I'll also try to take a few pictures of what it looks like installed. There is plenty of room to fit my hand in there to work the clutch lever. Just have to figure out a good place for the control box mounting. At the moment it's getting installed on the outside of the winch plate until I get a good cable crimper to make some longer cables.
As for cost, so far the winch (15% discount right now from milemarker) was just under $800, and another $90 for shipping.
the 24V are apparently special order, even though they stock them, so they cost a little more than the 12V version.
The mounting plate and brackets were hand-me-downs from one of the other guys in this area. I got really lucky with that.
Last edited:


