• Steel Soldiers now has a few new forums, read more about it at: New Munitions Forums!

  • Microsoft MSN, Live, Hotmail, Outlook email users may not be receiving emails. We are working to resolve this issue. Please add support@steelsoldiers.com to your trusted contacts.

Valence's 1960 Pioneer Tool Trailer

Valence

Well-known member
Steel Soldiers Supporter
2,112
555
113
Location
Davis County, UT
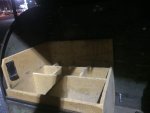
It's not as dramatic as it sounds, but the seller did say he had considered just straight up scrapping it, but thought he'd try selling it first. Hey, in Utah with the high Boy Scout population, it was a logical move. However, I want it for my own camping and not for the Boy Scouts. :)

Though, honestly, I can't keep the MVs out of my drive way. I keep adding to it! :shrugs:

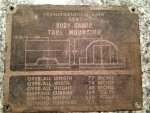
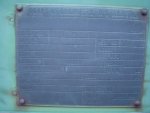
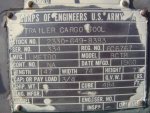
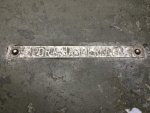
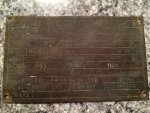
Data Plate says:
CORPS OF ENGINEERS, U.S. ARMY
National Stock Number (N.S.N.): 2510-649-8384 (if you want to look this up online try adding a couple zeros for the second set of digits "2510-00-649-8384")
Nomenclature (NOM.): Body, Cargo TOOL MOUNTING
ENG 7&8
MAKE: METRO ENG & MFG
Model (MOD.): BCTM (if there's more, it's illegible)
Inspection (INSP.): (a mostly illegible stamp)
Serial (SER.): 533
Manufacture Date (MFD.): Nov 1960
FOR USE WITH
Nomenclature (NOM.): ORD CHASSIS, M-116
F.S.N.: 2330-542-5987
Model (MOD.): M-116
2016-02-10 22.15.03.jpg 2016-02-10 22.14.43.jpg
Note:
It took looking up other data plates online (see post #8) to figure out what some of these said.


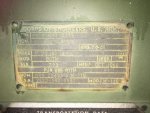
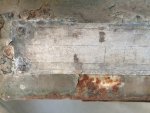
This next data plate is located on the passenger side of the frame near the hitch, and reads:

DELIVERY DATE: NOV 60
INSPECTED: (Illegible stamp)

(Illegible)EMPTYCROSS COUNTRYHIGHWAY
P...(Illegible)15002250
WHEELS122526403360
DG. LEG115200230
TOTAL134028403590

SHIPP...(illegible)
C...(Illegible)
2...(Illegible)
CU. ...(Illegible)
2016-02-11 16.45.42.jpg2016-02-11 16.46.05.jpg

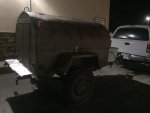
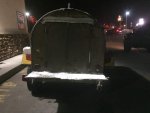
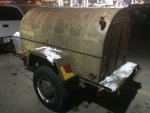
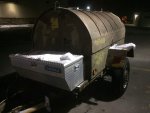
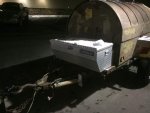
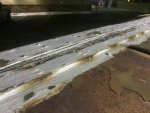
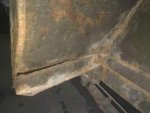
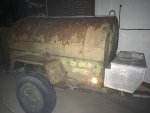
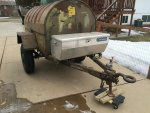
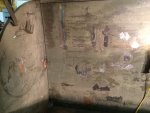
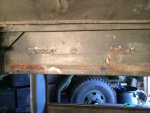
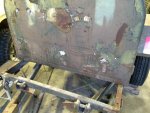
This is the older style of the Pioneer Tool trailers. The trailer needs a total restoration, tear down, sand blast, weld a few rust holes (though not as many as you'd think), paint, and of course the rubber top hing drilled out and replaced. It still is a fairly solid and straight trailer though. The body metal is thicker than I expected just by looking at it.

Quick run down on the trailer issues or mods that's been made or I will need to make:
  • The Military lights are long gone. The plug has been cut off and the harness on the left tail light has also been cut. It probably could be spliced back together and made workable, but if a complete (like new?) M116 wire harness could be found I'd just rather go that route.
  • The front landing gear is there, but it's a bit rusty and doesn't want to move much, so at some point someone welded on a standard civilian trailer jack - which works well though.
  • The emergency chains are a couple links too short for my Dakota's hook up points. Will need to cut a link and add a few more.
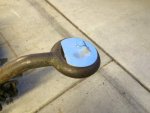
  • The hand brakes are missing (just the handles/levers). They'd normally be below the diamond plate Kobalt tool box. But the rest of the components are there. Maybe I can just mount the "newer" style hand brakes outside the frame. The right-side hand brake cable is broken at the axle end.
  • The left-rear recovery/tie down shackle is missing. I found a loose one in the Kobalt tool box but it doesn't fit, it's a little too large. Also, it's pin is slightly bigger than even the pins used on the deuce rear tow hooks.
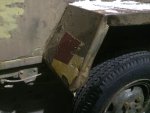
  • The left front fender has been bent inward and damaged. Should actually repair alright though.
  • There's dent in the top of the right gull-wing.
  • As mentioned earlier, and not surprisingly either, the rubber hinge needs replacing.
  • Of the two doors in the back, the right door is missing its bottom latch, and the exterior hook to keep it open, and where that hook would clip to stay open is broken.
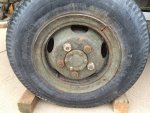
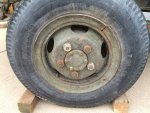
  • Needs new tires, the sidewalls are cracked.
  • Still has the 5 lug nut split rim (exterior locking ring) original wheels (that I've read were the same as the M37?) I'm hoping to go with tubeless wheels. Maybe 3 and have a spare on the trailer. My Dakota also uses a 5 lug nut pattern but I wouldn't imagine that they're the same.
  • Looks like it has oil shocks, and at minimum, the right one is leaking. They'll need replacing.
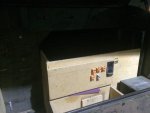
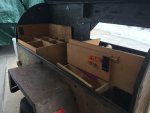
  • Disposal of the interior particle board boxes from former carpenter.
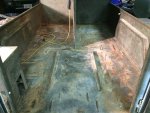
  • Weld close and grind a few small interior rust holes in the floor. (This will be a great opportunity for me to "cut my teeth" on actual vehicle restoration, and a final motivating factor to buy a welder).

Pictures!
2016-02-10 20.04.33.jpg 2016-02-10 20.04.40.jpg 2016-02-10 20.04.51.jpg 2016-02-10 20.05.04.jpg 2016-02-10 20.05.12.jpg 2016-02-10 20.06.21.jpg 2016-02-10 20.05.26.jpg 2016-02-10 20.06.39.jpg 2016-02-10 20.06.34.jpg 2016-02-10 20.06.56.jpg 2016-02-10 20.07.08.jpg 2016-02-10 20.07.27.jpg 2016-02-10 20.05.42.jpg 2016-02-10 20.05.48.jpg
 
Last edited by a moderator:

Valence

Well-known member
Steel Soldiers Supporter
2,112
555
113
Location
Davis County, UT
And if you haven't yet read enough, here's little synopsis of my recovery:
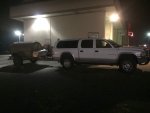
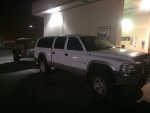
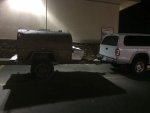
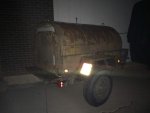
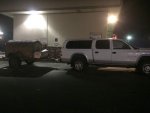
I was worried about the tires (which have like new tread but sidewall cracking) and the bearings as the thing probably has sat around for a while. I towed it a block and checked the tires and felt the hubs for heat. Then checked again about 1/2 a mile later. Then again 2 miles later at a gas station where I aired up the tires to ~30 PSI (they were at about 17 and 22 PSI at pick up). I then got on the interstate and towed it about 10 miles more and pulled over on the shoulder at an off ramp. Everything still checked out great. In all, I towed it without incident from Pleasant Grove, UT back to Kaysville, UT (~60 miles). In consideration for the tires I only drove at 55 mph. I felt the hubs when I pulled into my driveway. The left one was slightly warmer than air temperature, and the right hub was cold.


Thanks to Alexsha, the pintle hitch and magnetic lights I got from him a couple years ago were real handy! Saved the day (made the trip possible). The trailer did come with a pintle hitch on a 2" receiver, but it was rusty and didn't have a pin to keep it closed. I didn't trust it. The 12v LEDs mounted on the trailer work but have wiring issues (turn off when the brakes are applied).


The trailer sure does follow and tow well behind my 2001 Dodge Dakota, and it's the perfect size.

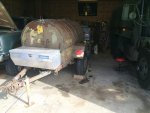
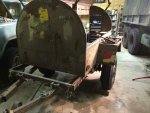
Here it is at home. safely tucked behind my M105A2 (that's covered by a tarp) by the house...
2016-02-10 21.41.43 - Copy.jpg 2016-02-10 21.41.33 - Copy.jpg
 
Last edited:

bikeman

Well-known member
Steel Soldiers Supporter
2,894
501
113
Location
Ft. Bragg, NC
Nice score. Can't believe those deliniator stickers managed to stay on that long. Gives me hope for mine when I get to installing them (need to sand and paint the area before I do).
 

Valence

Well-known member
Steel Soldiers Supporter
2,112
555
113
Location
Davis County, UT
Nice score. Can't believe those deliniator stickers managed to stay on that long. Gives me hope for mine when I get to installing them (need to sand and paint the area before I do).
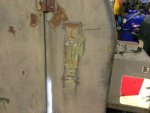
No kidding! Unlike my mailbox stickers with my house number where the black and reflective "stuff" wear off in 5 years. The delineator stickers are STILL very reflective, even with all the sitting outside, scrapes and wear. Only the one on the front of the right fender is missing. They are, obviously, of quality manufacture.

Is there a decent source for those? I see some for sale on eBay out of Italy, and the price seems maybe a bit steep? I was thinking if I do get any, since they are adhesive backed to stick them to those large magnet sheets, that way if they do wear out they'd be far easier/cleaner to replace.
 
Last edited:

Valence

Well-known member
Steel Soldiers Supporter
2,112
555
113
Location
Davis County, UT
For the curious, I forgot to mention I paid $300 for it (Plus probably the $~25 in fuel to get it home, heh). Price points are different from person to person, but I think I did just fine, and the seller got a lot more than scrap would have given him for the some ~1400 lbs. Unfortunately that means I have to register and license it in Utah (750 lbs is the current cutoff point), which means about $42 per year. It needs hundreds (emphasis on the plural) more into it for it to feel like it's ready for long term service, but man, talk about some serious blessings not having any trouble getting it home in the dark. That made my day.

In my Dodge Dakota (4.7L), I could feel it back there in accelerating, braking, bumps etc. Though it's about the same width as the truck and follows almost the same track as my rear tires. Probably will be a little squirrely backing up, but I can see it out of all three mirrors, and with power steering, it shouldn't be that bad. At some point I'm going to take it to a nearby church parking lot and practice backing up with it as I've not done much with trailers.
 
Last edited:

Valence

Well-known member
Steel Soldiers Supporter
2,112
555
113
Location
Davis County, UT
Speaking about registration, I have some concern that I'll have difficulties. It only came with a bill of sale as I don't think anyone has ever bothered registering/titling it. I'll have to apply for a title and have a officer inspect the VIN. Is the serial number stamped on the frame anywhere? I need daylight to check it over thoroughly. The very first picture in the thread shows the Serial Number as a whopping "533". I'm sure the DMV would have fun with that.
 
Last edited:

bikeman

Well-known member
Steel Soldiers Supporter
2,894
501
113
Location
Ft. Bragg, NC
.

Is there a decent source for those? I see some for sale on eBay out of Italy, and the price seems maybe a bit steep? I was thinking if I do get any, since they are adhesive backed to stick them to those large magnet sheets, that way if they do wear out they'd be far easier/cleaner to replace.
I had a WTB thread that we actually ended up with a decent discussion regarding these... but it's gone.

The Italy ones are, as I was told, not too great, and the guy folds them in half to ship them, so they come in not the best condition. I was grateful that a member here had some extra. I'm not sure if he still does, he might chime in though.
 

Valence

Well-known member
Steel Soldiers Supporter
2,112
555
113
Location
Davis County, UT
NOTE: I originally thought the Model read "BOTM" but I'm fairly certain now that the 'O' is actually a 'C'.
I found other 1960 Pioneer Tool trailers on the internet and with data plates that also have a Model of "BCTM".
http://www.vintagemilitarytrucks.com/1960_Pioneer_Tool_Outfit_Trailer_6C690_j.JPG
2016-02-11 16.53.28.jpg

http://www.vintagemilitarytrucks.com/1960_Pioneer_Tool_Outfit_Trailer_6C6767_data1.JPG
1960_Pioneer_Tool_Outfit_Trailer_6C6767_data1.jpg

23148153515_e6969622c7_z.jpg

However, looking up the Acronym ("Brigade Combat Team Modernization") seems to imply that the acronym didn't exist until fairly recently. *shrug*
https://en.wikipedia.org/wiki/BCT_Modernization

Anyone know what "BCTM" means, if otherwise different than the above?
My guess: Body Cargo Technician (or Technical) Maintenance
 
Last edited:

Valence

Well-known member
Steel Soldiers Supporter
2,112
555
113
Location
Davis County, UT
I got a little behind in posting.

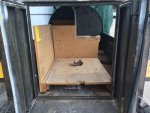
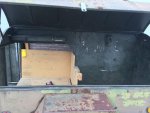
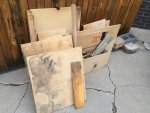
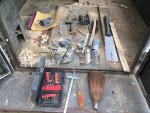
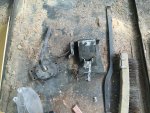
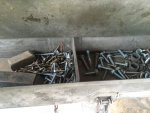
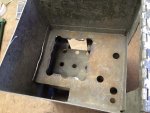
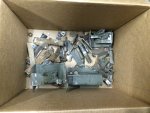
I cleaned out the crap and broke down the particle board boxes. I'm happy to report that I managed to fit them all in my garbage can. LOL. Also pictured is all the left over stuff in the trailer, some actually readily usable stuff (like new in the package safety glasses), as well as a few original trailer pieces.
2016-02-12 10.21.42 HDR.jpg 2016-02-12 10.21.50 HDR.jpg 2016-02-12 10.22.03 HDR.jpg 2016-02-12 11.40.47.jpg 2016-02-12 11.32.28.jpg 2016-02-12 11.32.40.jpg


I used a furniture dolly to make it easier to roll the trailer up my driveway and red helped situate it in the garage for immediate working on.
2016-02-13 11.26.43.jpg 2016-02-13 14.39.48.jpg


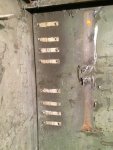
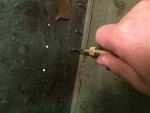
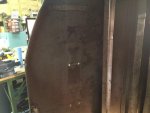
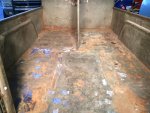
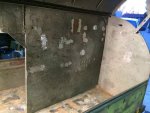
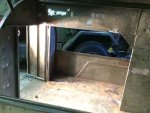
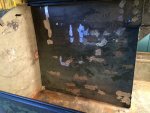
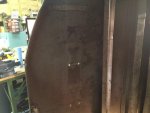
I spent a number of hours slowly cleaning off the interior divider wall and floor. I found that a spring loaded center punch, on the back side of the tool label twist rivets, makes removing the labels really easy and doesn't damage them. It does tend to send the little rivets flying though. :-D When I have all of the tool labels off, I plan on giving most of them away, though I will probably keep some. The tool labels on the floor of the trailer have generally been too rusted and a pain to get out so those are mostly ruined/damaged when grinding the head off.

2016-02-14 18.28.30.jpg 2016-02-14 18.38.40.jpg


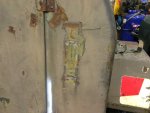
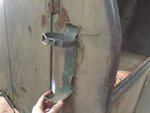
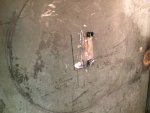
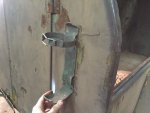
It appears that there were two fire extinguishers mounted on the passenger rear of the trailer, one on the inside and one directly opposite on the outside. I "just happen" to own two older military fire extinguisher mounts and lo-and-behold, the mounting holes and paint wear/rust line up exactly. Even the rust/paint damage on the rear door matched where it would have hit the fire extinguisher. I would really like keep this part original and put two fire extinguishers in this location - I've just had a difficult time finding fire extinguishers that'll fit in these old military mounts.
2016-02-14 18.44.31.jpg 2016-02-14 18.44.21.jpg 2016-02-14 18.44.52.jpg


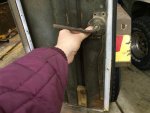
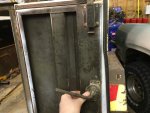
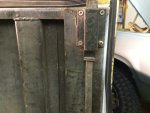
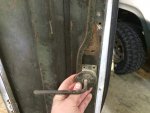
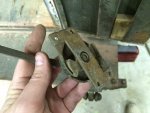
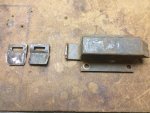
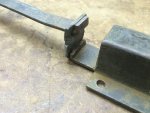
I determined that two of the left-over trailer parts floating around inside the trailer when I cleaned it out belong to the rear-door latch mechanism. It appears what I have is the upper latch ("attached" to the door with wood screws), the center handle mechanism (that appears a bit wallowed out) and lower latch pull-bar. I am missing the lower latch and upper latch pull-bar.
2016-02-14 18.56.52.jpg 2016-02-14 18.56.56.jpg 2016-02-14 18.57.17.jpg 2016-02-14 18.57.24.jpg 2016-02-14 18.57.57.jpg

Update!
I was reviewing my pictures in closer detail, and I believe the lower latch is located in the small "Electrical Repair" box on the the passenger side. I had taken a picture of the contents of the box because I couldn't see into it without fetching a step stool. But in the lower left of the picture it sure looks like the missing rear-door latch. Sweet!
2016-02-12 11.31.44.jpg
 
Last edited:

Valence

Well-known member
Steel Soldiers Supporter
2,112
555
113
Location
Davis County, UT
The trailer looks a lot better with that Kobalt tool box removed. I am giving it to one of my brothers for his trailer that he hauls his rock crawler on.
2016-02-14 20.08.27.jpg

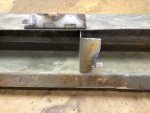
This type of bracket that is tack (?) welded on is just the worst to grind off as I have to basically cut/grind through the whole plate at each tack weld point, versus just cutting the weld, removing the bracket and grinding smooth.
2016-02-14 20.06.52.jpg

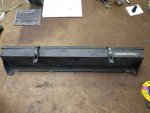
I'm several hours of grinding into removing the left over tool mounting brackets, and I sadly have still yet a lot more to go. I will remove the box in the driver's side rear and give it away, though some of the internals have been cut up.
2016-02-14 20.57.20.jpg 2016-02-14 20.31.01.jpg

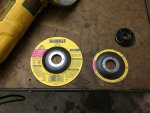
I think this cutting disk is all used up.
2016-02-15 12.30.47.jpg

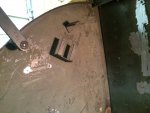
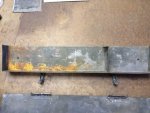
Pictured here is the hing rest (top) for the gull wing sides, but some other tool mount/hose end holder (bottom). I'm considering just leaving the bottom one there as it's not really in the way, and unlike most of the metal brackets, hasn't been torched to pieces in some fashion. Plus, it's attached through that more difficult-to-remove tack welding.
02/21/2016
Update: I decided to remove it, difficult/messy it was, as I did not want to run into a situation later after the trailer is sand blasted and painted and find out it's in my way and wish I had removed it earlier.
2016-02-14 20.57.54.jpg

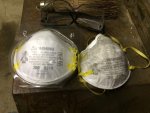
Also, proper masks will protect your lungs from the metal dust! Though, I want to get the type that'll vent your breath upon exhale so my safety glasses won't fog up in the cold!
2016-02-14 21.00.15.jpg
 
Last edited:

Valence

Well-known member
Steel Soldiers Supporter
2,112
555
113
Location
Davis County, UT
Missed posting these:

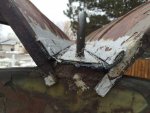
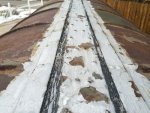
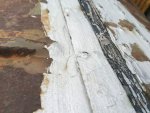
As mentioned earlier, the gull-wing door rubber hing is (no surprise) rotted out. Also visible are the attempts of the former owner(s) to try and seal it from leaking. I will grind off all of these 154 rivets and use bolts with RTV to reattach through some new rubber. My brother has a friend that has access to used conveyor belt rubber (the stuff still looks like new). It'll be a little thicker (~0.33" vs ~0.20"), but it has the same high strength internal woven fabric. I think it'll last me for years to come and the bolts will make it easier to replace. Besides all the grinding, it'll probably be a lot of work to punch out that many holes in the new piece of rubber.

2016-02-12 10.47.03.jpg 2016-02-12 11.01.44.jpg 2016-02-12 11.10.43.jpg


The BDL253 Draw-bar lunett lock arrived (~$27.00). As expected, it fit great. I think I may throw it into my lot of stuff to be powder coated. Because I can. :p
2016-02-17 18.11.08.jpg 2016-02-17 18.12.03.jpg
 
Last edited:

Valence

Well-known member
Steel Soldiers Supporter
2,112
555
113
Location
Davis County, UT
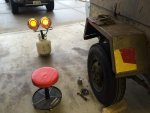
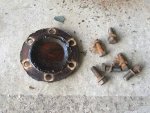
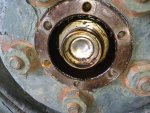
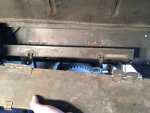
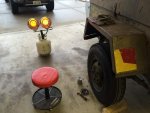
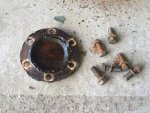
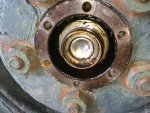
I love the Mr. Heater. It was more expensive than I would have liked, but it does greatly improve the work conditions. I decided to take a look at the axle bearing. I assumed that the axle/bearings have not been serviced since the Army sold the trailer "umpteen" years ago. So far, initial indications look promising as the hub bolts came off with just a 1/2" socket and the inside wasn't full of water or coorosion (just the typical military very sticky grease).
2016-02-11 16.47.30.jpg 2016-02-14 17.10.16.jpg 2016-02-13 14.40.03.jpg 2016-02-13 14.40.21.jpg


I have a number of questions though: (If anyone can help me answer these, it would be greatly appreciated!)
  1. This axle appears different than my deuce (the only axle I've taken apart). What is the the proper way to take the bearing out? I see what appears to be the 8-sided nut inside, but I don't know what the flange is in front of it. I expected to see a similar tabbed lock washer and two spindle nuts.
  2. What size of 8-sided socket will I need? I tried measuring it with my calipers and ordered a 2-9/16" eight-sided socket from my local O'Reillys, but I believe it's actually too small. It did not seem to fit, but it seemed close so I think it might be a 2-5/8" nut instead?? I haven't been able to find a 2-5/8" eight-point socket.
  3. I've read that these trailers use M37 wheels. Is this true? The tires say "7.5-16", so the wheel is 16" in diameter, but how wide/deep is it?
  4. I would rather have tubeless wheels +1 spare, so I'm trying to determine what wheel will fit this axle. Being a 5 lug bolt pattern, I've measured according to the following figure and it appears to be 5 x 6.5" bolt pattern. Do you agree with this methodology?

http://www.crawlpedia.com/bolt_patterns.htm
bolt_pattern.jpg
 
Last edited:

bikeman

Well-known member
Steel Soldiers Supporter
2,894
501
113
Location
Ft. Bragg, NC
Awesome updates and finds. I might have a connection for some (perfectly legal) .mil extinguishers... just haven't explored it in a while.
 

Valence

Well-known member
Steel Soldiers Supporter
2,112
555
113
Location
Davis County, UT
Awesome updates and finds. I might have a connection for some (perfectly legal) .mil extinguishers... just haven't explored it in a while.
Thanks bikeman! If they are usable, fit the brackets and are commercially rechargeable, I'm all ears!
 
Last edited:

Valence

Well-known member
Steel Soldiers Supporter
2,112
555
113
Location
Davis County, UT
Speaking about registration, I have some concern that I'll have difficulties. It only came with a bill of sale as I don't think anyone has ever bothered registering/titling it. I'll have to apply for a title and have a officer inspect the VIN. Is the serial number stamped on the frame anywhere? I need daylight to check it over thoroughly. The very first picture in the thread shows the Serial Number as a whopping "533". I'm sure the DMV would have fun with that.
Not to derail from the questions above that I earnestly would appreciate help on, but here's the follow up story about my adventures through the Utah government titling circus hoops.

Let me just preface this with the following advice: (note, I'm not advocating any falsifying measures, but just trying to make your life easier and end up at the same destination without all the extra clowning around).

  • Before you attempt to obtain a title for something that you have the, obviously, original serial/VIN plate for but it just doesn't happen to be attached to the vehicle, just quietly attach it and keep your mouth shut. Then you may proceed with all the repetitive paperwork.

At the time of this writing, current Utah law is that any trailer weighing over 750 lbs must be titled and registered. Even if I called the trailer just the base M116 frame, and the cargo body part of the payload, the TMs list the frame and axle as 780 lbs. Over the Utah limit.

The following 4 forms are required to get a title on something that's never had one:
http://dmv.utah.gov/faq/titles
  1. Bill of Sale
  2. Certificate of Inspection, with signature of inspecting officer
  3. Application for Utah Title
  4. Declaration of Ownership, + 1 or 2 pictures, preferably color

The fun part is that all 4 of these forms have the exact same information (Your name, address, vehicle make, model, VIN/Serial number), with only one or two things different between each (official's signature, a statement why no title is available, vehicle length and weight)


I had the Bill of Sale, so the next step was filling out the Certificate of Inspection and I called the local police station to have an officer come over and perform a VIN inspection and sign the form. He was very friendly but when I showed him that the previous owner had removed the military data plate from the cargo body to fill the holes with silicon (I assume in an attempt to lessen water intrusion) he went "Oh...". He did agree that the plate did appear to be the original. However, after he performed his due diligence in verifying the information presented and radioing back in, he informed me that he had been advised to not sign the Certificate of Inspection form because the serial plate was not attached to the vehicle. And it wasn't a matter of "Here, attach this and I'll re-inspect". The officer provided me with contact information that now the State Inspections office would need to come and inspect the trailer and likely issue me a new Utah VIN and attach it to the frame.

My heart sank at the last, because I like to keep things with the appearance of originality but customized to suit my taste and needs. A Utah VIN would stick out like a sore thumb and would also just have to be removed to clean up and paint the frame.

I called the State Inspections office, got transferred to the lady who was over my area and, no surprise, was greeted with only voice mail. I left a message and waited two hours, anguishing at now being at the mercy of the Government Process to "get back to me". I did the only thing I could do: I called again and explained my goal of trying to get this done 'today' (I know, silly right?). Now I was told that the lady over my area was actually out of the office on vacation (I do have to give this lady credit, hours later she actually did call me back, while not even at work that day, with the intent to set up a time to come by). I asked for someone else and got her supervisor, we'll call him "Sergeant Bill". Another voice mail though. However, 1 hour later Sergeant Bill did call me back and straight away left his office in Salt Lake City to come inspect my trailer, 20+ miles away. I believe he just wanted to get out of the office. :)

Sergeant Bill agreed that there was no question the Data Plate was the original, and radioing back to his office for a VIN check only produced a watercraft of the same "533", which this trailer never was, nor will be. He had no problem signing the Inspection form and did not even mention the need for a State issued VIN.

I took my completed Bill of Sale, Certificate of Inspection, and Application for a Utah Title to the DMV. After a 45 minute wait was asked for the Certificate of Ownership form and pictures.... the need for these was actually not listed on all the web pages I researched and read - but I was instantly reminded of two years ago when I ran into this same problem when trying to obtain a title for a new-to-me M105A2 trailer. :doh:

Fortunately, thanks to this thread, I had pictures of the trailer on my phone. I was able to e-mail the pictures and fill out the Certificate of Ownership form right then an there (that saved hours of coming back and waiting in line again). The DMV lady had to register the trailer make as "TRAILER" because there was no "Metro Eng. & Mfg" from her drop-down menu. Lol.

So yes, I walked out of the DMV with a registration paper, license plate, and title to arrive later in the mail. I managed to navigate, once again, the waters of government red tape. It is like a modern "Rite of Passage".

But really, who else would be trying to steal and register a such a rusty, leaky 56 year old trailer? No, they would have just cut it up and taken it to the scrap yard, or like every-other owner of the trailer, not even bothered to register it until a bored enough Officer wanted to make an issue out of it.
:rant:
I'm not upset, but it is a lot of checking, money and time spent when all that was needed was a little common sense to assess the situation. Thank you Sergeant Bill.
 
Last edited:

Valence

Well-known member
Steel Soldiers Supporter
2,112
555
113
Location
Davis County, UT
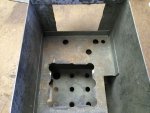
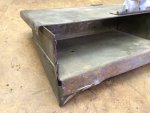
I removed the Portable Hammer box from the driver's rear. It was a bit of a challenge as I couldn't fit the round cutting disks that close to the wall to cut the weld. So I had to use a punch to break the weld from the side. Also, the rear and side red reflectors were helping hold down the box. In all, I think I didn't damage it it too badly getting it out. Less than the previous owner did - who cut and bent up the internals.

2016-02-21 14.25.54.jpg 2016-02-21 14.26.02.jpg 2016-02-21 14.26.19.jpg 2016-02-21 14.26.39.jpg 2016-02-21 14.27.04.jpg 2016-02-21 14.27.12.jpg


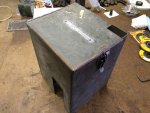
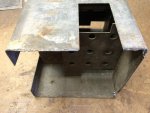
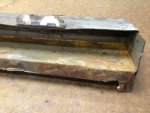
I also removed the Electrical Repair box. I liked the box, but decided it was basically useless as even at 6' I couldn't actually see into the box without a stool. I would like to mount matching little cabinets with a fold down door on either side right there. They could share the same mounting bolts too. The Electrical Repair box was very difficult to remove. Not only was access to it awkward, but it was tack welded and then welded some more on the edges and inside. Also, it was the least accessible to get at with my angle grinder or my Dremel so I damaged it more than would have liked.. Still, I think it could still be reused.

2016-02-21 13.50.11.jpg 2016-02-21 14.22.38.jpg 2016-02-21 14.24.20.jpg 2016-02-21 14.24.36.jpg 2016-02-21 14.25.06.jpg 2016-02-21 14.25.14.jpg 2016-02-21 14.25.22.jpg


And then here's most of everything else I removed, minus the above boxes and the generator angle iron:

2016-02-21 18.23.54.jpg


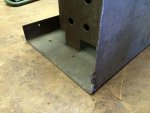
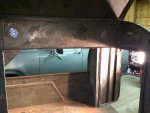
The, initial at least, grinding of the interior is *finally* complete! I went through four 4-1/2"grinding wheels and 4 dremel ez-lock grinding wheels. I have probably spent at least 12 hours removing that stuff, and I had a head start from previous owners having cut the brackets down. It's not perfect, but I don't need it to be.

2016-02-21 18.15.05.jpg 2016-02-21 18.15.40.jpg 2016-02-21 18.15.49.jpg 2016-02-21 18.16.03.jpg 2016-02-21 18.16.28.jpg 2016-02-21 18.17.00.jpg


Next will be to tow it to my brother's and have him weld ALL THE HOLES from various too mounts and labels, which I'll then need to grind smooth. There's also 3 holes in the floor from rust. One about the size of a silver dollar, and the other two about quarter sized.
 
Last edited:

Valence

Well-known member
Steel Soldiers Supporter
2,112
555
113
Location
Davis County, UT
Oh yeah, and the Electrical Repair box did have the other, lower, rear-door latch as I suspected earlier. However, it's top loop was broken and will need repairing. Fortunately I can probably just use some of the tabs I cut off the inner wall of the trailer. So that means I'm only missing the upper pull-bar.

2016-02-19 19.34.51.jpg 2016-02-19 19.36.08.jpg
 

Valence

Well-known member
Steel Soldiers Supporter
2,112
555
113
Location
Davis County, UT
It appears that there were two fire extinguishers mounted on the passenger rear of the trailer, one on the inside and one directly opposite on the outside. I "just happen" to own two older military fire extinguisher mounts and lo-and-behold, the mounting holes and paint wear/rust line up exactly. Even the rust/paint damage on the rear door matched where it would have hit the fire extinguisher. I would really like keep this part original and put two fire extinguishers in this location - I've just had a difficult time finding fire extinguishers that'll fit in these old military mounts.
2016-02-14 18.44.31.jpg 2016-02-14 18.44.21.jpg 2016-02-14 18.44.52.jpg
In my search to try and find fire extinguishers that match the above bracket, member Steinmeister provided me with the following excellent information - also see attached "f06073.pdf" - HANDHELD FIRE EXTINGUISHER (HFE) HALON REPLACEMENT PROGRAM FOR ARMY GROUND VEHICLES, STATUS AND SUCCESSES.

"[They] are [for] 2.75-pound halon 1301 handheld fire extinguisher... I recognize the bracket. We used them in M1 tanks."
"But I believe the bracket is pretty specific to that extinguisher. That model of 1301 Halon with the replaceable bottle has been around since at least 1989."

1301_halon_military_fire_extinguisher.PNG
 

Attachments

Last edited:

Valence

Well-known member
Steel Soldiers Supporter
2,112
555
113
Location
Davis County, UT
I love the Mr. Heater. It was more expensive than I would have liked, but it does greatly improve the work conditions. I decided to take a look at the axle bearing. I assumed that the axle/bearings have not been serviced since the Army sold the trailer "umpteen" years ago. So far, initial indications look promising as the hub bolts came off with just a 1/2" socket and the inside wasn't full of water or coorosion (just the typical military very sticky grease).
2016-02-11 16.47.30.jpg 2016-02-14 17.10.16.jpg 2016-02-13 14.40.03.jpg 2016-02-13 14.40.21.jpg


I have a number of questions though: (If anyone can help me answer these, it would be greatly appreciated!)
  1. This axle appears different than my deuce (the only axle I've taken apart). What is the the proper way to take the bearing out? I see what appears to be the 8-sided nut inside, but I don't know what the flange is in front of it. I expected to see a similar tabbed lock washer and two spindle nuts.
  2. What size of 8-sided socket will I need? I tried measuring it with my calipers and ordered a 2-9/16" eight-sided socket from my local O'Reillys, but I believe it's actually too small. It did not seem to fit, but it seemed close so I think it might be a 2-5/8" nut instead?? I haven't been able to find a 2-5/8" eight-point socket.
  3. I've read that these trailers use M37 wheels. Is this true? The tires say "7.5-16", so the wheel is 16" in diameter, but how wide/deep is it?
  4. I would rather have tubeless wheels +1 spare, so I'm trying to determine what wheel will fit this axle. Being a 5 lug bolt pattern, I've measured according to the following figure and it appears to be 5 x 6.5" bolt pattern. Do you agree with this methodology?

http://www.crawlpedia.com/bolt_patterns.htm
bolt_pattern.jpg
Still hoping someone can help me answer these questions.

Was the 2-9/16" 8-sided actually correct? It appears a 2-5/8" 8-sided does not exists (Checked Summit, O'Reilly's, Autozone, Amazon, eBay...). Given the age, I can't imagine it being metric (I've not seen metric sizes in this style anyway)

2-9/16" = 65.0875 mm
2-5/8" = 66.675 mm

Yeah, I didn't find any results searching for a 66 MM 8-sided (or octagon) spindle nut socket.


Also, the lug nuts are the same 1-1/2" as my deuce front lug nuts, but there isn't enough space between the nuts and hub to fit the impact socket. :doh:
 
Last edited:
Top