• Steel Soldiers now has a few new forums, read more about it at: New Munitions Forums!

  • Microsoft MSN, Live, Hotmail, Outlook email users may not be receiving emails. We are working to resolve this issue. Please add support@steelsoldiers.com to your trusted contacts.

What have you done to your CUCV today/lately - Part 2

cucvrus

Well-known member
11,473
10,432
113
Location
Jonestown Pennsylvania
Actually, I had it sandblasted and primed by a coating company. It's been a while, I doubt they'd "warranty" it by now...
On a frame and axle I tend to lay heavy paint on. It can sag a bit and still look great. That was not put on heavy enough and could have been cold when the paint was applied from the sags on the crossmember. Good Luck. Scuff and sand yourself. Paint it with a self etching primer with a good rust inhibitor. I have 5 gallon pails of good primer I will never use anymore.
 

Rutjes

Well-known member
Steel Soldiers Supporter
359
272
63
Location
Amersfoort, The Netherlands
On a frame and axle I tend to lay heavy paint on. It can sag a bit and still look great. That was not put on heavy enough and could have been cold when the paint was applied from the sags on the crossmember. Good Luck. Scuff and sand yourself. Paint it with a self etching primer with a good rust inhibitor. I have 5 gallon pails of good primer I will never use anymore.
It was during winter, but you'd expect a shop to have a curing room or whatever. Guess I haggled too much and got what I paid for.

The primer I have is from De Ijssel Coatings. Very well known in the marine world (at least, over here). It's called ZF Primer, and is a 2K epoxy primer. I guess the ZF stands for zinc phosphate (zink fosfaat in Dutch), because that's what's in there as a rust inhibitor. Supposed to be very good stuff. First thing to try it on will be the D60. I'll put it on thick (most likely in multiple thin layers) before applying 2K paint.

Leaning towards following Curtisje's example and strip the frame down completely and do it properly. Got this far, so why not...

Did some more wire wheeling on the D60 today, started taping it and put it on a "paint stand". Sneezing rust now btw.

IMG-20200630-WA0100.jpeg
 

Curtisje

Well-known member
Steel Soldiers Supporter
596
693
93
Location
Okinawa, Japan
It was during winter, but you'd expect a shop to have a curing room or whatever. Guess I haggled too much and got what I paid for.

The primer I have is from De Ijssel Coatings. Very well known in the marine world (at least, over here). It's called ZF Primer, and is a 2K epoxy primer. I guess the ZF stands for zinc phosphate (zink fosfaat in Dutch), because that's what's in there as a rust inhibitor. Supposed to be very good stuff. First thing to try it on will be the D60. I'll put it on thick (most likely in multiple thin layers) before applying 2K paint.

Leaning towards following Curtisje's example and strip the frame down completely and do it properly. Got this far, so why not...

Did some more wire wheeling on the D60 today, started taping it and put it on a "paint stand". Sneezing rust now btw.

View attachment 804757
Thanks for the pat on the back. Unfortunately I haven't done any more work on mine. I hope to be back at it over the long weekend.
 

cucvrus

Well-known member
11,473
10,432
113
Location
Jonestown Pennsylvania
Today I exchanged the starter with a new ACDelco.......

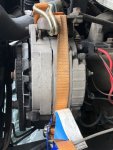
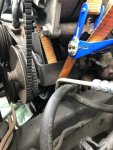
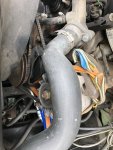
......... I also tensioned the V-belt of the steering pump, that was a pleasure.
No more dented and broken steering pump tanks

View attachment 804998View attachment 804997View attachment 804996
genius idea. I have a bar I use on the pulley hub and with a helper get that thing tight. It is a royal PITA. I think the reservoir should be remote of the pump like the civilian models. Better yet. Electric power steering like it is on 2014 Silverado's and up. I just replaced a broken one on a crashed 2018 Silverado. $900. used for the electric rack unit. Looks good. Keep up the good work. Be Safe.
 

Cory1337

Member
29
28
18
Location
Terre Haute, IN
Installed new high beam switch. Decided to pull apart the fuse block to clean that while I was working under the dash. I cleaned the cluster circuit board a while back but still don't have 4wd indicator light. It worked last year, so tomorrow night plan to track that down.
 

joshuak

Active member
747
214
43
Location
Slower shore, DE
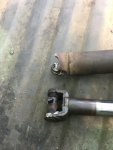
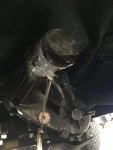
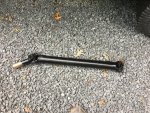
U joint in my rear driveshaft gave up the ghost, non greasable vatozone special, been on there six years.

IMG_3042.JPG

Didn't have to walk home, but did ask mrs.k for a bag of tools, a gatorade bottle and some tape. Not a bad place to breakdown, dog and I had a place in the shade.

IMG_3040.JPG

Removed driveshaft, locked hubs, threw the np208 in front wheel drive and made it home with fluid to spare. :-D


IMG_3112.JPG


$240 got me a new yoke, spicer u joints and a balanced shaft. Standing in high cotton now!

IMG_3111.JPG

No need for SYE on this rig, for others maybe.

https://4xshaft.com/blogs/general-tech-info-articles/np208-slip-yoke-eliminator-kit
 

Russm

Active member
244
69
28
Location
Ft. Wainwright, AK
Last edited:

Rutjes

Well-known member
Steel Soldiers Supporter
359
272
63
Location
Amersfoort, The Netherlands
I..... Need this for reasons


Sent from my LM-G710 using Tapatalk
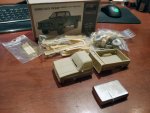
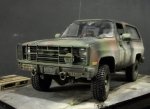
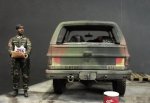
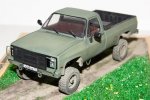
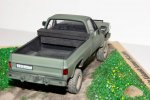
How about this one or this one. Price is a bit steep, but great models, great detail. Will take some work, the resin cast isn't perfect. Needs some cleaning and fixing here and there.

I got the M1008 and found some HMMWV wheels on eBay to make it look like my truck. Never got around to putting it together... some day I will...

IMG_20200709_213530.jpg

Here's a build thread. Lots of photos.

Couple of photos I've found:

5.jpg DSCF6098.jpg DSCF6105.jpg 82641089_1065118060512307_8924288157323279873_n.jpg 83120369_180056879904218_3938709145086352232_n.jpg
 
Last edited:

Russm

Active member
244
69
28
Location
Ft. Wainwright, AK
Already have my head buried in the truck trying to sort out the gremlins (this month its the brake system and the proportioning valve). Between that and work I've no time for models.

Just saw the price... 75 euros for something I wanna use as a dash ornament, that will bake in the Georgia sun every day

Sent from my LM-G710 using Tapatalk
 
Last edited:

Tinstar

Super Moderator
Super Moderator
Steel Soldiers Supporter
4,290
1,776
113
Location
Edmond, Oklahoma
Installed new 6 blade fan (as recommended in another thread) and new fan clutch.
Clutch was still working but starting to seep.

Zero difference made that I can tell on the temp gauge.
Just Additional fan noise now when clutch engages.
 

shotty

Active member
211
56
28
Location
Northern VA :(
Spent last week rebuilding a transmission then the last few days swapping it with the leaky one in my m1028. Dropped the leaky trans to find one of the mounting flanges on the bellhousing was shattered, so I was glad I was installing a second trans instead of banking on rebuilding that one...

After the install we took it for a spin and all was well, no more bellhousing leak! But what's this, leaking from the transfer case adapter... Turns out the bolts holding the transfer case to the adapter were loose. Snugged them back down, the leak slower but was stillk there.

Day three was spent dropping the tcase and installing a new gasket on that side of the adapter. No more leaks, but it might be leaking fluid from tcase to transmission. I know it usually goes the other way when the tcase seal fails though so we'll just keep an eye on it and see what happens.
 

Rutjes

Well-known member
Steel Soldiers Supporter
359
272
63
Location
Amersfoort, The Netherlands
I was going to build a simple spray booth. Even tho the paint I used is supposed to be able to be applied by brush and roller and I used the brush thinner from the same manufacturer, I was not happy with the result when painting the D60 axle. Anyway, I ended up doing something else. It's not really CUCV related, but I still had the donor M1009 brush guard laying around so I hacked it up and bolted it to my '98 K1500 to see how it would look. Not bad I think. Also made custom bed rails, similar to what I made for my M1028 before, but better IMO, so I'll redo those some time in the not so distant future.

IMG-20200721-WA0007.jpeg IMG-20200721-WA0009.jpeg IMG-20200721-WA0012.jpeg IMG_20200722_195945.jpg
 
Last edited:

Russm

Active member
244
69
28
Location
Ft. Wainwright, AK
Been chasing spongy brake pedal gremlins for over a month now. Old MC wasn't able to fully actuate the rear disk brakes, it was running out of fluid. I also snapped a brake line (few posts above).
Took off the original disk/drum proportioning valve in exchange for an adjustable one (can see it in second picture). Original was causing the rear brakes to drag.
Improvised a workbench in my gym room because I don't have a garage for this kind of stuff. Used my new workspace to make a replacement brake line, got it pretty close to the original.
New MC is from a 1980 Corvette, which has 4-wheel disk brakes. Rear reservoir is much bigger. Same bore and same size outlets makes it a straight swap for a M1009.
Waiting on one more part, a Tee splitter for the front brake line to split it direct to both front wheels.


Sent from my LM-G710 using Tapatalk
 

shotty

Active member
211
56
28
Location
Northern VA :(
Been chasing spongy brake pedal gremlins for over a month now. Old MC wasn't able to fully actuate the rear disk brakes, it was running out of fluid. I also snapped a brake line (few posts above).
Took off the original disk/drum proportioning valve in exchange for an adjustable one (can see it in second picture). Original was causing the rear brakes to drag.
Improvised a workbench in my gym room because I don't have a garage for this kind of stuff. Used my new workspace to make a replacement brake line, got it pretty close to the original.
New MC is from a 1980 Corvette, which has 4-wheel disk brakes. Rear reservoir is much bigger. Same bore and same size outlets makes it a straight swap for a M1009.
Waiting on one more part, a Tee splitter for the front brake line to split it direct to both front wheels.


Sent from my LM-G710 using Tapatalk
Clever! Hope this works well, I might do the same.
 
Top
AdBlock Detected

We get it, advertisements are annoying!

Sure, ad-blocking software does a great job at blocking ads, but it also blocks useful features of our website like our supporting vendors. Their ads help keep Steel Soldiers going. Please consider disabling your ad blockers for the site. Thanks!

I've Disabled AdBlock
No Thanks