KN6KXR
Well-known member
- 238
- 561
- 93
- Location
- Felton, CA
Posting this to document some information that may come in handy to others. Item rebuilt was on a M936A2 but should be the same for other platforms as the bed and crane are similar.
Synopsis: New to me M936A2 rebuilt by RSMS in 2012. Sat until 2016 when bought by previous owner. Stored inside an aircraft hangar until I bought it in late 2021. Odometer showed 2,090 miles since reset. Certain that crane was used for demonstration only after reset. Noticed problems with sluggishness on the turntable straight away. Saw it was shy about 20 gallons of hydraulic fluid topped off seemed OK with no load. Went to try and pick up a load (3k pounds) and could not swing smoothly. It would jerk and hit the pressure relief. Tuned the pressure relief on the system to 2200psi same result (it was about that when I started). Took a sample of hydraulic fluid for analysis came back fine. Lubed the heck out of the turntable, cleaned the gears of crud, lubed all again. After each one of these I would pick up the 3k test load and it would not swing smooth. Crane and boom worked amazing I went to see if I could pull a stump one day and got the front tires 2 feet off the ground without trying too hard. So hydraulic pump and winch motor seem fine. The last test I did left a big spot under the wrecker. Smelled like gear oil. So I called it and decided to take it apart.
Removal: Don't think you are going to get the gear case out without draining the system. The suction line from the resevoir is in the way it has to go. You'll have to work with the boom vertical to get to the suction line end under the crane. So first elevate the boom all the way. I'm lucky my boom is rock solid if yours sags you may need to crib/strap/block it. After draining the system you'll need a 2 1/2" and 2 5/8" box wrench. Even then pipe wrenches and cheater bars may be necessary I used a bandsaw and pieces of pipe then cut to length to get in there. The motor unbolts and can swing to the side. Hold down bolts (2 each on the side feet, 2 interior) are obvious. You'll need typical blocks and prybars to now elevate the case (since the suction line is out of the way) and pull it out. Have a couple strong friends or another wrecker handy that case is pretty heavy. I can lift it complete (without motor) but only dead lift and not even chest height. My little Kubota with the backhoe did the trick. Needless to say this is the time to clean that suction filter, add that extra valve in the plugged bung on the tank, or anything else you can think of.
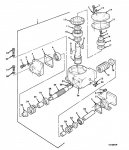
Disassembly (begins): The top cover of the gearcase has provision for 3 jack screw. I didn't see this at first as the holes were covered and painted over. Just take 3 of the 6 bolts that hold the cover and insert in the holes. This will pry the cover off. Turn the case over on something like a set of sawhorses (to clear the pinion/spur gear assembly) and use the "bigger hammer method" to drive the assembly out. I used an engineers hammer (4lb hand sledge) and a block of wood to cushion the blow.
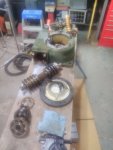
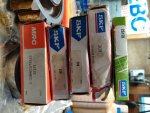
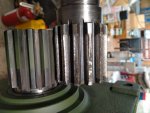
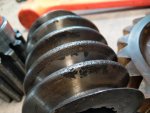
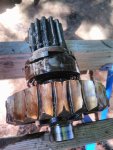
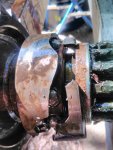
Attached pictures are what I found. As you can see the failure was catastrophic.


