• Steel Soldiers now has a few new forums, read more about it at: New Munitions Forums!

  • Microsoft MSN, Live, Hotmail, Outlook email users may not be receiving emails. We are working to resolve this issue. Please add support@steelsoldiers.com to your trusted contacts.

goldneagle's M923 recovery and modification thread

Scarecrow1

New member
1,355
1
0
Location
Florence , S.C.
LOL I agree about the knife but, it's what they don't see that will do the most damage . I was amazed at the amount of light the 24 volt did put out. I have a problem with guys who have head lights that 1 are so bright that I can not see the road due to their friggin head lights . Then to top it off the stupid people jack up the truck so the light is level with your windshield . I have stopped more than one person and tell them their lights need to be adjusted to the height of the truck because of the angle has become such it is a hazard . Some take it well some don't . I have decided to bring this matter up before our State Senator to see if a bill can be passed to prohibit the use of such dangerous set ups . Lights are designed to see not to blind on coming traffic . So if you guys do use these super bright light kits please correct the angle to compensate the height .......Just saying
 

goldneagle

Well-known member
4,510
1,007
113
Location
Slidell, LA
LOL I agree about the knife but, it's what they don't see that will do the most damage . I was amazed at the amount of light the 24 volt did put out. I have a problem with guys who have head lights that 1 are so bright that I can not see the road due to their friggin head lights . Then to top it off the stupid people jack up the truck so the light is level with your windshield . I have stopped more than one person and tell them their lights need to be adjusted to the height of the truck because of the angle has become such it is a hazard . Some take it well some don't . I have decided to bring this matter up before our State Senator to see if a bill can be passed to prohibit the use of such dangerous set ups . Lights are designed to see not to blind on coming traffic . So if you guys do use these super bright light kits please correct the angle to compensate the height .......Just saying
The difference with our use of the LED lights is that they were made for use with these trucks. As installed they seem to light the road at the perfect location as to allow us to drive safely at night. I was impressed by how well it lit the road in front of me. These lights do have adjustment screws -so they can be adjusted to the proper angle for that truck.

I understand you completely about drivers with blinding headlights. i have experienced it before. Was not happy about it!

I still like my decision to install the LED lights. The marker light came out great! I am glad I replaced them because some of the original lights were not in great shape. I found cracks and loose bulb mounts in some of the old fixtures. I was going to sell the old ones as replacements but some are not in good enough shape to sell.
 

Danger Ranger

New member
2,253
23
0
Location
Roland, IA
LOL I agree about the knife but, it's what they don't see that will do the most damage . I was amazed at the amount of light the 24 volt did put out. I have a problem with guys who have head lights that 1 are so bright that I can not see the road due to their friggin head lights . Then to top it off the stupid people jack up the truck so the light is level with your windshield . I have stopped more than one person and tell them their lights need to be adjusted to the height of the truck because of the angle has become such it is a hazard . Some take it well some don't . I have decided to bring this matter up before our State Senator to see if a bill can be passed to prohibit the use of such dangerous set ups . Lights are designed to see not to blind on coming traffic . So if you guys do use these super bright light kits please correct the angle to compensate the height .......Just saying
This has been taken into effect in most states. When a truck is jacked up pretty high, the lights are not allowed to be above a certain level. This level varies, but is similar to any other semi truck. Sometimes I have seen lights lowered or their location changed because of this. Your problem here is that A) you don't agree with the set levels, or B) the laws are not enforced well. My vote is a bit of both. Vehicle heights are so different, that you are not really going to be able to get around this. Truckers have to be able to see out in front of them, and the trucks are tall, period. They can't aim their lights on the ground so the Dodge Neon coming the other way won't be blinded, the lights won't help the trucker there.
 

goldneagle

Well-known member
4,510
1,007
113
Location
Slidell, LA
I did want to mention that this thread is about my M923 modifications and not a discussion about LED or headlight brightness issues.
 

goldneagle

Well-known member
4,510
1,007
113
Location
Slidell, LA
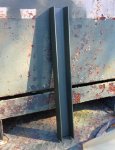
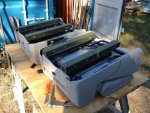
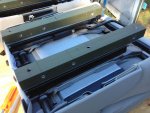
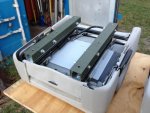
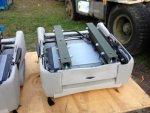
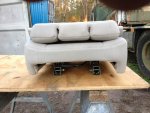
Yesterday was a descent day out so I did some prep-work on the U-channel for my seats install. I had some scrap U-channel that I wanted to use. It was rusty and welded together. I ground out the welds and cut it to length. Then i spent time grinding off the welds and rust. After the metal was clean I primed and painted it OD Green.

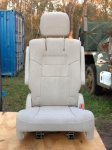
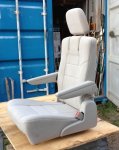
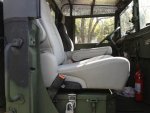
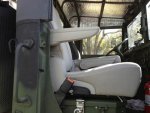
Today I took the seats out of storage and started to fabricate the mounts that will secure the seats to the top of the battery box. I was going to fabricate a quick release system but when I drilled the holes I realized it was not going to be strong enough. So it looks like it is going to be a little more involved in removing the seats to be able to access the battery compartment.

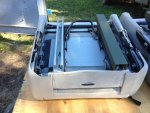
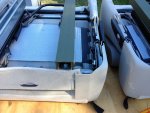
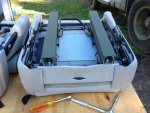
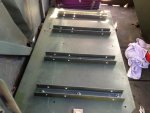
I ended up using the heavy U-channel as the base and a Unistrut U-channel as the mate to it -that will fit inside the larger U-channel. (pictures to show what i mean) After cutting the Unistrut to the proper lengths i drilled 3 holes in the bottom of each piece that lined up with the bolts in the chair tracks. Had the bend the 2 parallel walls of the Unistrut inward slightly with the bench vise in order to allow the narrower one to slide inside the other. I bolted the Unistrut temporarily to the seat tracks. I marked and drilled 6 holes on the sides of each of the heavy u-channel. I also drilled 3 more holes on the bottom of the heavy u-channels.

i then placed the u-channel over the Unistrut and marked the locations of the 6 holes in each piece. I removed the Unistrut from the seat tracks and placed them in side the heavy u-channels so I can mark the locations of the corresponding holes in the Unistruts. I clamped each pair of u-channels and unistruts together so I can drill the holes precisely. Once I had all 72 holes drill (total) I started to reasemble the parts. I got all the parts assembled ready to fit and install on the battery box cover tomorrow. I took pictures as i was working on different stages of this fabrication. Here are the pictures:
 

Attachments

goldneagle

Well-known member
4,510
1,007
113
Location
Slidell, LA
72 holes for that? Dang you got patience... Well done, as usual.
I want to make sure the seats are fasten-in properly for safety. I do not want them to let go in a collision. Never thought about the hole count until I finished and started to take count. I thought to myself "no wonder it took so long for such a simple design!"


I was just thinking that I may need to install some type of lifting device to help lift the battery box lid with the 2 seats attached. I was trying to install a quick release setup for the seats so I could quickly remove at least one before opening the battery compartment. When i saw how small the tab that would be left to hold the seat in the back would be I decided it would not be strong enough.

I was going to cut diagonal channels in the Unistrut to slide over the 2 back bolts and a quick release pin for the front bolt hole. This way I would lower the seat onto the back two bolts with a slight movement back then lock the front using a 3/8" pin through both u-channels. (easy to reach the pins near the front) I now realize that the U-channels would need to be much deeper in order for the notch piece that remained would be strong enough to support the seat during any major stress.

I ended up leaving the two back securing points as through-holes that I inserted 5/16" hardened bolts through to hold the set in place. Now i have to fabricate a lifting assembly for the lid. I was thinking of installing a long piece of Unistrut on the back wall near the corner. I can then add a 2nd piece with a angle attached that can be attache to the first. At the other end of that piece would be a hook with a pulley. I have not thought it out any further yet. I am open to suggestions... No I am not moving the batteries to another location!

More on this tomorrow...
 

juanprado

Well-known member
Steel Soldiers Supporter
5,614
2,922
113
Location
Metairie/La (N'awlins)
Zev,

Maybe use one or two automotive hood/tailgate lift support shocks. They come in different sizes and a full size hatch like a suburban or expedition has some weight to it.
 

goldneagle

Well-known member
4,510
1,007
113
Location
Slidell, LA
We had a great day today for working on the truck. It was a high of 63 degrees and sunny today. I had a friend come by and help remove the battery box cover from the cab. Need 2 people to get the 6 nuts and screws out. I set the battery box cover on the saw horses and arranged the seats on top. We marked the locations of the brackets while they were attached to the seat tracks. We removed the brackets from the bottom of the seats and lined them up with the marks on the battery box cover. I marked the location of the 12 holes we had to drill in order to mount the seats to the cover. We drilled the holes and then attached the U-channels to the battery box cover using short 5/16" hardened bolts (nut facing up inside the u-channel)

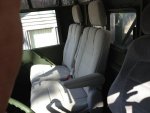
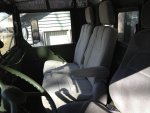
We fitted the seat on to the u-channels to make sure they lined up properly. Took the battery box cover back to the cab and reinstalled it. Once secured we installed the middle seat first using the 6 bolts I had set up yesterday. We then installed the right passenger seat the same way. Opened up the seats and adjusted them for comfort. They fit perfect! Look like they were always there! Check out the pictures!

Seat_mount_1.jpgSeat_mount_1a.jpgSeat_mount_1b.jpgSeat_mount_1c.jpgSeat_mount_1d.jpg

I also managed to refinish a gerry can i had purchased from a member here on SS and installed it over the tool box. I used the locking strap I bought a while back on Ebay to secure it in place.

Juan stopped by later in the afternoon and we swapped LED tail lights. He had green ones on his tan truck and I had tan ones on my green truck. Now we both have the proper colors to go with the truck. It was a nice visit swapping stories and showing different features of our M923 trucks. I am sure we both picked up some neat ideas for out own trucks.
 

goldneagle

Well-known member
4,510
1,007
113
Location
Slidell, LA
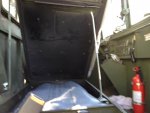
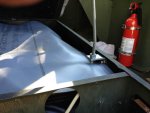
It was 65 degrees and sunny today! First thing to try was to lift the battery box cover with the seats still attached. Task accomplished without too much trouble. The cover was definitely heavy but I managed to lift it and hold it with one arm while I set the holding post. I could see that the cover was off balance with only one support. I ended up using a thick angle attached with 2 bolts to the side of the battery box and a 3/8" hole on the top. I also bent a 5/16" all-thread to use as a the 2nd support post. Once I located a good location and drilled a 3/8" hole in the battery box cover near the right edge. I installed a over-sized nut about 1 inch from the end of the all-thread. I also installed a 2nd over-sized nut about 2 inches from the other end of the all-thread.

I took the all-thread and inserted the longer end into the hole in the battery box cover. I then inserted the shorter end into the top of the angle I had installed. I noticed the all-thread was a little sort when I tried to adjust it. Since I did not have any longer pieces available I decided to add a splice piece to extend the one I was using. I cut the all-thread in the middle and installed a nut on each of the cut ends. I installed the splicer and adjusted the length (I only needed about 3/4") Once the all-thread fit I tightened the nuts against the splice to keep it from moving.

I took the extended all-thread and inserted the longer end into the hole in the battery box cover. I then inserted the shorter end into the top of the angle I had installed. I turned the top nut up towards the battery box cover until it supported the weight more evenly. There was about 1 inch of all-thread protruding below the angle and above the hole in the cover. I figure that is long enough to keep the all-thread from accidentally coming out of the holes. Now the battery box cover was supported by 2 heavy duty posts. I just thought of a way to secure the post better -add an extra nut on the other side of the hole to keep the all-thread rod from coming out.

I went to Home Depot and purchased a pack of spring clips used to store brooms on the wall. I installed them behind the seats on the top of the battery box cover. That is where I will store the all-thread post.

Here are pictures of the work done. (Sorry about the first one being out of focus. i will try to replace it soon)
 

Attachments

goldneagle

Well-known member
4,510
1,007
113
Location
Slidell, LA
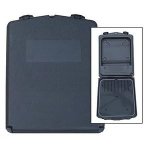
Just a minor note here about a small mod I came up with tonight. Since I had to remove the map/document box to fit the new seats. I tried a few ways to get it to fit but I could not find a good location for installing it. Then I remembered that I purchased a couple of Owner's Manual Cases when I was in NJ a couple of years ago. I found them in the storage container. Looks like one will fit nicely in the cab. I can store the paperwork for the truck in it. I am thinking of installing it in 3 possible locations. On the front of the battery box below the seat. On the firewall next to the shifter. Driver's side door below the door handle. Here are pictures of the case.

73729.jpg
 

doolest

New member
86
1
0
Location
Fort Worth, Texas
goldneagle - the seats turned out great and the battery box mods look like that will be a vast improvement as well...keep up the good work....making me wish we were fixing ours up....we did dump some diesel in and take it for a spin over the past 4 days at the ranch
 

goldneagle

Well-known member
4,510
1,007
113
Location
Slidell, LA
Another Spring day out. Had to repair my shop air compressor. The belts were slipping. Not sure if they stretched or whether the motor moved due to sliding base bolts. I ended up fabricating a simple tension-er that allowed me to pull the belt tight and keep the motor from sliding back the other way. If you are interested in seeing what I came up with ask me.

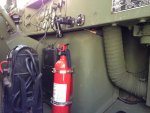
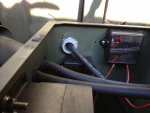
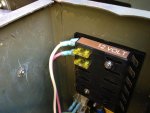
After successfully fixing the compressor I decided to install some dash outlets for the 12 volt system. I had checked the outlet size previously and knew that a 3/4" conduit punch would make the proper size hole for the outlets. I drilled 2 holes in the dash. I used the 1/2" conduit punch to make an initial 7/8" hole. (It uses a smaller bolt than the other punches) Once I had the 7/8" hole I was able to use the 1-1/8" punch to make the final 2 holes. I found some 14/4 SJOW cord that i thought was perfect for the job. It allows me 2 separate 20 AMP 12 volt lines for the 2 outlets. I stripped the one end and crimped 4 insulated female spade terminals. Installed them on the outlets and tightened the outlets on the dash metal. Once I ran the cord to the back of the battery box I cut the length to fit. I drilled a hole on the back corner of the battery box to fit a 3/4" pass through connector. Installed the connector and fiber bushing (to protect the wire from sharp edges) I pulled the wire through the opening and stripped the ends for 4 more female spade terminals. I connected them to the fuse panels and installed two 20 amp fuses. Tested the circuit. Works great! Pictures attached

.Dash_Outlets_1.jpgDash_Outlets_1a.jpgWire_Feed_1.jpg12V_Fuse_Panel_1.jpg
 

o1951

Active member
899
155
43
Location
Bergen County, NJ
Once again - Looks great - you can work on my stuff anytime!
Is that an old 12v battery booster I see on cab floor?
Yeah - post pix of belt tensioner. I use a wood wedge to get correct tension, tighten 4 base bolts, remove wedge and use it to block wheel. Have to do it every 10-12 years or so:-D
 
238
0
16
Location
Las cruces nm
Thats a pretty cool set up you did there i was planning on doing it this weekend but it looks like you did all the hard work for me.:doghead: I was only planning on doing one but now i think i will do 2 as you did.
 

goldneagle

Well-known member
4,510
1,007
113
Location
Slidell, LA
Once again - Looks great - you can work on my stuff anytime!
Is that an old 12v battery booster I see on cab floor?
Yeah - post pix of belt tensioner. I use a wood wedge to get correct tension, tighten 4 base bolts, remove wedge and use it to block wheel. Have to do it every 10-12 years or so:-D
Thanks for the compliments. It may take a couple of days to get the pictures since I am going to visit Jeff Davis in MS to get some more parts. I want to get two 5 ton shackles and bases as well as a tow chain. i plan to install the shackles on the bottom of the bumper like Juan did on his M923. I plan to use a genuine tow chain -so I can actually use it if i need to. I plan to weld one of the pins on the shackle so it is not removable. That way i can padlock the chain together so it cannot be stolen!

I just ordered 2 ANL fuse blocks so I can put fuse protection on the wire feeding the 24 volt fuse panel. Once I have the 24 fuse panel active i can finish the cab lighting. (3 Amber LED Marker Lights)
 

goldneagle

Well-known member
4,510
1,007
113
Location
Slidell, LA
I called Jeff Davis last night and made arrangements for me to go up to his place today to pick up some additional parts for my projects. When I got there today he was not there due to a medical emergency. Thanks to Jeff's trust and cooperation I managed to get the parts I needed and take them back home. I managed to get a 15 foot 5/8" tow chain, 2 shackle, a windshield washer jet, an intake mushroom cap, (mine is all dented up) and four V-belts in good condition.

I got back home at 2:35 PM and started to restore the items I picked up. The mushroom cap had flaking paint so I scraped it all off and re-primed with acid etch primer and then painted it CARC Brown. Got it installed once it dried. I also worked on the shackles. The safety pin was stuck so I had to compress the shackle to get it off easier. I used my bench vise to squeeze the eyes closer together on the shackles for a better fit to the base plates. Got them primed and painted. I drilled on of the safety pin holes out using a 1/4" drill bit. I plan to make a pin lock to keep the pin from being removed. This way I can secure the chain in place so it will not be stolen. Sorry I am not disclosing my locking method (top secret)

I also started to prime the 15 foot chain. Needs a bit more priming and then paint. I am thinking of painting the chain flat black.

Tonight I ordered a 3 foot long 5/8" grade 8 all-thread and 5 nuts for the 3rd bolt in back of the shackle base. The long bolt will go from the back hole in the top shackle base all the way down to the bottom shackle base. The existing bolt is 12" long and will not fit once I add the bottom shackle base. The all-thread will make 2 long bolts for my project -since 12" are the longest bolts available and are too short. I also need 4 longer bolts for the bottom shackle bases -since the existing bottom bumper bolts are too short. I have those in stock.

I will get some more work done on the project tomorrow.
 
Top
AdBlock Detected

We get it, advertisements are annoying!

Sure, ad-blocking software does a great job at blocking ads, but it also blocks useful features of our website like our supporting vendors. Their ads help keep Steel Soldiers going. Please consider disabling your ad blockers for the site. Thanks!

I've Disabled AdBlock
No Thanks