• Steel Soldiers now has a few new forums, read more about it at: New Munitions Forums!

  • Microsoft MSN, Live, Hotmail, Outlook email users may not be receiving emails. We are working to resolve this issue. Please add support@steelsoldiers.com to your trusted contacts.

mep-003a teardown and refurb

Jimc

Member
725
1
18
Location
Mullica, nj
thank you guys.

you arent kidding on the grounding. since i painted everything apart i have been very careful to remove the paint under the head and nut of about every bolt. almost all of the components on this this ground through the case or where they are mounted so you gotta have continuity though everything. thats one reason why i used all new bolts, nuts, ground straps.
 

Jimc

Member
725
1
18
Location
Mullica, nj
Hey guys i am looking for a part. I need a fuel level gauge. my whole float inside the fuel tank looks fine. I should just need the dial on top (rochester 5-62). Held in place by 2 screws. If anyone has one or even the whole thing they want to get rid of just send me a pm...thanks
 

gimpyrobb

dumpsterlandingfromorbit!
27,786
755
113
Location
Cincy Ohio
One of mine is missing that too. Anyone seen a part on the shelf that works? I know you guys are fairly resourceful.
 

Jimc

Member
725
1
18
Location
Mullica, nj
I managed to track down the fuel gauge. They are avail brand new. You buy the whole thing not just the dial. Rochester gauge still has them. Its model 8680. The guy i ordered from didnt stock rochester in the length i needed but had a different brand in stock.

http://www.fozmula.com/download/GLL43_Technical_Data_002.pdf

price he gave me was $44 + shipping. Seem a bargain for a brand new unit. My battery gauge is also so cloudy you can barely read it. Found someone on ebay with more than 10 of them all new. Only thing left i need to find is an oil pressure gauge in nice shape. I dont really want to use this one that that is all rigged on here by the former owner.

the place where i got the sender is www.jrscustomfab.com. the company makes fuel tanks so the guy stocks alot of these in both rochester and the other brand. length of the original unit is 14". mine should be on the way already.
 
Last edited:

Jimc

Member
725
1
18
Location
Mullica, nj
thanks neo!

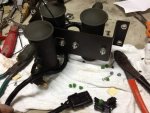
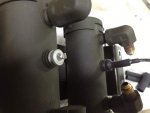
ok i worked on the fuel pumps tonight. got them all mounted back on the bracket and back onto the gen. i decided to eliminate those noise suppressors. they just looked like something waiting to fail. i totally removed the wires from all 3 pumps and soldered on new. i got an automotive 3 way waterproof pin and socket connector. one half will go on the pump end the other will go on the harness from the gen. ill cut those heavy rubber plugs off the harness and replace it with something a little more up to date.

IMG_1044.jpgIMG_1043.jpg

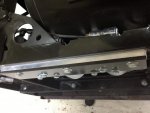
i got the assembly mounted to the gen and the fuel lines all connected. i also mounted my spin on fuel filters. i am going to need to make a 1/2" spacer for that tomorrow to give the canisters a little more room. the water sep is kinda tight against the wires coming out of the gen head.
 

LuckyDog

Member
394
11
18
Location
Freedom, NH
Jim, stop it.... you're killing me.....
I'm gonna hafta unsubscribe from this thread.


When's the next post??????????????????????????????????????:drool::drool::drool::drool::drool::drool::drool::drool::drool::drool:
 

Jimc

Member
725
1
18
Location
Mullica, nj
Lol well i will be stopping it soon. This thing is getting close to being done. Just hope it fires up and makes power.
 

JOateyNV

Member
59
1
6
Location
Henderson NV
I'm sure it will. No matter what we do to them and how hard we try, they always seem to work. Looks great. Have you found the fasteners for the front panel yet? Jeff

Lol well i will be stopping it soon. This thing is getting close to being done. Just hope it fires up and makes power.
 

Jimc

Member
725
1
18
Location
Mullica, nj
huh, thanks but too late now. i ordered the whole thing. it seems like the float part on mine is ok but cant really tell. at $44 i guess it was safer to just buy the whole thing brand new. thanks for the link though. maybe it will help others
 
Last edited:

Jimc

Member
725
1
18
Location
Mullica, nj
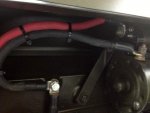
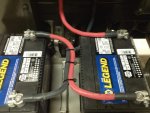
ok tonight i made my battery cables. i picked up some real nice 1/0 rubber jacket welding cable, solder on ends and went to town. those are 34r batteries. seems to be about the biggest battery i could find that would fit in the original battery tray.

IMG_1046.jpgIMG_1045.jpg

as i posted before i needed to make a 1/2" spacer for the spin on fuel filer setup. i used the standard wix mounts that everyone seems to be using. my problem was even with the mounting plate mounted on the outside of the frame, the watersep filter was pushing tight on the wires coming out of the gen end. a piece of 1/2 aluminum solved the issue. the filter barely touches the wires now.

IMG_1047.jpgIMG_1048.jpg

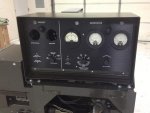
and last thing accomplished today was i replaced mu old faded control box panel with a nice new one that showed up in the mail this afternoon. thank you JOatey. i managed to get away without buying a new batt gauge. i clearcoated the lens and that made it clear again so you could see it. just like new actually. only problem was i dropped it and the needle broke:cry:. oh well i guess i have to get one now. what a difference the new panel made though.

IMG_1049.jpg
 

Jimc

Member
725
1
18
Location
Mullica, nj
I hope so. Whenever i restore something i like to improve on things as much as possible but still try and keep the original feel to it.

thanks btw!!

i cant spend the night working on the gen today. valentines day, i would really be in the dog house lol. so ill sit here on the computer for awhile and get some stuff done. instead of tracking down all new data plates which would be time consuming and expensive, i am designing them in the computer then i can print them in vinyl and overlay them on the old plates. basically making decals.
 
Last edited:

Jimc

Member
725
1
18
Location
Mullica, nj
you know i was gonna offer that up too oatey. i can do all of them on the set except for the wiring diagram on top of the control box. mine is shot and i would need an almost brand new one to get the design off of first, then i can reproduce it. all these others are just black boxes and type so i can just retype it. that schematic is pretty nuts so no way am i redrawing that. it would take days of design time. scanning a good one is the way to go. here is what i have so far. you can see i scanned in the originals on the left then i made the two on the right so far.

NAME-PLATES.jpg
 
Top
AdBlock Detected

We get it, advertisements are annoying!

Sure, ad-blocking software does a great job at blocking ads, but it also blocks useful features of our website like our supporting vendors. Their ads help keep Steel Soldiers going. Please consider disabling your ad blockers for the site. Thanks!

I've Disabled AdBlock
No Thanks