• Steel Soldiers now has a few new forums, read more about it at: New Munitions Forums!

  • Microsoft MSN, Live, Hotmail, Outlook email users may not be receiving emails. We are working to resolve this issue. Please add support@steelsoldiers.com to your trusted contacts.

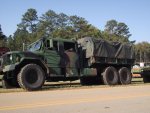
My Crew Cab Deuce Build

FatBuddhaBoo

Member
330
8
18
Location
Jacksonville, Fl
That thing is coming along real nice! Wish I could say the same about mine..haha
Thanks! Probably the greatest reason for progress is that I convinced the wife to let me park in the driveway for the last week and half and have dedicated a few hours daily after work plus put in 16+ hours each of the last two weekends. Come Friday though it's vacation time with the kids, so trying to get as much done on her as I can before that.
 

FatBuddhaBoo

Member
330
8
18
Location
Jacksonville, Fl
Taking the vents off really changes the way the truck looks compared to other crew cab builds. In my opinion this is looking really good. I really like the proportions. Good job sir!
Yeah, it's the only way I could do it and keep the dual axles in the back. Once I get the cab done I just gotta decide on what to do with the bed. The original thought was to extend the rear frame and keep it 12 feet, but thinking that will through off the balance way too much without moving the axles back. Contemplating now cutting the bed down to 10 feet and extending the frame just a foot. Not sure...
 

o1951

Active member
899
155
43
Location
Bergen County, NJ
Yeah, it's the only way I could do it and keep the dual axles in the back. Once I get the cab done I just gotta decide on what to do with the bed. The original thought was to extend the rear frame and keep it 12 feet, but thinking that will through off the balance way too much without moving the axles back. Contemplating now cutting the bed down to 10 feet and extending the frame just a foot. Not sure...QUOTE]
To keep esthetic balance, that sounds like the way to go. However, I would make a cardboard model with 12 ft and 10 ft and see how she looks.
 

o1951

Active member
899
155
43
Location
Bergen County, NJ
Scott- you got that big lunk of an engine up front - you really think 2 ft would make a difference? I know you don't get snow there. In snow country, people talk about putting several tons of stuff in back for extra traction.
 
Last edited:

FatBuddhaBoo

Member
330
8
18
Location
Jacksonville, Fl
Scott- you got that big lunk of an engine up front - you really think 2 ft would make a difference? I know you don't get snow there. In snow country, people talk about putting several tons of stuff in back for extra traction.
You have a point there. Perhaps it would only matter if I was taking it off road and climbing steep embankments. Guess it still warrants consideration. And yeah, snow country, I remember what that was like being living there....
 

o1951

Active member
899
155
43
Location
Bergen County, NJ
Yeah - off road, you want it to end close to wheels as possible so you can have good ascent and departure angles. I believe 12 foot bed would be functional, but think it would look like an abortion, that is why I suggested cardboard model.
 

FatBuddhaBoo

Member
330
8
18
Location
Jacksonville, Fl
Why not move the axles back? I really like the way it looks with the stock bed. Although it takes a lot of room to turn around.
That was a thought, and it would certainly be easier to do it now than later after the bed is back on. Was yours moved and the frame extended or ???

Comparing lengths from the prints in the TM's, the M35 carries about 40" of bed past the center or the rear tire, whereas the M36 has about 70". This is very apparent visually when comparing pictures of the two trucks. Hence why I thought that the extra 3 feet of bed with just extending the frame might be doable, with at the most maybe moving the axles back a foot. Worst case I'll cut the 12 foot bed down to 10 feet and just extend the frame 1 foot with no axle change.

I wonder how it would look with split axles - leave one where it is, move other back? Sure would be different. Gotta cardboard that.

I think if I moved them I'd move the set.
 

FatBuddhaBoo

Member
330
8
18
Location
Jacksonville, Fl
Well got the side window panels 90% done today. Only a few minor things left to do to her and all the cab work will be done....minus putting in the seating. That however will come after the entire interior and exterior are painted. Then it's on to the bed...

side panels.jpg

The kids spring break starts tomorrow, so there will be no work done over the next two weeks... :-(
 

taylordc15

Member
249
3
18
Location
Sale Creek, TN
That was a thought, and it would certainly be easier to do it now than later after the bed is back on. Was yours moved and the frame extended or ???

Comparing lengths from the prints in the TM's, the M35 carries about 40" of bed past the center or the rear tire, whereas the M36 has about 70". This is very apparent visually when comparing pictures of the two trucks. Hence why I thought that the extra 3 feet of bed with just extending the frame might be doable, with at the most maybe moving the axles back a foot. Worst case I'll cut the 12 foot bed down to 10 feet and just extend the frame 1 foot with no axle change.


I think if I moved them I'd move the set.
Mine was two frames welded together,
DSC04570.jpgDSC04574.jpgDSC04577.jpg
 

FatBuddhaBoo

Member
330
8
18
Location
Jacksonville, Fl
Mine was two frames welded together,
Thanks for the pics. Unfortunately I don't have a second frame to play with, so extending mine and moving the axles would be the way to go for me IF I decide not to just cut it down to 9 feet. Certainly though for what I am wanting to do the bigger the bed the better. Still have time to ponder it....
 

FatBuddhaBoo

Member
330
8
18
Location
Jacksonville, Fl
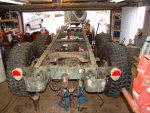
Well finally got a weekend to work on her again. In preparation for putting the bed back on, I had previously degreased and pressure washed the rear section of the frame. Yesterday I scraped any big flakes off, hit the entire thing with Ospho then primed it. Also sanded the back section and both sides of the cab along with blending in the cab section stitch welds with a little body filler. While sanding other portions of the cab found some serious rust spots, including one that almost ran the entire length of the door. Probably should have just cut the entire piece out and welded in a new section, but decided against it for now. Once the body filler was sanded everything was washed, primed and painted with Behr premium "383". Hopefully tomorrow I can get the hood and other fender looking the same. Then it's on to cutting and putting the bed back on as well as painting the interior to match. From there it's the rest of the underbody and the engine compartment.

IMAG1055.jpgIMAG1053.jpgIMAG1051.jpgIMAG1049.jpgIMAG1048.jpgIMAG1047.jpgIMAG1046.jpgIMAG1045.jpg
 
Last edited:
Top
AdBlock Detected

We get it, advertisements are annoying!

Sure, ad-blocking software does a great job at blocking ads, but it also blocks useful features of our website like our supporting vendors. Their ads help keep Steel Soldiers going. Please consider disabling your ad blockers for the site. Thanks!

I've Disabled AdBlock
No Thanks