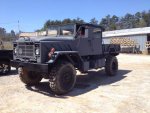
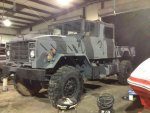
Here is the process I use. Prior to painting, I select the colors I want to use doing a mockup on a piece of cardboard. this ensures that you do not paint your truck the wrong colors and hate it. Sherwin Williams can match any color you use for your rattle can mockup in their Genesis urethane flat. 2. Use a good degreaser and pressure wash or use a hose with a pressure nozzle on the end. That is your first wash. 2. I use the same degreaser called Purple Power in a bucket and hand wash the truck with a red scotch pad. I use the scotch pad to remove the chalking and prepare the surface for a new coat. After running the scotch pad with degreaser over the surface to be painted, rinse thoroughly with water. 3. I use an air powered Disc Sander with 80 grit paper to feather edges from dings in paint, and to sand down runs left by the military. I am a commercial painting contractor, so it is hard for me to leave any runs in paint. I have excellent equipment, but you can get everything you need a Harbor Freight and save $$$. I run the DS on any runs, rough areas, and dings to feather the edges. Then I use air to blow all the sanding dust off of the truck. 4. Take a rattle can of red oxide primer and hit any bare metal areas. Make sure to use a cardboard shield as your truck is not masked off yet. 5. Now that all our sanding and priming is complete, it is time to mask the truck off. Wash the entire truck one more time and let dry. Take a rag with denatured alcohol and wipe only the surfaces your masking tape is sticking to. After all surfaces are masked, it is time o paint. Use a gravity fed conventional hvlp gun and start with your darkest color to to your lightest. After the paint is dry remove masking and take pictures. Now, you are ready to stencil all the military markings back on. Have fun and send me some pictures when you are finished.


