• Steel Soldiers now has a few new forums, read more about it at: New Munitions Forums!

  • Microsoft MSN, Live, Hotmail, Outlook email users may not be receiving emails. We are working to resolve this issue. Please add support@steelsoldiers.com to your trusted contacts.

What have you done to your 5 ton this week?

MyothersanM1

19K M1 Armor Crewman
Steel Soldiers Supporter
1,958
427
68
Location
Culver City, CA
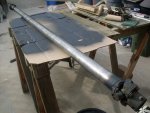
I had the PTO to winch drive shaft retubed (.120 wall) 6 1/2" longer this past week. The drive shaft with my winch kit must have been from an M39-series truck. Found a great hole-in-the-wall drive shaft specialist who did the work fro $240. That's beats the heck out of buying a new one for $350 PLUS and the ride. The retubed shaft is straight as an arrow. A quick coat of flat black paint, some grease on the slip joint and the winch collar and it was ready for install.
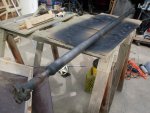
SDC12344.jpgSDC12343.jpg

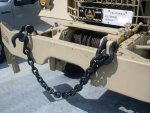
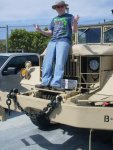
On Saturday, with the help of Soldier B and C, we installed the drive shaft for a perfect fit. We tested the winch operation in both directions. Success. Reattached the wire rope to the drum and secured it to my pick up truck hitch receiver for some winching resistance. Slowly we wire brushed and sprayed the wire rope with some Mac's Chain and Wire Rope Lube from Napa (good stuff). We would winch in 25-30 ft. and clean and lube another section. The hardest part was probably laying down that first full layer everything else fell into place with a couple of minor adjustments. I did discover that my drag brake is in need of adjustment, as we experienced some bird-nesting, but we were able to correct. Sorry, I was too busy and dirty to stop and photograph the work session. BUT, here's the end result with Soldier B (clutch man) taking pride in the in his efforts. HE really likes the lead chain hanging on the bumper
SDC12345.jpgSDC12346.jpg


KaiserM109

New member
1,108
4
0
Location
SE Aurora, CO
I went from the transmission on the ground to bolted up!!!

We had to stand it on its tail and lift the torque converter up and down with an engine hoist to get all the splines and the front pump to ligh up.

The good news, for you guys who have to do this, is that when it is all bolted up snug with NO oil, the torque converter can be turned through the fording drain hole with your finger in order to line up the bolts to the flex plate (flywheel for you manual transmission guys).


Transmission down.jpg transmission up.jpg
 

LiqTenEXp

Member
206
6
18
Location
NJ
replaced a steering knuckle boot
replaced a bad pitcock air drain valve
replaced bad glad air hand seals
replaced air filter
 

Scott88M

New member
152
0
0
Location
East Greenwich, RI
After 2 months of adjusting the transmission modulator cable and various adjustments to accelerator linkage finally was able to pin point the problem. It would hang at the top of second gear forever it seemed. It was the bracket where you adjust the idle it was shifted forward about 1/4 inch. What a nightmare to hunt down but she finally drives like she is supposed to. Also picked up a metal jerry can from Craigslist to throw in the holder.
 

engineer233

New member
251
0
0
Location
London,Ky
Installed a keyd start switch from tractor supply in my M932 today. I left the old switch in place for now. I plan on making the mounting bracket in the morning.
 

98G

Former SSG
Steel Soldiers Supporter
6,067
4,429
113
Location
AZ/KS/MO/OK/NM/NE, varies by the day...
20140505_173550.jpg20140505_173439.jpg

Started repainting my 925. Rattlecan paint and Hazard Fraught $20 sandblaster. So far the front bumper and bits of the winch and frame extensions. Planning to go front to back, sandblasting and painting as I go. The frame extension is still wet in this pic.
 

MyothersanM1

19K M1 Armor Crewman
Steel Soldiers Supporter
1,958
427
68
Location
Culver City, CA
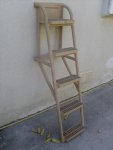
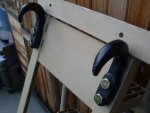
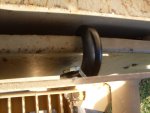
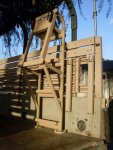
I finished modifying the boarding ladder I got a while back. I cut the bottom step off and about half of the tubing to the second step. I bolted up a couple of Curt 10K lbs. tow hooks to the ladder so it can hang on the open tailgate lip.
SDC12313.jpgSDC12391.jpgSDC12398.jpgSDC12392.jpg

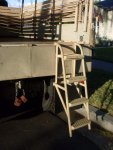
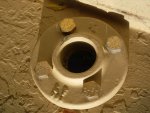
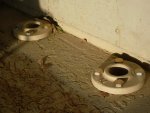
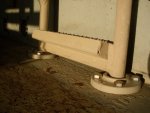
In order to haul it around, I mounted up two aluminum 1 1/4" pipe flanges and cored two 1 3/4" holes in the bed floor for the bottom tubes of the ladder to slip into. The flanges give extra strength to the holes.
SDC12394.jpgSDC12393.jpgSDC12396.jpg

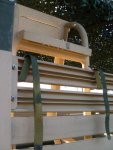
All I do is slip the tubes into the pipe flanges and secure the top end of the ladder to the headache rack with a couple of GP cargo straps. The ladder is aluminum so it is not too unwieldy to move around.
SDC12397.jpgSDC12395.jpg

It sure makes getting into the bed a whole lot easier.
 

MyothersanM1

19K M1 Armor Crewman
Steel Soldiers Supporter
1,958
427
68
Location
Culver City, CA
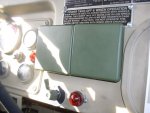
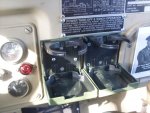
Foldaway cup holders.
SDC12384.jpgSDC12386.jpg


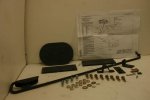
An improved raised hood kit (NSN: 2510-01-281-1273, PN#12356798). They are kind of hard to find and can be a little pricey.
$_57.jpg
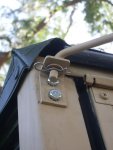
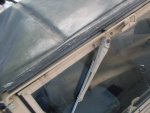
Mounts to windshield top right. It folds and clips to windshield frame in the stowed position. It is also removed completely by simply detaching the hitch pin. It secures to the hood with a steel loop and has a spring lock to hold it in place. This is much easier to deploy than the standard holder on the driver's side. The two thick shims for the windshield hold-downs
included in the kit are to compensate for rod and bracket when the windshield is in the folded down position.
SDC12389.jpgSDC12390.jpgSDC12387.jpgSDC12381.jpgSDC12383.jpg
 

Jakelc15

Active member
718
37
28
Location
Hanover Pa
Your hood kit might be for a gun ring. I've seen some modified hood catches on trucks with the ring. The ring extends past the top of the windshield so the hood won't open all the way, requiring a longer prop.
Looks good, cup holders should be on everyone's to do list!
 

zxmedic

New member
157
2
0
Location
Canada
I gutted the cab and started cleaning the rust and cut the bad rust out grinded the floor after and first coat of por 15 went on with finish with raptor bed liner .uploadfromtaptalk1399638404136.jpguploadfromtaptalk1399638421906.jpguploadfromtaptalk1399638439074.jpg
Anyone know where that fitting should connect to I may pull the tranny out and check why its jumping out of second gear and no syncro into third .
uploadfromtaptalk1399638554784.jpguploadfromtaptalk1399638578076.jpguploadfromtaptalk1399638598894.jpg
 

topo

Well-known member
912
260
63
Location
farmington NM
The fitting on the transmission is where the air vents from shifting in and out of reverse nothing connects to it . nice work .
 

MyothersanM1

19K M1 Armor Crewman
Steel Soldiers Supporter
1,958
427
68
Location
Culver City, CA
Your hood kit might be for a gun ring. I've seen some modified hood catches on trucks with the ring. The ring extends past the top of the windshield so the hood won't open all the way, requiring a longer prop.
Looks good, cup holders should be on everyone's to do list!
Yeah, it might have been designed for that. As a matter of fact, the hood I have on the truck now had a third hold-down on the passenger side about 15" forward of the standard one which is about where the hood would land when open of if there was a gun ring mounted. I took it off, but that might have been for a gun ring catch.

Thanks for the compliments.
 
Top
AdBlock Detected

We get it, advertisements are annoying!

Sure, ad-blocking software does a great job at blocking ads, but it also blocks useful features of our website like our supporting vendors. Their ads help keep Steel Soldiers going. Please consider disabling your ad blockers for the site. Thanks!

I've Disabled AdBlock
No Thanks