• Steel Soldiers now has a few new forums, read more about it at: New Munitions Forums!

  • Microsoft MSN, Live, Hotmail, Outlook email users may not be receiving emails. We are working to resolve this issue. Please add support@steelsoldiers.com to your trusted contacts.

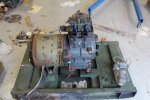
Picked up 6 MEP-802A gensets and will be documenting making them all runners here

dynotatics

New member
4
0
1
Location
Washington, DC
Any tips on removing the generator? Ive broke the unit down to expose the rear of the gene side. Blocked the engine. worried about bearings on rear support plate.
 

m-35tom

Well-known member
Supporting Vendor
3,021
222
63
Location
eldersburg maryland
have you read 9-6115-641-24? it tells you how to do it, much to long to explain here. if it was put together that way, i would worry about it being a bad gen head and check it carefully while it is apart.
 

dynotatics

New member
4
0
1
Location
Washington, DC
have you read 9-6115-641-24? it tells you how to do it, much to long to explain here. if it was put together that way, i would worry about it being a bad gen head and check it carefully while it is apart.
yes the tm's have been my guide. I was just woried about destroying the bearingwhile removing the rear stator support. sucessfully removed generator discovered the bolts on the fly wheel were broke clean due to the unit being struck by a fork lift. stator and housing in good shape. Thanks again!
 

wfish001

New member
1
0
0
Location
Washington, DC
Thought I'd give an update. Dynotatics (aka Dino) is working on an 802a that I technically own.

Turns out the reason the bolts between the engine shaft and flywheel broke is because the engine threw a rod and came to a very abrupt halt.

I think that Peter (guy who started this thread aka pmclausen) got his 802a's from the same guy I bought mine from. Future buyers: if there are holes drilled in the fuel tank, they're there for a reason. Also, trying to turn that sucker by hand before you pay for it; even if it is just $475.

Back to our 802a: since the rod did some damage to the block, we're looking to replace the whole engine as not to get into a never-ending project. There is a LPW2 on eBay for 900 right now that runs and about 22 on GL in Barstow, CA in lots of 2. We're leaning toward the ones in Barstow.
 

pclausen

Well-known member
Steel Soldiers Supporter
452
281
63
Location
Afton, VA
Hi guys,

So after a LONG break, I finally found some time to work on these again. Sometimes life just takes you on other directions and/or other hobbies take over for a while. In my case it was a bit of both.

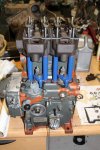
Head mounted. When I took it apart, I noticed that on the intake side of the head, no washers were used on the head bolts. I picked up some grade 8 washers to remedy that prior to assembly. The exhaust side uses only spacers on the head bolts.

MEP802-11-8-2015-01.jpg
http://www.cstone.net/~dk/MEP802-11-8-2015-01.JPG

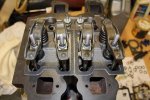
Rockers installed. I was careful to install them in the same position where they came off.

MEP802-11-8-2015-02.jpg
http://www.cstone.net/~dk/MEP802-11-8-2015-02.JPG

Engine resting on base and flywheel housing bolted on. When I removed the engine, I lifted it and set in on my work table by hand. This time, with the head bolted on, I decided to save my back and used an engine lift to position it. You can also see that the new injectors have been installed in this pic. I used new washers (they were part of my gasket kit). A tiny bit on grease on the side towards the injector, held it in place as I dropped each injector into the head.

MEP802-11-8-2015-03.jpg
http://www.cstone.net/~dk/MEP802-11-8-2015-03.JPG

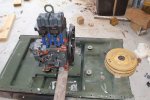
Getting ready to mount the flywheel:

MEP802-11-8-2015-04.jpg
http://www.cstone.net/~dk/MEP802-11-8-2015-04.JPG

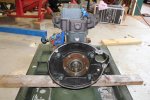
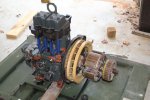
Flywheel and rotor installed. I did not scribe the flywheel nor the rotor when I removed them. However, there's a pilot hole of sorts on the crank, which left a matching mark on the flywheel, so I was able to ensure it went back on in the right position. I'm sure it would have been way unbalanced otherwise! Not sure if the rotor is critical as far as how it goes back on, but again, I was able to see some rust spots and what not, and mounted it in the same position that it came off. I'll be sure to scribe the others when I take them apart.

MEP802-11-8-2015-05.jpg
http://www.cstone.net/~dk/MEP802-11-8-2015-05.JPG

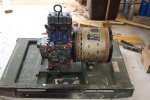
Stator installed. Not shown is the stage where I threaded the 4 long stator housing bolts into the flywheel housing, nor the step where I pressed a new bearing into the stator housing. Once I slid the housing on as far as it would go (to where the bearing touched the rotor shaft), I used a very large pin to drive the bearing onto the rotor shaft, and at the same time made sure the 4 long bolts went through the holes in the stator housing. The whole process went smoother than I anticipated. Much easier than taking it apart!

MEP802-11-8-2015-06.jpg
http://www.cstone.net/~dk/MEP802-11-8-2015-06.JPG

View from the other side. Also got exhaust manifold installed as well as the fuel lines. I blew them out with air first.

MEP802-11-8-2015-07.jpg
http://www.cstone.net/~dk/MEP802-11-8-2015-07.JPG

As can be seen from the picks, I painted a few small parts with some blue engine enamel. I'm torn if I'm going to go ahead and paint the rest or not. If I do, I need to do it soon I suppose before I bolt too much else back on.
 
Last edited:

pclausen

Well-known member
Steel Soldiers Supporter
452
281
63
Location
Afton, VA
This is what I said from his first post when when he was pulling out the fuel pumps thinking they where injectors. SLOW DOWN. At least one of these generators he should of just thrown fuel in it saluted it and turned the key. The guy had huge drive way more then i ever I hope he is ok
Yes, in my excitement to get these up and running and reading here about pulling the injectors and dropping some oil on top of the cylinders to let them soak, I removed what I at the time thought were the injectors. What I didn't mention before, was that it was late at night, and I had been working a bottle of bourbon pretty hard that night. I enjoy turning wrenches after a few drinks, but that particular night, I should not have been near my tools. :roll:
 

pclausen

Well-known member
Steel Soldiers Supporter
452
281
63
Location
Afton, VA
I think that Peter (guy who started this thread aka pmclausen) got his 802a's from the same guy I bought mine from. Future buyers: if there are holes drilled in the fuel tank, they're there for a reason. Also, trying to turn that sucker by hand before you pay for it; even if it is just $475.
Did you get it from Dean? If so, then yep, that's who I got mine from. I do have one with a hole drilled in the fuel tank. I think between the 5 units I got, I hope to make 4 of them runners.

Did you get a replacement engine?
 

Chainbreaker

Well-known member
1,796
1,992
113
Location
Oregon
As can be seen from the picks, I painted a few small parts with some blue engine enamel. I'm torn if I'm going to go ahead and paint the rest or not. If I do, I need to do it soon I suppose before I bolt too much else back on.
If it were me I would take the opportunity to paint everything now. Since you have everything apart it would be a shame not to and fairly easy to do now. I bought some of the Mil Spec enamel colors from Rapco and ran through my HVLP spray gun and it turned out great, or you can buy individual spray cans. If you intend to re-sell any of your units it should add value as well as protecting them from the elements.
 

Another Ahab

Well-known member
17,999
4,556
113
Location
Alexandria, VA
If it were me I would take the opportunity to paint everything now. Since you have everything apart it would be a shame not to and fairly easy to do now. I bought some of the Mil Spec enamel colors from Rapco and ran through my HVLP spray gun and it turned out great, or you can buy individual spray cans. If you intend to re-sell any of your units it should add value as well as protecting them from the elements.
I agree, but temper my comment with the understanding that I have no skin in the game, and the labor doesn't come from me.

But if you're looking for comment to help tilt you one way or the other, I say go for the paint work now. You'll likely be glad later you did it when the opportunity was optimal. And if you get it done and behind you now, you won't have to think about it and deal with it again sometime later. 2cents
 

pclausen

Well-known member
Steel Soldiers Supporter
452
281
63
Location
Afton, VA
So if I do paint, I should mask off the flywheel housing, the base, the generator, and all bare surfaces that are going to have gaskets put on them. But what about the black fuel hoses and the governor assembly? Am I ok to paint those parts? And what about the fuel pump and injector pump fuel line nuts? I guess just paint the whole darn engine and once everything dries, "break loose" the pieces that needs to be able to move?
 

Chainbreaker

Well-known member
1,796
1,992
113
Location
Oregon
If it were me I would unbolt the engine/gen head ass'y from the skid and using your hoist take that off (check the TM to verify it is OK to hoist both bolted together as an assembly when not attached to skid) and then paint the skid with that off. Then with the unit safely hoisted paint the engine/gen head ass'y so its easier to get at. I would definitely mask off any gasket surfaces or just put those parts on and paint engine as a complete ass'y and mask off any areas you don't want painted. In the end its your call as to how much time you want to spend painting. Unless you want a museum piece/show piece it is not worth any further disassembly and OK to get paint on bolts/nuts, assembled gasket edges, etc. For any moving parts that you can't mask off you might try putting a drop of oil where parts move so paint won't stick there and can wipe off later.

When I do decide to paint something like this I keep telling myself "its not a car/truck" and paint won't really make it run any better. If I do a 90% quality paint job (perfection to get 100% quality is what eats up time) that is good enough and keeps the rust at bay plus it makes it easier to spot leaks on freshly painted surfaces and does add value if selling. Besides its just that much purtier to look at and admire your work afterwards! :)
 

Daybreak

2 Star Admiral
Steel Soldiers Supporter
1,522
771
113
Location
Va
Howdy,

Since you are going all the way thru the unit. I too would paint it all "purty like" :)
 

oldsman

New member
5
1
3
Location
Fuquay NC
As can be seen from the picks, I painted a few small parts with some blue engine enamel. I'm torn if I'm going to go ahead and paint the rest or not. If I do, I need to do it soon I suppose before I bolt too much else back on.
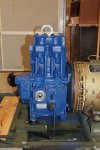
I would absolutely paint after all the great work you have done. JMHO
 

pclausen

Well-known member
Steel Soldiers Supporter
452
281
63
Location
Afton, VA
Alright guys, you convinced me to paint it. :D

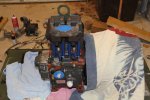
Wiped down the block with denatured alcohol and using a mix of masking table, aluminum foil and blankets, to cover up the parts not to be painted.

MEP802-11-9-15-01.jpg
http://www.cstone.net/~dk/MEP802-11-9-15-01.JPG

MEP802-11-9-15-02.jpg
http://www.cstone.net/~dk/MEP802-11-9-15-02.JPG

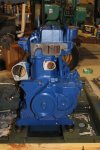
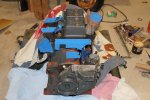
Last night I gave it the first coat, and then this morning before work, I gave it a 2nd coat. I went with the Ford Dark Blue. Pulled the masking off this evening:

MEP802-11-10-2015-01.jpg
http://www.cstone.net/~dk/MEP802-11-10-2015-01.JPG

MEP802-11-10-2015-02.jpg
http://www.cstone.net/~dk/MEP802-11-10-2015-02.JPG

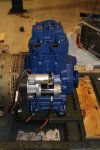
Bolted on the starter as the first accessory:

MEP802-11-10-2015-03.jpg
http://www.cstone.net/~dk/MEP802-11-10-2015-03.JPG

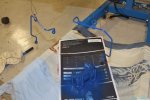
Sanded down the fuel hard lines and the intake manifold next, wiped them, and shot them with the Ford Dark Blue:

MEP802-11-10-2015-04.jpg
http://www.cstone.net/~dk/MEP802-11-10-2015-04.JPG

Tomorrow I hope to find some time to work on the water pump plate as well as the water pump itself. Those pieces are pretty nasty.
 
Top
AdBlock Detected

We get it, advertisements are annoying!

Sure, ad-blocking software does a great job at blocking ads, but it also blocks useful features of our website like our supporting vendors. Their ads help keep Steel Soldiers going. Please consider disabling your ad blockers for the site. Thanks!

I've Disabled AdBlock
No Thanks