• Steel Soldiers now has a few new forums, read more about it at: New Munitions Forums!

  • Microsoft MSN, Live, Hotmail, Outlook email users may not be receiving emails. We are working to resolve this issue. Please add support@steelsoldiers.com to your trusted contacts.

What did you do to your deuce this week?

pitpawten

Active member
259
199
43
Location
Centreville, Maryland
I completed my dual front bumper shackles addition.

I think I'll tie the lower shackles to the upper ones with some 550 cord so they'll hang "upward".

The new, longer bolts I purchased were all too long but they were on clearance at Fastenal and the whole order, shipped, for less than $20. The regular price for the 11" or 12" long 5/8" rear bolt would have been over $17 just for one!

I was recently taught a very handy method for cutting down too-long bolts:

First, thread on a regular nut (I like using grade 8 nuts for this). Then cut the bolt to length (a metal cutting disk on a hand-held angle grinder makes this easy). Second, use a bench grinder to bevel/taper the bolt end. And finally, when you unthread the nut it'll clean up the bolt's threads on it's way off.

I trimmed the front bolts but they still were a hair too long so I just added a washer under the bolt head (the upper shackle pin still cleared). I have no excuse for my laziness here other than I wanted to be done with the project. I had already cut, beveled, painted the bare metal tip and applied anti-seize to them. I didn't feel like cleaning up the anti-seize, re-cutting/grinding and painting when a washer looked fine, and didn't interfere at all. I do try to take the extra time on my projects, but I am fine if my "corner-cutting" results in an item that wasn't strictly necessary and probably only helped.

Tip: use all metal lock nuts on the bottom or else you won't have the clearance to put in/remove the shackle pins.

I had to borrow a friend's air-hammer to pound out the original front bolts because they were rust-seized to the sleeves. I almost gave up on the project! So all the bolts (and even shackle pins) now have a coat of anti-seize on them.

View attachment 628088 View attachment 628087 View attachment 628081 View attachment 628082 View attachment 628083 View attachment 628084 View attachment 628085 View attachment 628086

In the 3rd and 4th pictures above, you can see the cut and drilled 1/4" thick spacer plate sitting on the flat base of the lower shackle mount. It matches the dimensions of the spacer welded to the top of the frame extension below the upper shackle mount so the mount will lie flat.
Good stuff here, I got a pair off an A3 just need to mount them, think I need some new HW though. Nice writeup.
 

KaiserM109

New member
1,108
4
0
Location
SE Aurora, CO
GOT IT STARTED!

I am well known for finding the hard way to do something. Last fall I charged up the batteries until each showed 12 volts no load (plus a little). When I tried to start it, it made a loud "CLUNK" and the voltage (according to the dash meter) went to zero.

Big Mistake: I blamed it on a short in the starter. I took it off and started to open it up. Then I thought better of doing that on the sidewalk behind our apartment and took it to a shop. He charged me $50 to open it, clean it up, re-grease it, put it back together and tell me there was nothing wrong. Just getting it re-greased was probably worth $50.

Leaping way ahead, I was having similar problems with my M923, so I bought a NOCO Genius G7200 and began going through all 6 batteries. Two of them, including one of the deuce batteries, would take a charge, but not a deep one.

Fearing I might really have a problem in the engine, such as a hydro-lock, I put the transmission in 4th gear (straight through) and the transfer in neutral. I had my son, who crawls under trucks better than I do, bar the engine 2 full turns in the same direction in which it runs using a rebar on a U joint between the transmission and transfer case.

Putting 2 of the best batteries in the deuce box almost started it. Might have caught if I used ether, but I don't like doing that. I took two more batteries, connected them into 24v on the ground and jumped them to the deuce with my auto cables and VOILA, IT STARTED.

I decided I need a bigger charger to deal with 6 batteries, though I think the G7200 is good for 1 or 2, so I am going to replace my big 40 amp Stanley that got stolen a year ago.
 

Kaiser67M715

Member
699
26
18
Location
NH
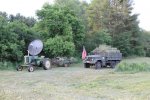
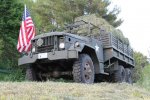
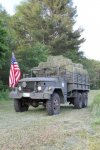
loaded up the truck with hay from our field, only have one horse now, so we only got the one field, brought out 90 bales, probably another 5 or 6 tomorrow after re-raking. This is after all the intake exhaust work I did(still think it vapor locked on me, I stalled it and it failed to restart until it sat a while) that engine bay got HOT just idling around it 2nd low.

Anyways, couple o' pics.
 

Attachments

Another Ahab

Well-known member
18,003
4,565
113
Location
Alexandria, VA
loaded up the truck with hay from our field, only have one horse now, so we only got the one field, brought out 90 bales, probably another 5 or 6 tomorrow after re-raking. This is after all the intake exhaust work I did(still think it vapor locked on me, I stalled it and it failed to restart until it sat a while) that engine bay got HOT just idling around it 2nd low.

Anyways, couple o' pics.
How many cuttings of hay up there in NH do you all get in a season:

- Do you squeeze three into the year?
 

USAFSS-ColdWarrior

Chaplain
Super Moderator
Steel Soldiers Supporter
18,541
5,852
113
Location
San Angelo, Tom Green County, Texas USA
My step-daughter responded to an online offer for a FREE canoe in need of some plastic-bottom repair. She wants to use it for her "indian" themed birthday party for our almost 2-year old granddaughter.

Well, just as the sun was setting I was "invited" to help go pick it up all the way across town.llll "SURE !" was my reply, of course.

We hopped into the Deuce and drove over - beautiful evening, somewhat cooler than the daytime west Texas HEAT. Actual greeting, loading, thanks, and drive-off took about 5 minutes and back home we headed.

The fella giving the canoe away had suggested we bring a truck or trailer due to the canoe's length. He was SHOCKED to see what we pulled up in :naner:

Sorry - no pics last night, but I'll take a couple of the still-loaded canoe later today.

I chucked when our Deuce - aka THE ARK - was now carrying a dinghy. I'm ready for some deep water action now !!!
 

USAFSS-ColdWarrior

Chaplain
Super Moderator
Steel Soldiers Supporter
18,541
5,852
113
Location
San Angelo, Tom Green County, Texas USA

Kaiser67M715

Member
699
26
18
Location
NH
Kind of looks like a John Deere "G" pulling a "14T" baler. Or close. I used to run both at 16 years old, which was exactly 50 years ago . JT
1952 Model 60 with a 14T, we also have a '46 "B", which does the tedding and the raking. Our conditioner and tedder are the only non-John Deere implements, both are New Hollands
 

tobyS

Well-known member
4,832
833
113
Location
IN
The man that sold me an A3 put in a used tranny and it had exactly the same problem. I got two tranny's with fourth and reverse out so had the original, with just 10k, rebuilt. Picked up the AT 1545 from the shop that rebuilt it. All new frictions, steels, fourth piston and improved PTFE seals should do the trick. Now comes the change-out.

I have another thread about PTO's on the A3 Allison tranny. It appears the same one as fits the 939 series will work on the AT 1545, but I will confirm that. Space does appear to be an issue...man is it tight...so even if it fits the tranny, may not work to mount a pump.
 

tobyS

Well-known member
4,832
833
113
Location
IN
Working on prepping and painting a new hood for my deuce.
Is that a fiberglass hood? Is it a new one, not just new to you?

Mine, fiberglass, has some stress cracking that I'm wondering how to stop/fill/prepare, prior to painting.
 

Another Ahab

Well-known member
18,003
4,565
113
Location
Alexandria, VA
Is that a fiberglass hood? Is it a new one, not just new to you?

Mine, fiberglass, has some stress cracking that I'm wondering how to stop/fill/prepare, prior to painting.
I don't know if there's water around your part of Indiana, but any good marine store will have all the product you need to patch fiberglass, and YouTube will have the tutorials to walk you through it.

It's not difficult; just messy.

And any kind of kayaking/ canoe supplier should have the same kind of supplies.
 

tobyS

Well-known member
4,832
833
113
Location
IN
I've worked with fiberglass and epoxy...learned on a Vari-easy aircraft and have several types of glass mat around. Mine is more of a surface problem that I thought primer would fill, but they show through. I think I need some very slow set epoxy or something that will go into the small cracks. Some TLC too.

I used a wood stain/penetrating sealer the other day that had the characteristics that I would like...water thin and soaks in (and I wipe the excess off).
 

Aussie Bloke

Well-known member
725
373
63
Location
Lost, out bush in OZ
G'day everyone,....


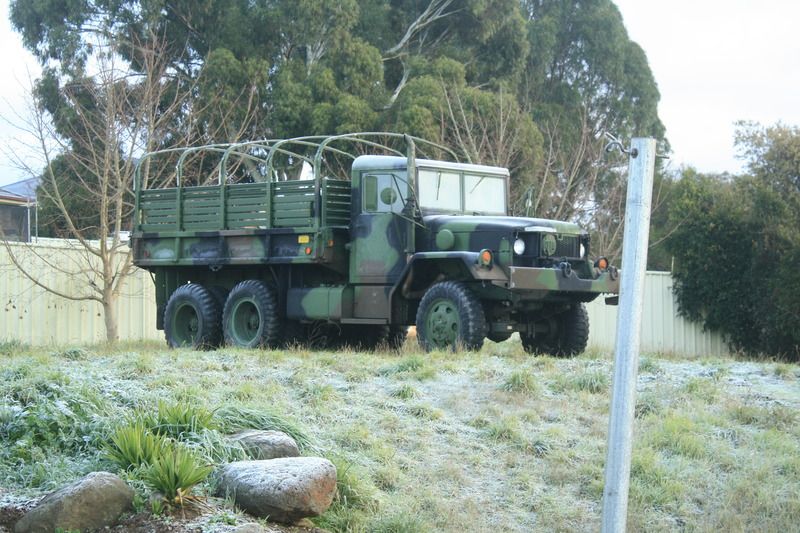
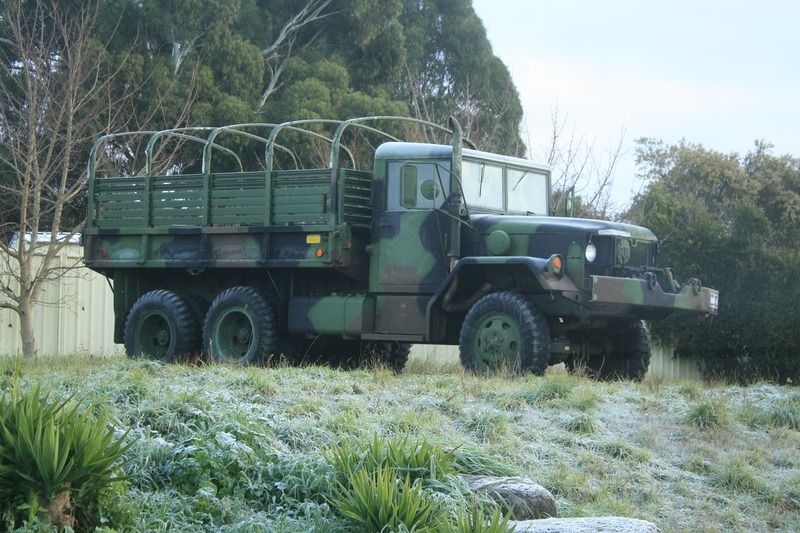
Collected my Deuce yesterday and will go grease the drive train and suspension today.
Will also clean around the engine and see about a few leaks,...

This is how I woke up to my Deuce this morning,..


I hope it doesn't get to hot to work on today,....

;)


Aussie.
 
Top
AdBlock Detected

We get it, advertisements are annoying!

Sure, ad-blocking software does a great job at blocking ads, but it also blocks useful features of our website like our supporting vendors. Their ads help keep Steel Soldiers going. Please consider disabling your ad blockers for the site. Thanks!

I've Disabled AdBlock
No Thanks