• Steel Soldiers now has a few new forums, read more about it at: New Munitions Forums!

  • Microsoft MSN, Live, Hotmail, Outlook email users may not be receiving emails. We are working to resolve this issue. Please add support@steelsoldiers.com to your trusted contacts.

FLU419 SEE HMMH HME Owners group

The FLU farm

Well-known member
Steel Soldiers Supporter
3,342
1,329
113
Location
The actual midwest, NM.
It goes on the steering column, then the arrow moves according to steering input. I assume that it's calibrated for a Unimog's steering angle as the needle doesn't move all that much with one turn of the cogs.
If I'm lucky it'll fit together with the "steering cruise control" I posted about a while back.
 

Another Ahab

Well-known member
18,004
4,565
113
Location
Alexandria, VA
It goes on the steering column, then the arrow moves according to steering input. I assume that it's calibrated for a Unimog's steering angle as the needle doesn't move all that much with one turn of the cogs.
If I'm lucky it'll fit together with the "steering cruise control" I posted about a while back.
Are you taking bets? :naner:
 

The FLU farm

Well-known member
Steel Soldiers Supporter
3,342
1,329
113
Location
The actual midwest, NM.
Today's free advice; If you ever have any plans to remove the lower pin on the backhoe bucket, start soaking the inner area with your favorite penetrating oil weeks in advance.
Unless you favorite is WD-40, in which case don't bother.
 
Small Victories

This.
20170315_123203.jpg

That's the first sign of life by the air pressure gauge. When I pressed the brake pedal, it had a noticeably firmer feel (maybe just my imagination) and the orange needle briefly moved up to join the white. Up to now it's just been the red light mocking me every time I start the truck.

Some other good news on the air system front: The main pressure regulator on the right side is unpainted, and appears nearly new. With any luck it has been replaced, and is not original. Likewise the infamous cross-body air line which starts at said regulator. It is unpainted, and my hopes are high that it was replaced according to the Army's own recommendations.

When the truck first arrived, I noticed that the drain valve on the big air tank was very loose, with the stem just jiggling around. Some time later on, with the engine running, I tried to get the valve to seal by pulling down on the stem. No dice. It wouldn't even think about seating. I can swear I felt air escaping from the valve, but with the noise from the engine, I couldn't hear it. Being a proud, ham-fisted shade tree diagnostician, I addressed the offending stem with a couple squirts of expanding spray foam. The yellow kind used to stop drafts in your house.

I came back today and the loud hiss from the foamed valve was unmistakable. So I still had a leak, but I had managed to narrow the size of the hole enough to at least hear the air escaping. The air pressure reading was also encouraging.

So now I've got an air pressure valve on order. I am too much of a pessimist to think that I won't have to disassemble most of the air system, as others have, but I'm keeping my fingers crossed that I can get through the commercial vehicle inspection here and get plates for the road.
 

peakbagger

Well-known member
734
360
63
Location
northern nh
You do realize that an option is to hook up an air line to the air system and chase the air leaks with the engine off? You can buy a air line that connects up to fittings on the air system on either side of the truck. Its set up for inflating tires but could be cut to hook up to standard air fitting.

The official cross body air line repair is stainless so put a magnet on it. If it isn't magnetic its probably stainless.

Have fun playing, mine is still sitting under the tarp awaiting some semblance of spring.

That post of the fuel tank is what mine looks like. I had to pull the tank to get at the fuel fittings.
 
Yup, thanks. I've got that line for the tires. I have thought of buying a cheap air tank, filling it at the gas station and using that for diagnosis and filling duties. She sits on a building site with no power as of yet, so getting a compressor out there would not help.

Thanks for the magnet idea. I will try that.

We got about 14" out of this last storm, but the ground was dry before that. I'm sure you have more snow on the ground, being further North.
 

The FLU farm

Well-known member
Steel Soldiers Supporter
3,342
1,329
113
Location
The actual midwest, NM.
When the truck first arrived, I noticed that the drain valve on the big air tank was very loose, with the stem just jiggling around. Some time later on, with the engine running, I tried to get the valve to seal by pulling down on the stem. No dice. It wouldn't even think about seating.
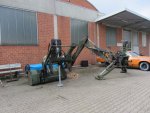
Which is one reason I installed ball valves instead. Now there's 60 psi in the system after 24 hours. EDIT: Make that 48 hours.

And yes, that tank "clearance" looks painfully familiar. My next task is to get the tank out, completely, as the pickup tube must be at least partially at fault, based on plumbing an electric pump into the system an nothing coming out after a while. Not looking forward to that one.
Thankfully I'm still VERY happy after finally getting that backhoe bucket pin out.
 
Last edited:

Migginsbros

Well-known member
2,211
6,739
113
Location
Berlin-Germany
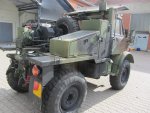
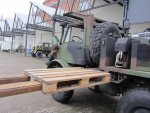
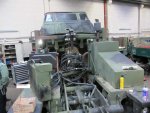
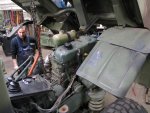
These are pictures from stripping the SEE in advance to get cabin tilt. Kommunaldepot+See Geräte 001.jpg Detach the loader + excarvator See Geräte anAb 002.jpg Roll out the sparetireSEE Vorbereitung Schubrohrmanschetten 003.jpg get the FOP off.SEE Vorbereitung Schubrohrmanschetten 009.jpg The space between the ROP bar and the cabin is enoughtSEE Vorbereitung Schubrohrmanschetten 016.jpg to tilt the cabin. Dont forget using the special brackets and first rise the cabin an then tilt.
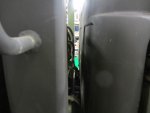
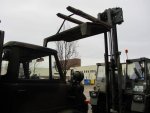
All these things become very easy if you have an extra HMMH or if you dont, use SEEs best mate in our yard, the Steinbock FUG 2,5T Y4 all terrain forklift.

Bythe way,............more technical specs/pictures of this vehicle in MV march poll thread at Members Ride Forum MV of the month. Please vote for.:jumpin:
 

peakbagger

Well-known member
734
360
63
Location
northern nh
Nice photos. Did you make an special provisions to keep the excavator mounts from spreading out? I heard comments from people who have removed the excavator that the hydraulics will slowly leak down and the attachments points will end up not lining up with the mounting points. They advocated chaining the excavator mounting arms so they cant separate to make reinstallation easier.

I look forward to your next set of pictures on the cab tilt.
 

Migginsbros

Well-known member
2,211
6,739
113
Location
Berlin-Germany
Nice photos. Did you make an special provisions to keep the excavator mounts from spreading out? I heard comments from people who have removed the excavator that the hydraulics will slowly leak down and the attachments points will end up not lining up with the mounting points. They advocated chaining the excavator mounting arms so they cant separate to make reinstallation easier.
In this case we dont. But we recogniced last time we detached/attached that the 3 point stand moved a little bit and lowered the mounting points. We get the SEE near by and connect the hydraulik lines to get the points to the correct height.
Your right, next time we will secure with chains or tiedowns because it only a question of time and all the heavy stuff get down to the floor. And then......the hydr.hoses are to short, i think.
 
Last edited:

Migginsbros

Well-known member
2,211
6,739
113
Location
Berlin-Germany
These are a pair off front tilting brackets for the cap. Due to the case at this time there was only 1 side available we buy 2 off the same side cut it and weld it to give the correct oposit side.brackets.jpg
 
Last edited:

The FLU farm

Well-known member
Steel Soldiers Supporter
3,342
1,329
113
Location
The actual midwest, NM.
Your right, next time we will secure with chains or tiedowns because it only a question of time and all the heavy stuff get down to the floor. And then......the hydr.hoses are to short, i think.
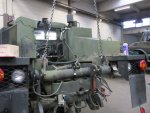
Yep, peakbagger is right. Each machine is different, of course, but it's really only a matter of how long it takes before the hoe either ends up low (best case) or on it's side.
When I had my SEE lifted up by the outriggers and bucket while waiting for wheels to get done, I put a chain between the outriggers, kind of loosely.
On day two, that chain was tight.
In your case, migginsbros, it's not too late to put a chain or a ratchet on it. Now, not next time.
 

Migginsbros

Well-known member
2,211
6,739
113
Location
Berlin-Germany
In your case, migginsbros, it's not too late to put a chain or a ratchet on it. Now, not next time.
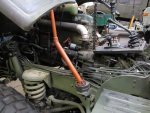
Of course, but in this case the backhoe is already installed. The pictures are from earlyer days. SEE Schubrohrmanschetten Endres 005.jpg SEE Schubrohrmanschetten Endres 011.jpg SEE Schubrohrmanschetten Endres 014.jpg SEE Schubrohrmanschetten Endres 016.jpg SEE Schubrohrmanschetten Endres 015.jpg
But to get further with the cab tilting story we drive the SEE to a Truck garage in the neighborhood, perfectly prepared, the chapter from the TM with
the brackets and lot off DOT5 silicon brakefluid with the SEE.
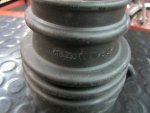
Task was to change the 2 Rubber boots on the drive shafttubes.endres zurueck 008.jpg We cant do this job ourself because you have to get the rearend out so that they can change the boots in one piece. We had no opportunity to hang the chassis on a crane in our garage.
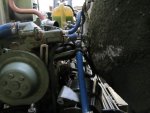
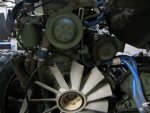
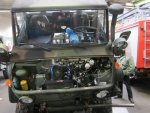
Unfortunatly the mechanic did not follow our advice and used some laying around brackets (maybe from a 403).SEE Schubrohrmanschetten Endres 019.jpg
so the cab could not be tild as perfect as it should and plenty of extra work with some collateral damage was the result.
For example with the SEE brackets the generator stays in place with no damage to the gatorcoat or the radiator.schubrohrmanschetten endres.jpg SEE Schubrohrmanschetten Endres 012.jpg

Fortunately they get everything back in place, we assembled all the detached parts and with a little paintjob everything is working fine.
 
Last edited:

BigBison

Member
317
1
18
Location
Yampa, CO
Every time I get out of a FLU, I swear imma order earmuffs, passenger seat's the worst. ;) Too many Dead shows in my past, for the FLUs not to make my ears set to ringin' after 20 minutes or so!
 
Top
AdBlock Detected

We get it, advertisements are annoying!

Sure, ad-blocking software does a great job at blocking ads, but it also blocks useful features of our website like our supporting vendors. Their ads help keep Steel Soldiers going. Please consider disabling your ad blockers for the site. Thanks!

I've Disabled AdBlock
No Thanks