• Steel Soldiers now has a few new forums, read more about it at: New Munitions Forums!

  • Microsoft MSN, Live, Hotmail, Outlook email users may not be receiving emails. We are working to resolve this issue. Please add support@steelsoldiers.com to your trusted contacts.

I have the Airlift bumper and brackets, but no nuts and bolts. Need sizes...

TOBASH

Father, Surgeon, Cantankerous Grouch
Steel Soldiers Supporter
Supporting Vendor
3,582
3,490
113
Location
Brooklyn, NY
Like it says.

I bought the bumper and the tire/wheel carrier that lowers to the ground (I would rather not be lifting 150lb wheels mid-Winter on slippery ice).

I bought the attachment support rods seperately.

I have no washers, lock washers, spring washers, nuts or bolts.

What bolts do I need? what washers? What nuts. What lock/spring washers? Is there a list?

I need size in length and diameter and thread pitch. I would prefer grade 8. I would prefer to know in advance because trying to fit without the proper bolts on a super heavy bumper without proper sizes available will suck.

Thanks,

T
 
Last edited:

LouWon

Active member
Steel Soldiers Supporter
410
94
28
Location
Michigan
I have 26 Grade 8 , 1/2 bolt holding mine to the frame
Go to Tractor Supply and get some spares, most of them are 3" or 3"1/2
Bolt depot, is also good, get the locking nuts and buy 100 pack of flat washers, you will need them somewhere
 

TOBASH

Father, Surgeon, Cantankerous Grouch
Steel Soldiers Supporter
Supporting Vendor
3,582
3,490
113
Location
Brooklyn, NY
Like it says.

I bought the bumper and the tire/wheel carrier that lowers to the ground (I would rather not be lifting 150lb wheels mid-Winter on slippery ice).

I bought the attachment support rods seperately.

I have no washers, lock washers, spring washers, nuts or bolts.

What bolts do I need? what washers? What nuts. What lock/spring washers? Is there a list?

I need size in length and diameter and thread pitch. I would prefer grade 8. I would prefer to know in advance because trying to fit without the proper bolts on a super heavy bumper without proper sizes available will suck.

Thanks,

T
I think I posted a list here somewhere but you'd have to search my posts. Someone else asked same question about a year ago.
check the parts manual. it gives all the sizes and lengths. search for bumper in the .pdf file.
I have 26 Grade 8 , 1/2 bolt holding mine to the frame
Go to Tractor Supply and get some spares, most of them are 3" or 3"1/2
Bolt depot, is also good, get the locking nuts and buy 100 pack of flat washers, you will need them somewhere
All excellent sources of information.

Now I need to lift a very heavy piece of steel into position. Will use my cherry-picker and gloves and hope I lose a minimum of skin.

THANKS one and all.

T
 

Mario

Active member
315
87
28
Location
Rio Rancho, NM
All excellent sources of information.

Now I need to lift a very heavy piece of steel into position. Will use my cherry-picker and gloves and hope I lose a minimum of skin.

THANKS one and all.

T
Good luck.
Let us know how it went -- that is assuming that you still have most/all of your digits and at least some skin to press the keyboard keys. :)
 

ohiohmmwv

Member
450
16
18
Location
Columbiana, Ohio
I lifted the bumper and rhino lift myself. Just lift one end up(with opposite end still on the ground),secure one bolt, then lift the other end, secure a second bolt. Then do the rest of the bolts. It wasn't too bad.
 

juanprado

Well-known member
Steel Soldiers Supporter
5,614
2,922
113
Location
Metairie/La (N'awlins)
unbolt the tire carrier from the base, mount base, and then later attach carrier. I also used milk crates and 2x4's to make a jenga set to hold bumper temp. Once a few bolts started, you are set.

Make sure bumper and brackets match. I ended up with a2 bumper and non a2 brackets. I have some pictures on my thread. My solution was extra washers as I did not have a hole saw and I did not want to remove and do double work. I just added 3 fender washers to the inside to each bolt one by one.
 

Mario

Active member
315
87
28
Location
Rio Rancho, NM
Use a tractor, forklift or even engine lift.
****, use jack stands and take air out of the tires if you need fine adjustments or even car jack to raise the front a bit.
 

Mario

Active member
315
87
28
Location
Rio Rancho, NM
Nevermind the tractor idea -- just saw that you're in Brooklyn.
Where in Brooklyn? I haven't lived there in over a quarter of a century, but may still have a contact or two in mechanic shop.
 

TOBASH

Father, Surgeon, Cantankerous Grouch
Steel Soldiers Supporter
Supporting Vendor
3,582
3,490
113
Location
Brooklyn, NY
Nevermind the tractor idea -- just saw that you're in Brooklyn.
Where in Brooklyn? I haven't lived there in over a quarter of a century, but may still have a contact or two in mechanic shop.
Sheepshead Bay is where my office is located. Will be living in Far Rockaway in Queens later this year.

Thanks.

T
 
Last edited:

Mario

Active member
315
87
28
Location
Rio Rancho, NM
Sheepshead Bay is where my office is located. Will be living in Far Rockaway in Queens later this year.

Thanks.

T
Far Rockaway you say? I was stationed at Fort Tilden.
I lived in Bensonhurst and Bay Ridge before parents bought house in Staten Island.
****, I miss Brooklyn.
 

NormB

Well-known member
1,220
72
48
Location
Cloverly,MD
Use a tractor, forklift or even engine lift.
****, use jack stands and take air out of the tires if you need fine adjustments or even car jack to raise the front a bit.
this:

IMG_0332.jpg

Just a couple of ratchet straps. Work great.

Now, a question.

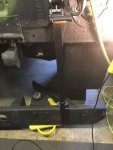
Short of having an actual set of instructions for this installation, IN WHAT order do components get assembled? As it stands, I can't get the bumper up high enough to engage any of the four cross-bolts on the the frame 9L or R), and I can't get the bracket forward enough to insert the frame bolt/rubber isolator (mount, resilient in Milspeak) either, so it looks like the brackets have to come loose.

I DID manage to get the long angle pieces onto the frame and I have a set of jack stands under the bumper in case anything breaks free (those mudflaps had to come off too, interference from the side arms).
 

Action

Well-known member
3,576
1,557
113
Location
East Tennessee
Put the 4 angled pieces on last. They only reinforce the bumper. They don't hold it on.
Bolt the 4 brackets and spacers to the frame rail ends. Leave bolts loose. Lift one end of the bumper off the ground and stick a bolt and nut in one of the holes. Then go over and lift the other side and do the same. Then get the rest of the bolts, nuts, and washers installed. Put in the angled braces and tighten them all down.
Or look in the TM for rear bumper replacement instructions.
 

NormB

Well-known member
1,220
72
48
Location
Cloverly,MD
Put the 4 angled pieces on last. They only reinforce the bumper. They don't hold it on.
Bolt the 4 brackets and spacers to the frame rail ends. Leave bolts loose. Lift one end of the bumper off the ground and stick a bolt and nut in one of the holes. Then go over and lift the other side and do the same. Then get the rest of the bolts, nuts, and washers installed. Put in the angled braces and tighten them all down.
Or look in the TM for rear bumper replacement instructions.
Thanks. And I did. From TM whatsis 20-2:

  1. Install rear bumper (12) on inner mounting brackets (8) with four washers (7), capscrews (17),washers (7), and locknuts (6). Tighten locknuts (6) to 90 lb-ft (122 N•m).
  2. Install rear bumper (12) on mounting brackets (5) with four washers (4), capscrews (18),washers (4), and locknuts (3). Tighten locknuts (3) to 90 lb-ft (122 N•m).
So you see, had I followed the directions from the MANUAL - which I had already perused - I'd be exactly where I'm at NOW, with the bumper as I picked it up, with the mounting plates torqued into place, not fitting and all.

Thing about forums, community, is there's typically someone around who has actually DONE the job and can give a handy pointer or two.

I see this comment about "look in the TM" a lot.

It's not as helpful as most people think.

Just sayin'.

Thanks again.
 

Action

Well-known member
3,576
1,557
113
Location
East Tennessee


Thanks. And I did. From TM whatsis 20-2:

  1. Install rear bumper (12) on inner mounting brackets (8) with four washers (7), capscrews (17),washers (7), and locknuts (6). Tighten locknuts (6) to 90 lb-ft (122 N•m).
  2. Install rear bumper (12) on mounting brackets (5) with four washers (4), capscrews (18),washers (4), and locknuts (3). Tighten locknuts (3) to 90 lb-ft (122 N•m).
So you see, had I followed the directions from the MANUAL - which I had already perused - I'd be exactly where I'm at NOW, with the bumper as I picked it up, with the mounting plates torqued into place, not fitting and all.

Thing about forums, community, is there's typically someone around who has actually DONE the job and can give a handy pointer or two.

I see this comment about "look in the TM" a lot.

It's not as helpful as most people think.

Just sayin'.

Thanks again.
I did give pointers as to how I did it, in post #14 above. I added the option of doing it the way the TM states. My way was a lot easier. I have put on many rear bumpers, and the steps I listed seem to be the easiest way to do it.

I just read the entire TM directions. Those ones you listed are what is done AFTER the brackets are on the frame. It doesn't mean bolt the bumper to the brackets on the ground, then lift the entire thing up.
 
Last edited:

juanprado

Well-known member
Steel Soldiers Supporter
5,614
2,922
113
Location
Metairie/La (N'awlins)
The reason you see them sold with all the brackets installed is they torch them off to remove. I don't think that is the easiest way to install.

The main bracket with the body mount needs to go on first as that takes alignment with the body mount to hole and set that bolt first , then the horizontal bolts to the brackets, then bolt a few to the bumper itself. A ratchet strap is a good extra hand. I used one of those aluminum Christmas special workbenches with some wood scraps to hold it for me while I jiggled it together. Also I removed the tire carrier from the pivot bracket to save dead weight. There are some instructions in my thread as I ran into a2 bumper with the wrong body main bracket and was also attempting to do mudflaps, tire carrier, reinforcement plate and bumper at the same time and the OE length for all the bolts did not work. I also used original shackle mounts as I was not going to pay $200 for tear drop when the original works just as well for less than 1/4 the price.

It was a jenga assembly game.

I picked up a pintle extension cheap and that is on my list to go back and jenga that in.....
 
Last edited:

NormB

Well-known member
1,220
72
48
Location
Cloverly,MD
The reason you see them sold with all the brackets installed is they torch them off to remove. I don't think that is the easiest way to install.
The main bracket with the body mount needs to go on first as that takes alignment with the body mount to hole and set that bolt first , then the horizontal bolts to the brackets, then bolt a few to the bumper itself. A ratchet strap is a good extra hand. I used one of those aluminum Christmas special workbenches with some wood scraps to hold it for me while I jiggled it together. Also I removed the tire carrier from the pivot bracket to save dead weight. There are some instructions in my thread as I ran into a2 bumper with the wrong body main bracket and was also attempting to do mudflaps, tire carrier, reinforcement plate and bumper at the same time and the OE length for all the bolts did not work. I also used original shackle mounts as I was not going to pay $200 for tear drop when the original works just as well for less than 1/4 the price.
It was a jenga assembly game.
I picked up a pintle extension cheap and that is on my list to go back and jenga that in.....
Well, I have the tear drops, and the tears/tear drops to go with the whole process.

Thanks for chiming in, Juan. I have your comments on this process from October 2016 open in another tab and was reading through it.

This hobby teaches much. Humility, patience, hate, love, anger, remorse, joy, tolerance (and tolerances) and much more; sometimes on the same day.

I got back into some grubby clothes after going to dinner w/wife and daughter last night, sometime around 8PM and two hours later had everythign bolted up.

Except for Rhino spare carrier.

D'oh!

Realizing I was just too darned tired to make sense of it, I turned off the lights, leaving a dozen some odd tools and many more bolts, washers, parts laying about the garage floor I'd intended to install/put away.

One more cup of coffee and I'm back into it. Several back to back shifts this week and wife going in for surgery on Thursday then I work next Fri-Sat-Sun... Tue. Hope to get this part of the project done today so I can get the truck out for a ride, move on to something else (bleed brakes, change fluids in hubs and diffs still to do. 200 generator? Wiring antennas and ham radio?)

There's always something.

I'll post pictures.

Thanks, everyone.
 

juanprado

Well-known member
Steel Soldiers Supporter
5,614
2,922
113
Location
Metairie/La (N'awlins)
Oh, I did not even think of the tear drops as I did not have them and they go to the main bracket. Another step in the lego set....

Hang in there, well worth the hassle and cost in my opinion.

All the best to your wife!
 

NormB

Well-known member
1,220
72
48
Location
Cloverly,MD
Thanks. Sure she'll be okay, but it's yuge.

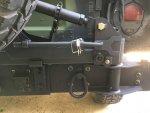
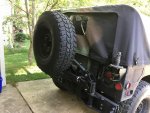
Anyway, got things mounted up today:

IMG_0336.jpgIMG_0335.jpg

Few details to work out like putting a "leash" on the safety pin.
 
Top
AdBlock Detected

We get it, advertisements are annoying!

Sure, ad-blocking software does a great job at blocking ads, but it also blocks useful features of our website like our supporting vendors. Their ads help keep Steel Soldiers going. Please consider disabling your ad blockers for the site. Thanks!

I've Disabled AdBlock
No Thanks