• Steel Soldiers now has a few new forums, read more about it at: New Munitions Forums!

  • Microsoft MSN, Live, Hotmail, Outlook email users may not be receiving emails. We are working to resolve this issue. Please add support@steelsoldiers.com to your trusted contacts.

6CTA8.3 engine rebuild for Sur Móvil

Mos68x

Active member
827
36
28
Location
Seligman,AZ
71CB8454-BE49-411C-9501-2661553680AA.jpg705FC9CE-A287-4412-A37E-EFED541C5F6F.jpg6D1DEA03-E028-4CD8-BF13-793A6AC111DA.jpg54F2D670-D043-462A-B07F-C31217E1414E.jpgEE39F167-42EA-4329-9660-BEF4D04F5EF5.jpg

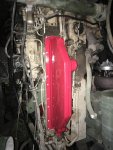
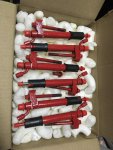
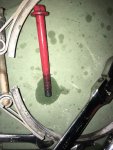
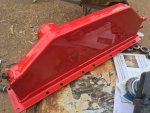
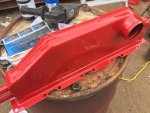
Got distracted and forgot to update. The last time I had it running there was no knock, just a definite miss. Bought rebuilt injectors from Oregon Fuel Injection and I actually just finished installing them today. After dealing with the rust that had seized the old ones in place I wanted to put some powder on the new ones, as well as the after cooler. Tried starting it, but the #6 injector was leaking past the injector because of stripped retaining bracket bolt threads. I’m guessing it’s M6x1.5 threads, but I still don’t have a way to get into town to get some temporary bolts, since they don’t carry flange head bolts. Need to replace all 6 injector bolts and all the bolts for the aftercooler as well.
 
Last edited:

Mos68x

Active member
827
36
28
Location
Seligman,AZ
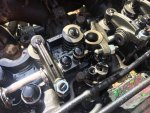
Got the bolts replaced, they were M8s not M6s. Got it running, still had a slight miss, but as I let it warm up it went away. By the time I drove into town (12mi) she was running good again. Did a couple things in town and started on my way back. Within a mile there was a ‘crack’ and then she ran like total poop again. Pulled over and took a look at the motor, had the #5 valve cover bolt moving with the engine rpm, the #5 injector was blowing past the crush washer. Took the valve cover off to see this nasty mess.
381D20CD-7F69-48E6-9D39-216C63C87F3D.jpg77EEAD4B-F12A-4C82-B97F-A348DA799075.jpg
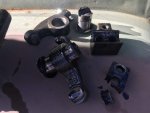
Pivot shaft broken, upper clamp half broken, lower clamp half gouged, one rocker arm gouged, and one bent push rod. I’ll have to drop the oil pan to be sure there are no chunks of tappet in the there. If there are I’ll have to figure out how to fix that as well.
 

74M35A2

Well-known member
4,145
330
83
Location
Livonia, MI
Bummer. You have the worst mechanical luck. 8.3’s are nearly bulletproof. That one 12 point bolt looks like it is backed out?
 
Last edited:

Mos68x

Active member
827
36
28
Location
Seligman,AZ
Bummer. You have the worst mechanical luck. 8.3’s are nearly bulletproof. That one 12 point bolt looks like it is backed out?
Yeah tell me about it, story of my life lol. The valve cover bolt was still tight but the two bolts that hold then entire rocker arm assembly had come loose. I think it was those two loose bolts that broke the pivot shaft but I’m goin to drop the oil pan just to be sure, last thing I want to do is wipe out my camshaft because of a broken tappet. And no, I wasn’t the one with a cracked block, if I do have a crack I still don’t know about it lol.
 

74M35A2

Well-known member
4,145
330
83
Location
Livonia, MI
Should just be the top end that fell apart. Best thing to do is to identify why it failed. Seems like the bolt backed out, so I’d get replacement parts, take them all apart, and torque them all to spec, paint stripe them each when done, and reassemble.

Distractions during assembly can be catastrophic and cause something to be missed. Keep your cell phone in the house, and tell wife to not call your name until you are done. The paint stripe works well to identify what is done, in case you get pulled away.

I get discount on Cummins parts, but aftermarket should work well. Looks like you would only need a valve cover gasket?
 
Last edited:

Mos68x

Active member
827
36
28
Location
Seligman,AZ
Should just be the top end that fell apart. Best thing to do is to identify why it failed. Seems like the bolt backed out, so I’d get replacement parts, take them all apart, and torque them all to spec, paint stripe them each when done, and reassemble.

Distractions during assembly can be catastrophic and cause something to be missed. Keep your cell phone in the house, and tell wife to not call your name until you are done. The paint stripe works well to identify what is done, in case you get pulled away.

I get discount on Cummins parts, but aftermarket should work well. Looks like you would only need a valve cover gasket?
The bent pushrod and Will Wagner’s advice is what has me prompted to drop the pan and look for chunks, hopefully I find none. I’ll PM you with Cummins PNs that I’ll need if you think you can get them cheaper. Fortunately I just got some paint markers so I can use those. If I disassemble all the cylinders I might as well check for valve lash while I’m at it too. I need to drop the oil pan on the red car as well so I can check the rod journal size since RockAuto sent me the wrong size bearings. I’ll probably do that first since that should be a quicker fix.
 

Mos68x

Active member
827
36
28
Location
Seligman,AZ
Lol a steam engine has more torque than this thing does right now lol

simp, although I would love to have the bigger engine for its low end torque I would still far rather have the fuel economy of the 8.3L. Besides I already have the rebuild kit for the 8.3, I just have to go through the kit and make sure it is all there. I’ll probably have to call Cummins anyways to make sure that the kits I do have is correct. From a previous call to them it sounds like there are different CPL codes for these engines, but don’t ask me what that means as I still have no idea.
 

Mos68x

Active member
827
36
28
Location
Seligman,AZ
Does anyone know how heavy the hood assembly is? I have any idea on how to get my head off the engine without hurting myself or anyone else, but I’ll need the hood out of the way to do it.
 

74M35A2

Well-known member
4,145
330
83
Location
Livonia, MI
More large than heavy. I did mine with 4 adults and 30 seconds, 2 on each side, and no one strained at all. Just have to police people not to pull it toward them after they lift. I HATE when people do that.
 

simp5782

Feo, Fuerte y Formal
Supporting Vendor
12,125
9,386
113
Location
Mason, TN
If you have a forklift its easy. Pull the cross springs out and lift it out. 2 good size adults can handle it. Jeff and I can lift one together and install it.

Since you have the hood off it would be a good time to order those bumper extensions so you can add a winch in the future the dang hood has to come off for that too practically.
 

Mos68x

Active member
827
36
28
Location
Seligman,AZ
Thanks guys, think I’ll be making an adapter to use my crane that is mounted in the bed to lift the head (and maybe the block) out for the rebuild. Unless I find a different spot up front to use, I’m thinking of using the front tow mounts for lifting that head off. Right now the hood is in the way for that....unless I can find a different spot closer to the radiator.
 

Mos68x

Active member
827
36
28
Location
Seligman,AZ
Does anyone have any ideas for removing the hood in a one-man operation? And no I do not have a forklift, or access to one, otherwise I wouldn’t even be asking this **** question.
 

simp5782

Feo, Fuerte y Formal
Supporting Vendor
12,125
9,386
113
Location
Mason, TN
Does anyone have any ideas for removing the hood in a one-man operation? And no I do not have a forklift, or access to one, otherwise I wouldn’t even be asking this **** question.
Pull the hinge springs. Pull the 4 plate mounting bolts 2 people can lift it off at the fender wells and back the truck from under it. Like a push press type lift. Unless you already disabled the truck


Sent from my SM-G935P using Tapatalk
 

74M35A2

Well-known member
4,145
330
83
Location
Livonia, MI
Apology, Simp can’t count to one.

Unbolt the front cross mount, go 40mph, and slam on the brakes. It will come off.
 

simp5782

Feo, Fuerte y Formal
Supporting Vendor
12,125
9,386
113
Location
Mason, TN
Apology, Simp can’t count to one.

Unbolt the front cross mount, go 40mph, and slam on the brakes. It will come off.
No sorry I just didnt read it i just saw remove the hood without a forklift while on my phone. Um is there a reason you need to remove the hood? just loosen your front bracket bolts down between the frame and jack it up. Install longer bolts. This will allow the hood to go further forward without the support cables. I dunno why the hood needs to come off for an in frame rebuild though. You should be able to pick the head up and set it off to the side of the truck. It is no different than doing a radiator R & R in one.

OR you can also do it my way I said in the other post just use some high lift jacks on some blocks to lift it up on 3 points. each Side and below the grille in the center then back out. Putting the tires down to flat makes this a little easier on height but it throws the weight off some
 

Csm Davis

Well-known member
4,166
393
83
Location
Hattiesburg, Mississippi
Sounds like you need to make an A frame or other type over head lifting assembly. Doesn't have to be expensive just make it twice as strong as you think it needs to be.
On a separate note do you have the part numbers on the engine rebuild kit for the 8.3L?

Sent from my SM-G930V using Tapatalk
 
Top
AdBlock Detected

We get it, advertisements are annoying!

Sure, ad-blocking software does a great job at blocking ads, but it also blocks useful features of our website like our supporting vendors. Their ads help keep Steel Soldiers going. Please consider disabling your ad blockers for the site. Thanks!

I've Disabled AdBlock
No Thanks