• Steel Soldiers now has a few new forums, read more about it at: New Munitions Forums!

  • Microsoft MSN, Live, Hotmail, Outlook email users may not be receiving emails. We are working to resolve this issue. Please add support@steelsoldiers.com to your trusted contacts.

What have you done to your FMTV or LMTV today

Awesomeness

Well-known member
Steel Soldiers Supporter
1,813
1,518
113
Location
Orlando, FL
Added the quick disconnect for the little 12v crane wench.

*I'm still learning to use my "metal glue gun" as you can tell

View attachment 765644

View attachment 765645
Picture is hard to tell, but crappy looking welds are often the result of contamination or poor shielding. Be sure to grind/wire brush all the paint and rust off the metals before you weld them. If your welder has a shielding gas bottle, be sure it's turned on and adjusted properly, and if not, that you are using flux-cored wire (which produces its own shielding as it melts).
 

Third From Texas

Well-known member
2,766
6,498
113
Location
Corpus Christi Texas
Picture is hard to tell, but crappy looking welds are often the result of contamination or poor shielding. Be sure to grind/wire brush all the paint and rust off the metals before you weld them. If your welder has a shielding gas bottle, be sure it's turned on and adjusted properly, and if not, that you are using flux-cored wire (which produces its own shielding as it melts).
Thanks for the tips.

Yeah, it was prepped properly, I had never attempted a vertical weld before. Plus this was the first time I had to crawl into a somewhat tight space to weld (and the back side was *really* tight). It didn't help that the fiberglass box was right behind my surface (I was trying not to start a fire, I've seen Vette's cooked up that way).

This is an arc weld (I'm just learning). The rig is a arc/tig/stick box (no argon bottle yet, though).

:)
 

FloridaAKM

Well-known member
2,699
392
83
Location
Gainesville, Florida
You could go the route of just replacing the open area with a turrent cover, but those things are made of unobtanium for some reason. Nice job on your truck, I need to follow suite after I get the air bags in & replaced.
 

Floridianson

Well-known member
Steel Soldiers Supporter
7,409
2,503
113
Location
Interlachen Fl.
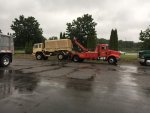
So did you make it out of that slop by yourself. I have a mud pit here in my town that gathers lots of people and they do run a big loader to help people out. My worry is the clean up that might take days to get all the mud cleaned out of the nooks and crannies of the 1088. My local mud pit is called Hogwaller and gets thousands of trucks / ATV's some weekends. Has a large mud pit and 1000 acres for ATV's.
 
Last edited:

fuzzytoaster

Well-known member
Steel Soldiers Supporter
4,300
3,132
113
Location
Fort Worth, Texas
In the final phase of this M1081. It came a long way and should get the final brown and black Sunday. The truck came with a canvas turret cover but the hardware (assuming gun ring) is missing. Does anyone have photos of that setup?
Black and brown done. Phew..on to the next one! :tank:
 

Attachments

fuzzytoaster

Well-known member
Steel Soldiers Supporter
4,300
3,132
113
Location
Fort Worth, Texas
That’s a nice looking truck.


Sent from my iPhone using Tapatalk
Man of few words

M1081 LVAD
Thank you! The next one is going dark forest. I've not done this color before so we will see how it comes out. I know a few other members have done it and it looks good so there's really not much experimenting happening besides just doing it and maybe adding some black for contrast. :jumpin:
 

Attachments

FloridaAKM

Well-known member
2,699
392
83
Location
Gainesville, Florida
My air bags for the cab came in today for the M1081 from perfection equipment. It took almost seven weeks, Jeff in the parts department was a big help, but this should clear up the rest of the big leaks on the truck. Tomorrow will be installation day as the daily rainstorms are forecast to stop for a couple of days. Now, I should be able to go drive around with the truck a bit more & find out if there are anymore surprises that I didn't know about.
 

FloridaAKM

Well-known member
2,699
392
83
Location
Gainesville, Florida
Today was a great day to be home & work on the truck, no rain & normal summer hot weather; bug count was low too. The drivers side air bag had been removed last year, so removing it was a breeze. Replacing the bag into the assembly wasn't too bad & went well; reinstalled back into the truck & ready for the right side air bag removal. Several bolts were rusted STUCK on this assembly, so it was a bear to get them loose. To add insult to injury, the air line nut(it has a T on this side) had a split in it when found. Even the old air bag nuts were severely rusted to the studs, to the point that a 6point wrench or socket just spun on them. It took a while to tear this mess down & put it all back together, but it was accomplished. Putting the air lines back on, the brass nut split in two, so I put a couple of plastic ties on it to hold it to move the truck back to its parking location. It actually held & didn't leak(yes, I will replace it) for the 15 minutes I ran it. When initially running the startup, the cab airbags inflated & moved the cab upward a few inches, which I have never experienced before. Upon shutdown, there was no longer that loud hissing of the airtanks dumping thru the leaking air bags. Now, the system actually works as designed & the gauges show higher air pressure retained in the tanks during operation & after shutdown. I would call this a successful repair session on the airbag system.
 

Third From Texas

Well-known member
2,766
6,498
113
Location
Corpus Christi Texas
Started tearing down the generator for cleaning and re-fit today.


Found the two exhaust leaks that had created most of the soot (just exhaust gasket and a missing bolt).


Took dimensions so I can fab up a head pressure relief rod (the lever and handle are both there, just missing the rod).


The shut-off solenoid is fried (the key won't shut off the engine but the manual STOP lever works). I'm going to toss the entire works and fab in a two-way solenoid so no manual interaction with the engine will be required (planning ahead for when the remote panel is relocated into the habitat).


Did initial dimensions for fab work of the new frame. I know where it will go on the truck, but until I get an ambulance body for the hab I can only sling the generator in along the side of the truck frame to mount the gen box.


And I have initial dimensions for the box for materials (will be sound dampened enclosure with a cooling fan).


Will de-grease and de-soot the entire engine and charging head while I wait on parts to arrive.


https://www.youtube.com/watch?v=kRvFCKcg5vA
 

Ohiobenz

Well-known member
Supporting Vendor
464
267
63
Location
Seville, OH
They are Freightliner Cascadia power and heated mirrors. They are running close to $300 on the Bay. When I bought mine they were almost $400.
I sell a full installation kit for them now; mount plates, wiring harness and a 10min timed switch for the heated mirrors. PM me if you need more info.
 

Nukizer

New member
15
3
3
Location
Norwich, CT
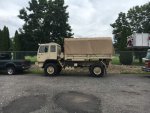
I just received my 2003 M1078A1 today. I had it delivered to my work. After work I removed the 4 AGM batteries and threw in a pair of group 31 batteries and it fired right up. Then I went home haha5342D9C8-F372-4072-8229-E5B988113F31.jpgC6C65720-1626-4772-BF89-C598381DA2E0.jpg
 
Top
AdBlock Detected

We get it, advertisements are annoying!

Sure, ad-blocking software does a great job at blocking ads, but it also blocks useful features of our website like our supporting vendors. Their ads help keep Steel Soldiers going. Please consider disabling your ad blockers for the site. Thanks!

I've Disabled AdBlock
No Thanks