• Steel Soldiers now has a few new forums, read more about it at: New Munitions Forums!

  • Microsoft MSN, Live, Hotmail, Outlook email users may not be receiving emails. We are working to resolve this issue. Please add support@steelsoldiers.com to your trusted contacts.

New pyrometer & boost gauge pod install

US6x4

Well-known member
Steel Soldiers Supporter
1,233
2,242
113
Location
Wenatchee, WA
In preparation for a turbo install I added a pyrometer and a manifold pressure gauge to my truck in a gauge pod I designed to fit center dash between the defroster outlets. I wanted my gauges to be within easy viewing and I also wanted the add-on to look pretty stock. Below are the step by step details of what I did.

Initially I planned to go with Hewitt gauges since others have had good results with them, they can be had in 24 volt form and they do not require outside power. I measured the dash, windshield divider post, and defrost outlet screw holes and then created the gauge pod and gauges in the 3D world to see how it would look.
20200106_160613.jpg
EGT POD ASSY MK2_3.JPG

It looked pretty sharp in SolidWorks so the next step was to print out a full scale flat pattern of the pod and transfer all of the lines to an unfolded cheez-it box for some Cardboard Aided Design...
20200114_171659.jpg


While shopping for the gauges I came across an NOS Stewart Warner pyro p/n 82334 (2005 manufacture) with a black face and white needle like our military dash gauges and that was too tempting to pass up. It ended up costing a bit more than the Hewitt gauges but now I have a semi-matching Stewart Warner setup. The pyro required an extension harness and the actual thermocouple which added to the cost. I also picked a current production SW manifold pressure gauge p/n 82321 (0-30 psi). With the gauges in hand and the cardboard gauge pod taped up I can start mocking up the install to find crashes and other things I need to change.

20200114_171452.jpg
20200114_171504.jpg
20200118_092728.jpg
20200118_093127.jpg20200118_092944.jpg
20200121_171508.jpg

On my first attempt the gauges sit too low and too deep so I made some adjustments to the model to get more height and depth and made another card board cutout. One point of concern is the tubing connection for the pressure gauge and its proximity to the windshield frame. I'm using Autometer 2234 Angle Rings for 2 1/16" gauges that angle the gauges at 15° toward the driver. This was a necessity to get enough clearance for the pyro gauge which was a very deep gauge. I don't have pictures of the second mockup but after adjustments were made it was a better fit for everything on the inside. Now it's time to get the gauge pod lasered out of some metal!
 

US6x4

Well-known member
Steel Soldiers Supporter
1,233
2,242
113
Location
Wenatchee, WA
Well, the corona virus freakout delayed the forming of the part from 1 week to 2 months so after a hefty wait the shear & brake guys got the flat pattern bent up using special roller dies. The gauge hole opening was so close to the bend on the front of the pod that even the roller dies could not get the metal to bend with the surrounding material like I was hoping for. I could have added a bend relief slot that would have to be welded up after the forming process, but instead I rolled the dice and then used a little hammer to coax the metal back into position.

20200404_073034.jpg
20200404_073048.jpg
20200404_073101.jpg
20200404_073129.jpg
20200404_073322.jpg
The gauge holes were not cut in an oval to allow for the gauges to be angled over 15° because I wanted to massage that in by hand to get a tight fit and then measure what the actual width needs to be.

20200508_153426.jpg

In the picture below you can see where the formed pod turned out different than what I intended. The flanges that screw down to the dash got bent with my dimension being used as an OD dimension instead of an ID dimension to the flanges ended up being a 16 GA. thickness too narrow. I had intended to mount the pod on top of the defrost outlets and that radius you see in the picture would be snud against the dash corner. Since the defrost outlet is also the same gauge material I ended up with a 16 GA. gap and the only choices are to have another pod made or mount the pod under the outlets - I chose the latter.
20200508_153441.jpg
20200508_153823.jpg
20200508_153837.jpg

Time to weld that baby up!
 

US6x4

Well-known member
Steel Soldiers Supporter
1,233
2,242
113
Location
Wenatchee, WA
Before I had the pod welded up I enlarged the gauge holes with the dremel tool and sand paper rolls to get the oval shape needed for the gauges to angle over. I also took some material off of the legs of the gauge mounting brackets since they would be angled over along with the gauges.

I used the sharp point on my calipers to scribe a line for where to cut and remove 7/16" worth of material.
20200517_115403.jpg
20200517_114959.jpg
20200517_121609.jpg

The gauge brackets had a unique shape to them so I put them back to back to trace the shape with a scribe and used the dremel cut-off wheels and sanding drums to make them the same contour.
20200517_120229.jpg

I ended up having to cut down the brackets twice to get them short enough.
20200517_115041.jpg
20200517_121709.jpg

My buddy Caleb did a fantastic job with his TIG torch and laid the beads super tight before sanding them down to look seamless. I wish I had pictures of the welding while it was happening.
20200521_094048.jpg20200521_094056.jpg
20200521_120811.jpg

Things are looking sharp!
 
Last edited:

US6x4

Well-known member
Steel Soldiers Supporter
1,233
2,242
113
Location
Wenatchee, WA
I tried on the gauge pod for size with the gauges mounted up and added some female wire ends for the gauge lights and gauge power. I used some Autometer 3214 red bulb covers to make the gauges illuminate red like the others. The SW pyro requires outside power which is a bummer but not a big problem. I ordered a Stewart Warner 829525-2D 24V to 12V resistor which mounts on the gauge and then I just run the normal 24 volt power wire to it.
The manifold pressure gauge required a few fittings to work so I ordered a Stewart Warner Oil Pressure Gauge Line Kit 365-ff installation set of brass fittings with compression ferrules.
20200521_121841.jpg
20200521_121912.jpg
20200522_153924.jpg

After I heated the tubing and put a bend in it without kinks I have just enough room to clear the windshield frame.
20200522_154124.jpg

Enough playing around - let's get these parts painted!
20200527_081650.jpg


Now we're getting into the part I don't like; how to route the wires and tubing into the dash. Here are the 2 options - horizontal hole or vertical hole...
20200527_091837.jpg

I actually stewed on this choice for a couple days because I had no idea how I would cut or drill a hole big enough with just a 1/2" gap right there and then I remembered that the windshield can fold forward! Duh... Now it made more sense to go with option #2 since it would not be blocked by the windshield frame and would not leak any water like a horizontal hole would. My wife had to help me remove the soft top and fold the windshield forward to access the front of that dash panel.

20200527_091950.jpg
20200527_171024.jpg
20200527_171032.jpg
20200527_171041.jpg
 
Last edited:

US6x4

Well-known member
Steel Soldiers Supporter
1,233
2,242
113
Location
Wenatchee, WA
I needed a grommet that was at least Ø1/2" I.D. and ended up with a 5/8" I.D. x 7/8" O.D. grommet and getting a 7/8" hole into the dash was not easy. Even with the windshield forward my hole saw and my drill bits were too short to reach so after trying a half-mangled hole with a drill bit I ended up using the dremel with a little tiny dentist looking burr bit - and that took a long time to complete...

20200527_191833.jpg
20200527_193735.jpg

The grommet fits nice and snug but all of the wire ends will not pass through it if it's installed first so the wires and tubing will go through the bare hole and then the grommet will get installed from the inside behind the instrument cluster - and everything has to go in a certain sequence.
20200527_193755.jpg


Everything assembled and ready for a trial fit:
20200528_133700.jpg
20200528_183110.jpg
20200528_165430.jpg
20200528_165353.jpg

Trial fit was good and now it's time for the icing on the cake! Decals!!!

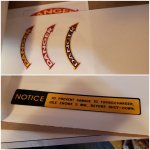
I got in touch with Gary at Left Coast Designs who happens to make military decals (member Polverone here on steel soldiers) and had him custom make the Notice decal and also shrink up the typical tachometer "DANGER" decals to fit a 2" gauge. They turned out sweet!
20200530_112037.jpg
20200529_090002.jpg

I aligned the Danger decal to be at the 1150° F point which seems to be the consensus as to when bad things start to happen for the NHC-250. Yikes!
20200529_091442.jpg
 
Last edited:

US6x4

Well-known member
Steel Soldiers Supporter
1,233
2,242
113
Location
Wenatchee, WA
Installation was a very tricky ordeal especially the coiled up air tubing. I have (2) smooth 18 GA. wires with female water proof ends, (1) 14 GA. Prestolite power wire which is kinda sticky and doesn't slide too well, (1) pyro wire harness, and the coiled air tubing to all go through the 7/8" hole in the dash all while trying to set the gauge pod in place. Took some patience.
20200529_145327.jpg
20200529_170615.jpg
Above is the mess of wires I had to work with. To install the grommet I poked the air tube through first, then the short pyro lamp wire, then the boost lamp wire, then the thermocouple harness wire, and lastly the sticky pyro power wire. Then I inserted the grommet into the metal hole in the dash and there is actually a fair amount of room behind the instrument cluster to work even with two hands. It's not easy but it's possible. Once the grommet was in place I attached the wye connector for the lamp wires to extra pigtail of circuit #40 (to come on with the other instrument lights) and attached the thermocouple wire to the 6' extension harness. The power wire which will go to the extra pigtail of circuit #27 (for keyed 24 volt power) will remain unhooked until I get the thermocouple installed in the exhaust manifold just in case powering it on without it will damage the gauge.
20200510_094741.jpg
20200530_111254.jpg

Here are some of the other pieces involved:
20200530_090724.jpg


And this is the final product!!! whew...
20200529_171703.jpg
20200529_171835.jpg
20200529_171741.jpg
 
Last edited:

US6x4

Well-known member
Steel Soldiers Supporter
1,233
2,242
113
Location
Wenatchee, WA
Bravo! Thanks for the post. Great work.
Thank you! I'm going to install the thermocouple probe into the exhaust manifold soon to see just how hot my NA engine runs then I'll have to get a turbo to make the other needle move...
 

J4Jenius

Member
44
31
8
Location
Iowa
I'm sure you have read all the forums here about the pros and cons of putting a turbo on a NHC 250 which doesn't have piston coolers. I have not read anything about someone who did it and caused their engine to fail. It is a great project. I look forward to seeing your results. Personally, I swapped out my NHC 250 for a NTC 350 and turned it up to 435HP with some other custom modifications. My M936 is a beast now. Based on your craftsmanship, whatever you decide to do it will be awesome. Remember to have fun doing it.
Thank you! I'm going to install the thermocouple probe into the exhaust manifold soon to see just how hot my NA engine runs then I'll have to get a turbo to make the other needle move...
I want one for my truck! How much?
 

simp5782

Feo, Fuerte y Formal
Supporting Vendor
12,125
9,384
113
Location
Mason, TN
I'm sure you have read all the forums here about the pros and cons of putting a turbo on a NHC 250 which doesn't have piston coolers. I have not read anything about someone who did it and caused their engine to fail. It is a great project. I look forward to seeing your results. Personally, I swapped out my NHC 250 for a NTC 350 and turned it up to 435HP with some other custom modifications. My M936 is a beast now. Based on your craftsmanship, whatever you decide to do it will be awesome. Remember to have fun doing it.
What are your boost numbers reading?
 

J4Jenius

Member
44
31
8
Location
Iowa
What are your boost numbers reading?
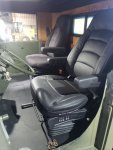
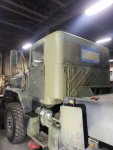
Unfortunately, FLUFFY is still a shop princess at the moment. She has a stage 3 Blaylock Switch Blade custom made for my engine. I have not loaded it up yet, but WOW she will spool up fast just tooling around parking lot. My engine work is pretty much done for now. I just extended the cab 10" and put it Bostrom air ride seats. Next on the list is paint the thing... I am sick of looking at old ugly paint.

Sorry about all the pictures... I want to show you what I've been doing.

Are you going to put in an air to air turbo air cooler in front of radiator? My NTC 350 has an after cooler, which means I had to lift the cab 2" for it to fit. Lifting cab is super easy. Also plan on moving your heater box, it will be in the way of the turbo more than likely.
 

Attachments

simp5782

Feo, Fuerte y Formal
Supporting Vendor
12,125
9,384
113
Location
Mason, TN
Unfortunately, FLUFFY is still a shop princess at the moment. She has a stage 3 Blaylock Switch Blade custom made for my engine. I have not loaded it up yet, but WOW she will spool up fast just tooling around parking lot. My engine work is pretty much done for now. I just extended the cab 10" and put it Bostrom air ride seats. Next on the list is paint the thing... I am sick of looking at old ugly paint.

Sorry about all the pictures... I want to show you what I've been doing.

Are you going to put in an air to air turbo air cooler in front of radiator? My NTC 350 has an after cooler, which means I had to lift the cab 2" for it to fit. Lifting cab is super easy. Also plan on moving your heater box, it will be in the way of the turbo more than likely.
I had an aluminum radiator, trans cooler, and intercooler setup on my 923 with a big cam. Simple bolt in swap. Done in about 3 hours. And I have a whole setup for sale.


Turbo may spool fast but when you get to loading it. Holding the hill is what makes it. Stock NTC400 pulls around 24lbs. I like the 35 to 38 range on mine.
 

J4Jenius

Member
44
31
8
Location
Iowa
I had an aluminum radiator, trans cooler, and intercooler setup on my 923 with a big cam. Simple bolt in swap. Done in about 3 hours. And I have a whole setup for sale.


Turbo may spool fast but when you get to loading it. Holding the hill is what makes it. Stock NTC400 pulls around 24lbs. I like the 35 to 38 range on mine.
Holy cow!!! How did you manage a 3 hour swap. It took me 3 weeks. I had a lot of stuff to change from the civilian engine. I'm really hoping the turbo let's me pull on hills.

How did your 923 drive on hills, and otherwise, compared to the NHC 250? Were you running super singles? Please tell me that it was awesome. I am getting anxious to run mine and see if all my efforts paid off. Because if it doesn't... there will be a 550 HP and new 16 speed automatic transmission in my future. (Maybe)

Tell me more about this "whole setup for sale"
Email me at Robin.jgolden@gmail.com please. This sounds interesting.
 

simp5782

Feo, Fuerte y Formal
Supporting Vendor
12,125
9,384
113
Location
Mason, TN
Holy cow!!! How did you manage a 3 hour swap. It took me 3 weeks. I had a lot of stuff to change from the civilian engine. I'm really hoping the turbo let's me pull on hills.

How did your 923 drive on hills, and otherwise, compared to the NHC 250? Were you running super singles? Please tell me that it was awesome. I am getting anxious to run mine and see if all my efforts paid off. Because if it doesn't... there will be a 550 HP and new 16 speed automatic transmission in my future. (Maybe)

Tell me more about this "whole setup for sale"
Email me at Robin.jgolden@gmail.com please. This sounds interesting.
The 3 hour swap was the radiator install to an aluminum setup.

My NHC250 with stock transmission was slow. My NHC250 with a CAT 16speed on 395 tires was pretty peppy running around empty. Would run up to 85mph. My NHC250 was modified though a good bit.

The big cam with the 16speed cat was pretty much in a league of its own. With 1600 tires on it it wouldn't miss a beat. In retrospect it is 360 miles from Bristol, TN to Hagerstown, MD. With the 923 grossing around 55k with a trailer it. The 250/16speed setup would do that I81 stretch in around 7.5 hours. In the 400/16 speed setup and with my 915 I can cover the same route in a little over 5hrs grossing more weight. I81 is a crap drive thru VA. Its up and down all the way.
 

J4Jenius

Member
44
31
8
Location
Iowa
Did you have the Caterpillar 7155 16 speed transmission? Did you have to move the transfer case to install it?
 

simp5782

Feo, Fuerte y Formal
Supporting Vendor
12,125
9,384
113
Location
Mason, TN
Did you have the Caterpillar 7155 16 speed transmission? Did you have to move the transfer case to install it?
Yes

Complete 7155 swap thread is here.

 
Top
AdBlock Detected

We get it, advertisements are annoying!

Sure, ad-blocking software does a great job at blocking ads, but it also blocks useful features of our website like our supporting vendors. Their ads help keep Steel Soldiers going. Please consider disabling your ad blockers for the site. Thanks!

I've Disabled AdBlock
No Thanks