• Steel Soldiers now has a few new forums, read more about it at: New Munitions Forums!

  • Microsoft MSN, Live, Hotmail, Outlook email users may not be receiving emails. We are working to resolve this issue. Please add support@steelsoldiers.com to your trusted contacts.

M1008 Build

WWRD99

Well-known member
Steel Soldiers Supporter
1,117
1,715
113
Location
York Pa
10 gallons. Theoretically should read 1/2. Not a good trend that 5 gallons indicated less than 1/4 and 10 gallons indicates greater than 1/2 but we’ll see what happens.
I have enjoyed reading up on everything you've done so far...truck will look new when you're done!! As far as the gauge goes you can adjust where it lands on the gauge by bending the bar the float is on in the tank sender... I see you have the bed off so it wouldn't take much to take it out and bend it up some to lower the gauge reading...would be a great time to do it too since you know exactly how much is in it...I wish I could've done that on mine when I replaced all that a month ago but with the bed on it would've taken way to much effort...mine reads half a tank with 5 gallons in it so it needs adjusted bad!! I forgot to say you can adjust for dead empty too by removing the float and putting some weight on the end and see if it does go to empty once it does read half with the tank now...would be a good thing to know where it actually reads on the gauge.
 
Last edited:
DIVE DIVE

Well-known member
217
778
93
Location
Chesapeake, VA
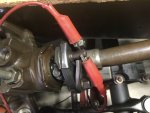
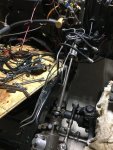
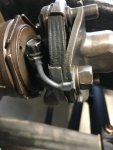
Apparently the steering shaft is supposed to be grounded through the steering box. When I jumper around the rag joint from the shaft flange to the steering box side flange it works fine, then if I remove the jumper it is intermittent. It also works when the steering wheel is locked with the key off, even without the jumper installed, I’m assuming because it’s grounding through the locking mechanism. Either way, when I looked the part up, sure enough, there is a wire or a metal bar that goes from one side to the other. No mention of it in the tech manuals, but there are a few other threads that I found that discuss it.
 

Attachments

INFChief

Well-known member
722
1,348
93
Location
New York
Apparently the steering shaft is supposed to be grounded through the steering box. When I jumper around the rag joint from the shaft flange to the steering box side flange it works fine, then if I remove the jumper it is intermittent. It also works when the steering wheel is locked with the key off, even without the jumper installed, I’m assuming because it’s grounding through the locking mechanism. Either way, when I looked the part up, sure enough, there is a wire or a metal bar that goes from one side to the other. No mention of it in the tech manuals, but there are a few other threads that I found that discuss it.
Are you going to make the jumper? First I’ve seen this - but I didn’t have to play around with that much. I haven’t thought about why the rag joint needs a jumper - but off the cuff it seems a bit odd to me since the steering column should be bolted to the chassis and the chassis is connected to ground(s). I’ve had plenty of old Chevys & Fords with rag joints and don’t recall any jumper.
 

DIVE DIVE

Well-known member
217
778
93
Location
Chesapeake, VA
Are you going to make the jumper? First I’ve seen this - but I didn’t have to play around with that much. I haven’t thought about why the rag joint needs a jumper - but off the cuff it seems a bit odd to me since the steering column should be bolted to the chassis and the chassis is connected to ground(s). I’ve had plenty of old Chevys & Fords with rag joints and don’t recall any jumper.
I’m not sure how I’m going tackle this yet. It is certainly an interesting design. The grounding path for the horn relay travels (electrically, not physically) through the steering shaft, not the steering column itself. So it will either find a path through the upper or lower bearings, or it can work through the locking plate when the wheel is locked with the key position. But the only real ground path that I can see, which sees continuity regardless, is through the rag joint, through the steering box, to the chassis. The drawings don’t address the grounding path, they just depict a generic ground symbol. This setup is fairly common in my research, even in Fords. Newer cars that I’ve seen use a ribbon type device that coils and uncoils as you turn the wheel.
 

DIVE DIVE

Well-known member
217
778
93
Location
Chesapeake, VA
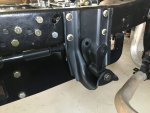
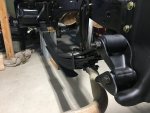
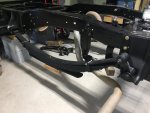
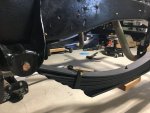
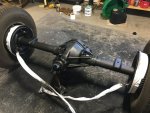
Finally got all my spring bushings in the mail today. Today I got the rear spring shackle hangers installed with some new 7/16-14 grade 8 fasteners and I was also able to get the rear springs installed. I went ahead and drilled everything out on the frame to 7/16” since that’s what the ORD drop shackles will need when I get around to doing the lift in the future. Now I just need to finish painting the axle and get the shackle flip kit ordered so I can get the rear axle back underneath her and rear driveshaft installed!

If you look closely at the first pic you can see where I took the opportunity to do some re-work. The upper shackle bolt has to go inboard to outboard with the spring installed first. Otherwise the bolt hits the hanger on the frame. Dope.
 

Attachments

DIVE DIVE

Well-known member
217
778
93
Location
Chesapeake, VA
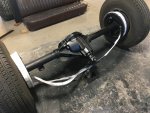
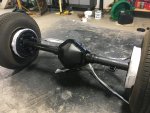
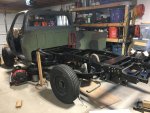
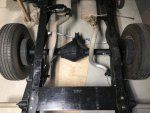
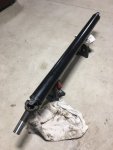
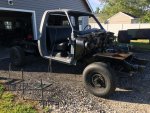
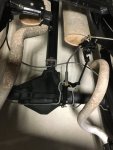
Despite the rear axle not actually being bolted to the leaf springs, I was able to roll her out and let her get a little sun today for the first time! I was also able to get the rear driveshaft installed and parking brake cables installed, along with a much needed cleaning with the backpack blower.

Rear u joints were in good shape so I cleaned them up in place.662D06C7-5DBF-42B5-8C17-6B5927A23516.jpegD498584E-3A87-440F-9660-1C2552547010.jpeg
 

ezgn

Well-known member
650
1,039
93
Location
Lake Elsinore Ca.
Despite the rear axle not actually being bolted to the leaf springs, I was able to roll her out and let her get a little sun today for the first time! I was also able to get the rear driveshaft installed and parking brake cables installed, along with a much needed cleaning with the backpack blower.

Rear u joints were in good shape so I cleaned them up in place.View attachment 867211View attachment 867210
You're going to have a fantastic truck when you're finished. I don't think you'll ever sell it, but it will be a valuable and desirable truck. Have you decided on the motor yet?
 
Last edited:
DIVE DIVE

Well-known member
217
778
93
Location
Chesapeake, VA
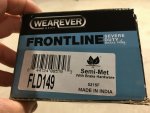
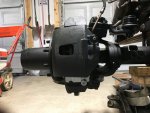
So I’m having some trouble sourcing parts in a reasonable amount of time. The day is apparently upon us that a guy can’t go down to an auto parts store and buy a pair of Dana 60 brake pads off the shelf. Also, I ordered two calipers and got one that was painted and one not painted so I asked them to order me another one to see if that one would be painted… both were Bendix parts though so at least that was good. One had a parts kit, the other was missing parts. The part that the guy ordered for my master cylinder came in as a Chinese new master cylinder so I said “no thanks”. I have a hard time turning in a Bendix master cylinder and getting a Chinese one in return. So again, I asked for another (reman) unit. What’s the deal with the 1605/1925 number that is supposed to be on the part that I can’t seem to find, or isn’t there? They are the same bore diameter and the ports are the same size, so what’s the difference? Both say JB8 brake code…
 

DIVE DIVE

Well-known member
217
778
93
Location
Chesapeake, VA
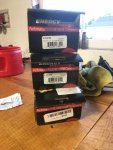
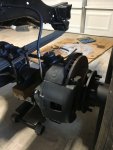
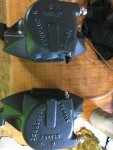
We’ll I was able to finally to make some progress after driving all over half the county. Pads I had to get from auto zone, and the rear I got from oreillys. I had to order two different passenger calipers before I got a painted one but there wasn’t any difference in the part numbers so you just get what you get I guess. Part numbers below.
Driver (left) caliper: 18-4167
Passenger (right) caliper: 18-4166
32.99 each
Master cylinder: 10-1982
26.99
This master cylinder is for ones “with stamping number: 1925 on master cylinder.”
Mine had no stamping on it.
 

Attachments

Last edited:

DIVE DIVE

Well-known member
217
778
93
Location
Chesapeake, VA
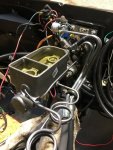
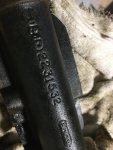
I didn’t use DOT 5 fluid. I’m not sure why there is DOT 5 in these things in the first place unless someone had the foresight to know they would be sitting around for decades at a time. DOT 5 was 12.99 for 11 ounces and I bought a whole gallon of DOT 3 for 22.49 so that was an easy decision. All components are “new” and the lines are all cleaned so I made the call to use DOT 3. When I got the reman master cylinder I noticed that it didn’t have the orifice in the front reservoir (rear brake reservoir) compensating port. I unscrewed it from the old core that I was returning and screwed it in the new reman that I got…not sure what that’s about. The pic below shows the old core after I already took it out and the new reman after I put it in. As a side note the actual casting numbers for the old core and new reman were the same (Bendix).
I got the steering shaft ground installed as well. Horn works perfect now every time.
 

Attachments

Last edited:

WWRD99

Well-known member
Steel Soldiers Supporter
1,117
1,715
113
Location
York Pa
I didn’t use DOT 5 fluid. I’m not sure why there is DOT 5 in these things in the first place unless someone had the foresight to know they would be sitting around for decades at a time. DOT 5 was 12.99 for 11 ounces and I bought a whole gallon of DOT 3 for 22.49 so that was an easy decision. All components are “new” and the lines are all cleaned so I made the call to use DOT 3. When I got the reman master cylinder I noticed that it didn’t have the orifice in the front reservoir (rear brake reservoir) compensating port. I unscrewed it from the old core that I was returning and screwed it in the new reman that I got…not sure what that’s about. The pic below shows the old core after I already took it out and the new reman after I put it in. As a side note the actual casting numbers for the old core and new reman were the same (Bendix).
I got the steering shaft ground installed as well. Horn works perfect now every time.
I got a NOS rebuild kit for my master and Booster a few months ago from a surplus store north of Harrisburg...Both were still in the brown military boxes...I'd rather rebuild mine than deal with parts right now...you're right about getting anything. If you do buy from the chain stores do the purchase online and go pick it up...they do 20-25% discounts for online purchases...some do free shipping a few days away.
 

Keith_J

Well-known member
3,657
1,323
113
Location
Schertz TX
The one benefit of DOT5 is long life. You discovered the only weakness, price. Because it isn't widely used outside of military, the supply chain makes it expensive.

Parts from local sources is a gamble for certain. I had to spend 15 minutes with an angle grinder on a wheel cylinder because the casting had excess material from foundry defect. And it was the last one on the shelf. No rebuild kit available and the old one would need major hone to bring into spec. Corrosion from not changing the brake fluid every 3 years. You see, brake bleeders are at the high point at the wheel cylinders to purge air. Saturated fluid drops water out which settles at the low point so even proper fluid replacement can leave water in the cylinders. I still remove cylinders and position bleeders at low point to sample the fluid.

Every DOT5 wheel cylinder I have serviced was perfect, even on M35s. No rust, water or damage. Just poor quality rubber parts lacking cup expander shoes as they were lowest bidder government parts. Replacement with proper civilian parts fixed the problem.
 

DIVE DIVE

Well-known member
217
778
93
Location
Chesapeake, VA
The one benefit of DOT5 is long life. You discovered the only weakness, price. Because it isn't widely used outside of military, the supply chain makes it expensive.

Parts from local sources is a gamble for certain. I had to spend 15 minutes with an angle grinder on a wheel cylinder because the casting had excess material from foundry defect. And it was the last one on the shelf. No rebuild kit available and the old one would need major hone to bring into spec. Corrosion from not changing the brake fluid every 3 years. You see, brake bleeders are at the high point at the wheel cylinders to purge air. Saturated fluid drops water out which settles at the low point so even proper fluid replacement can leave water in the cylinders. I still remove cylinders and position bleeders at low point to sample the fluid.

Every DOT5 wheel cylinder I have serviced was perfect, even on M35s. No rust, water or damage. Just poor quality rubber parts lacking cup expander shoes as they were lowest bidder government parts. Replacement with proper civilian parts fixed the problem.
That's great to know thanks! My son and I were able to get a great bleed done yesterday and when all was said and done we went through about 3 quarts of DOT 3. That's about a hundred and twenty bucks worth of fluid if I was using DOT 5!
 
Top
AdBlock Detected

We get it, advertisements are annoying!

Sure, ad-blocking software does a great job at blocking ads, but it also blocks useful features of our website like our supporting vendors. Their ads help keep Steel Soldiers going. Please consider disabling your ad blockers for the site. Thanks!

I've Disabled AdBlock
No Thanks