• Steel Soldiers now has a few new forums, read more about it at: New Munitions Forums!

  • Microsoft MSN, Live, Hotmail, Outlook email users may not be receiving emails. We are working to resolve this issue. Please add support@steelsoldiers.com to your trusted contacts.

Glow Plug Removal

Colonel Jim

New member
8
24
3
Location
South Boston, VA
I bought the glow plug removal tool from Black Dog Customs and it is a great tool. However, it pulled the case off the wire leaving the glow plug heating element still stuck in the cylinder head. The tool obviously placed a lot of pressure on the plug to cause the case to separate from the wire before the heating element could be pulled through. I assume the heating element is extremely swollen. My question is has anyone else had this problem and what do I do now?
 
  • Like
Reactions: OBX

MarkM

CODE BROWN...It's all going to sh~t !
Steel Soldiers Supporter
1,081
1,972
113
Location
WOBURN. MA.
Has happened to me. The tip can snap off and if you pull the injector you should be able to grab it from the inside using needle nose pliers then using a small punch to tap it in from the outside. I came up with an idea to use a cotton ball to put into the pre-cup under the plug tip to catch it if it falls.

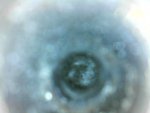
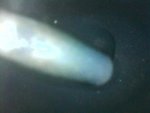
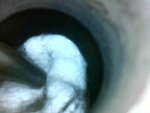
I bent up a cheap pair of long needle nose pliers to reach in the injector hole. If you have a inexpensive wifi bore scope it makes this process a lot easier. Below are some pics when I did mine.

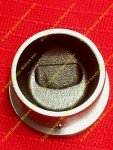
The tip will get caught in the pre-cup as it should not fit through the opening to get into the cylinder.

Many mechanics typically do not go fishing for the tip and just replace the plug. The tip without being connected to the rest of the glow plug bolted in the head will get heated way up from the fuel burning and will eventually break apart in tiny pieces and go into the cylinder and out the exhaust valve. I do not like the design but it is what it is. I was determined to remove the tip and was successful with the aid of the cotton ball bedding and lots of patients.

I feel your frustration.

Mark

20211108150957.jpg

20211106165428.jpg

20211106171410.jpg

s-l400 (74).jpg
 
Last edited by a moderator:

Colonel Jim

New member
8
24
3
Location
South Boston, VA
Thank you, Mark.
I have a borescope I can use in the injector hole for pictures and will try to post a few as this develops. One problem is the length of the wire sticking out of the glow plug hole. It is the full length of the glow plug and will need to be cut off if the tip doesn't come out of the hole. I have a pair of vise grips clamped on it now in a last-ditch effort to extract the tip after it soaked in WD40 overnight.

This is the easiest glow plug to get to, number 2 on the driver side, so I hope this is not the case with the rest of them. At my age, 81, climbing around the engine compartment is not fun!
Respectfully,
Jim
 

MarkM

CODE BROWN...It's all going to sh~t !
Steel Soldiers Supporter
1,081
1,972
113
Location
WOBURN. MA.
The worst one is number 8. One closest to the driver. No room at all and that is one I had fight with. Dont forget to put some copper never-seize on the plug threads.

I much much prefer the Cummins system as a single unit that heats the air in the intake. Simple,effective and easily worked on. I am not a fan of these v8 detroits for a multitude of reasons. I wish to hell they went with the Cummins 6BT as that wound have changed the truck..

Good luck with the repairs.

Mark
 

MarkM

CODE BROWN...It's all going to sh~t !
Steel Soldiers Supporter
1,081
1,972
113
Location
WOBURN. MA.
Make that cylinder 7. Drivers side far rear. No room.

Mark
 

Colonel Jim

New member
8
24
3
Location
South Boston, VA
It looks like the overnight soak in WD40 worked enough magic that it was pulled out with the vice grips and a small crowbar. No broken tips. Now I am starting on the back glow plug on the driver side and that unscrewed, but didn't move out of the hole but a few mm. Getting the extractor to accept the glow plug while standing on your head is not easy. I figured it can wait until tomorrow and I soaked it with WD40. It is at times like this I envy the octopus.
 

Colonel Jim

New member
8
24
3
Location
South Boston, VA
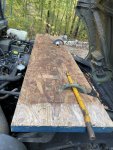
The WD40 and the extraction tool worked on the glow plug on the back driver side of the engine. It took some time to get it all the way out and I was sore from trying to balance myself over the top of the engine. Necessity is the mother of invention, or so it is said. I decided to make a platform that attached to the lifting rings so I could lay down on the engine without damaging it or me. Just need to add some padding and it will be fine.

With this rig, I finished replacing all the glow plugs on the driver side. Tomorrow it is the passenger side.

Engine Plank.JPG
 

Mainsail

Well-known member
Steel Soldiers Supporter
1,501
1,682
113
Location
Puget Sound, WA
My 1165 has the turbo, so the right side is a major pain in the butt. The driver side was easy from underneath, I did all four in no time.
 

Mullaney

Well-known member
Steel Soldiers Supporter
Supporting Vendor
7,724
19,777
113
Location
Charlotte NC
The WD40 and the extraction tool worked on the glow plug on the back driver side of the engine. It took some time to get it all the way out and I was sore from trying to balance myself over the top of the engine. Necessity is the mother of invention, or so it is said. I decided to make a platform that attached to the lifting rings so I could lay down on the engine without damaging it or me. Just need to add some padding and it will be fine.

With this rig, I finished replacing all the glow plugs on the driver side. Tomorrow it is the passenger side.

View attachment 883013
.
Nice work platform @Colonel Jim !
Yeah, some padding would be nice.
Some sort of short step ladder to get up there...

It's interesting. I'd bet I could use that same arrangement on my Mk23 too.
I need to check out that idea before I need it.
 

Colonel Jim

New member
8
24
3
Location
South Boston, VA
.
Nice work platform @Colonel Jim !
Yeah, some padding would be nice.
Some sort of short step ladder to get up there...

It's interesting. I'd bet I could use that same arrangement on my Mk23 too.
I need to check out that idea before I need it.
I used two low sawhorses with planks for a platform beside the Hmmwv that came up to the top of the tire. That gave me access to the "engine plank" easily.
 

Colonel Jim

New member
8
24
3
Location
South Boston, VA
Finally finished replacing the glow plugs on the passenger side. The back 2 required the glow plug extractor tool and it was a real exercise in working in tight spaces. The heat shield limited access to a small slot. I was able to get the tool on the glow plug but there wasn't enough room to hold it with a wrench while turning the extractor. Ended up screwing the tool sleeve up to the block by finger and then used an air ratchet on the extractor. The impact of the air ratchet started moving the extractor out while pushing the sleeve up tight against the block. The air ratchet really made it much easier than trying to turn it by hand with a wrench.

The new glow plug controller arrived Monday and took about an hour to install. It is from Camoteksystems and replaces the circuit board with a manual push button to activate the glow plugs. Much better system than the original one.
 
Top
AdBlock Detected

We get it, advertisements are annoying!

Sure, ad-blocking software does a great job at blocking ads, but it also blocks useful features of our website like our supporting vendors. Their ads help keep Steel Soldiers going. Please consider disabling your ad blockers for the site. Thanks!

I've Disabled AdBlock
No Thanks