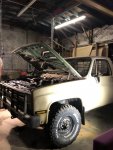
• Steel Soldiers now has a few new forums, read more about it at: New Munitions Forums!

  • Microsoft MSN, Live, Hotmail, Outlook email users may not be receiving emails. We are working to resolve this issue. Please add support@steelsoldiers.com to your trusted contacts.

My first 6.2 swap thread

Chunk ball

Member
40
45
18
Location
NC
CB29BCF8-1D18-4BE2-B60B-3C02F90ACC16.jpeg
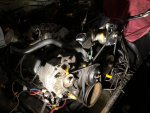
spent the day replacing the civilian stuff to the military style. Changed the vacuum regulator valve from the old IP to the new one which had the wired electronic style. And lots of small things. Deleted some things that did not exist on my old set up.

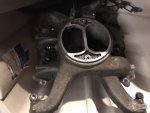
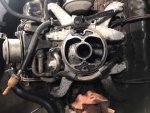
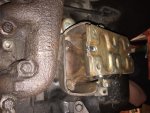
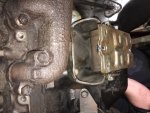
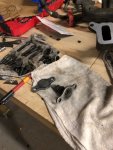
why are the intakes different and is one better to use than the other?
9726EF9C-4FE3-4C32-8482-7C120522A239.jpeg280771F7-3338-4350-BC1C-538EDB8EAFD4.jpeg
 
Last edited:

Chunk ball

Member
40
45
18
Location
NC
3BDB8C97-8318-4694-A323-E16856AB8F14.jpeg
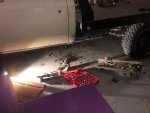
Motor mount parts came in. Energy Suspension 3.1116G. Just follow the instructions -drill out the rivets, pry them clamshells apart, clean em up,pop the inserts in. I used the zipties even tho I wanted to try the cucvrus hardware trick. Oh well it will hold.
Dropping engine in today. Here we go
 

Chunk ball

Member
40
45
18
Location
NC
DDB67B16-0AC7-4344-B2D7-929AC028C356.jpeg
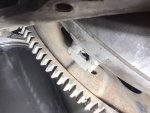
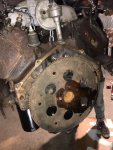
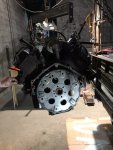
motor dropped in fine but oh no, the torque converter doesn’t seem to line up with the flex plate. I guess it has the wrong one for the turbo 400. So i’ll have to divorce the trans again and replace the flex plate with a new one
FF46B271-9DEE-4674-82D5-AEFC1CCF609F.jpeg
When rotated the holes don’t line up. Anyone ever had this happen? Anyone kno the correct part #?
 

Chunk ball

Member
40
45
18
Location
NC
2C12C066-CBB1-42C4-9148-462E6BB35FBE.jpeg
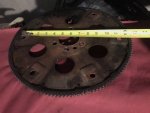
FRA142 is the part # that worked for me. I measured the hole to hole diameter- 11.5”
BCE9F1CE-01DC-4E7F-AC89-D6C416373CD8.jpeg

Hopefully this helps someone in the future. Measure the dang holes on the flexplate and torque converter before you drop that new engine in. Apparently there are two sizes that work on a 6.2; Oh well- a minor set back.
 

nyoffroad

Well-known member
942
690
93
Location
Rochester NY
View attachment 887424
spent the day replacing the civilian stuff to the military style. Changed the vacuum regulator valve from the old IP to the new one which had the wired electronic style. And lots of small things. Deleted some things that did not exist on my old set up.

why are the intakes different and is one better to use than the other?
View attachment 887425View attachment 887426
The one in pic #2 (with round hole) I believe is for an EGR California engine with the top piece (whatever it is) missing. Use the other one with the straight divider front to back, supposedly it flows air better.
 

nyoffroad

Well-known member
942
690
93
Location
Rochester NY
View attachment 888764
motor dropped in fine but oh no, the torque converter doesn’t seem to line up with the flex plate. I guess it has the wrong one for the turbo 400. So i’ll have to divorce the trans again and replace the flex plate with a new one
View attachment 888765
When rotated the holes don’t line up. Anyone ever had this happen? Anyone kno the correct part #?
Turbo 400 has it's own flex plate and needs proper T/C, TH350 and 700R4 share one flex plate and cannot use the same T/C as TH400.
Did you make sure the flex plate is from an 84? They changed tooth count in 85! Both bolt up the same and look the same UNTIL you lay them one on top of the other and then look closely. When you use an 85 plate and an 84 starter it grinds and makes the motor jump, Been there , lesson learned!
 

Chunk ball

Member
40
45
18
Location
NC
Turbo 400 has it's own flex plate and needs proper T/C, TH350 and 700R4 share one flex plate and cannot use the same T/C as TH400.
Did you make sure the flex plate is from an 84? They changed tooth count in 85! Both bolt up the same and look the same UNTIL you lay them one on top of the other and then look closely. When you use an 85 plate and an 84 starter it grinds and makes the motor jump, Been there , lesson learned!
Thanks, yeah I laid the new and old flex plates on top of eachother and the gear teeth and the fastening holes both line up perfectly.
image.jpg
Not sure about the year; I know my truck originally is an 86. The new motor—I’m not sure of the year but it does have those weird braille-style dots on the heads, and has some EGR stuff that seems to have been bypassed, like on the driver side header.

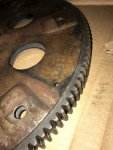
Also, this was probably confusing: I was trying to use the flex plate that came with the new motor because my original flex plate had major tooth damage from starter problems (missing support bracket). I reckon the new engine had the other flex plate for a different transmission like you said.
 

flyfishtrailer

Well-known member
Steel Soldiers Supporter
554
1,041
93
Location
Cool, CA
Thanks, yeah I laid the new and old flex plates on top of eachother and the gear teeth and the fastening holes both line up perfectly.
View attachment 888883
Not sure about the year; I know my truck originally is an 86. The new motor—I’m not sure of the year but it does have those weird braille-style dots on the heads, and has some EGR stuff that seems to have been bypassed, like on the driver side header.

Also, this was probably confusing: I was trying to use the flex plate that came with the new motor because my original flex plate had major tooth damage from starter problems (missing support bracket). I reckon the new engine had the other flex plate for a different transmission like you said.

If it is a CUCV truck, then no matter what year it was made its an 84. When looking for parts always use 84 as the year.
 

Chunk ball

Member
40
45
18
Location
NC
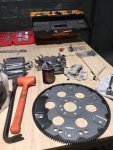
Flexplate replacement process. Big socket on the main crank bolt, breaker bar on the screws holding the plate on, have a buddy hold the crank still while you bust them flex plate fasteners free.
CF3F2DE3-C8E9-4B7F-AB5A-7182FE47969E.jpeg
FA456A8C-6180-40DB-9248-A90351DEF31C.jpeg
old and busted
8F90CBB0-4459-47E7-8501-8F9AE4E8815C.jpeg
new and hotness

Dropped the motor back in, bellhousing dowels lined up fine, driver side motor mount not lining up, got too late, busted my phone screen, went home. More tomorrow
 

Chunk ball

Member
40
45
18
Location
NC
Figured out why mounts weren’t lining up on the driver side. The shell that the mount fastens to was bent. Grabbed the old one off the old engine.
0275FCE8-1FFD-46CC-AC6F-C4C8AC6C7C78.jpeg
bad
64D5ABE5-2EB9-49D4-8B34-218DDDD253B0.jpeg
good

When you use the energy suspension mounts, dont use the zipties. Go with the Cucvrus method: Use hardware. One of the ties snapped off right in the heat of battle.

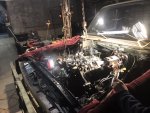
But the good news is, we got the motor in back in for the 3rd? 4th? time and mounts bolted up. That was hard. 3 people with long oak planks pushing this way and that, lots of hoist chain repositioning, and beers. Cheers.
E7877A9F-12B2-49F5-AE1F-E454AAD60AF5.jpeg

More to come soon. stay tuned
 

Chunk ball

Member
40
45
18
Location
NC
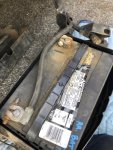
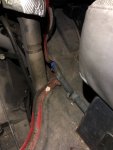
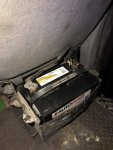
side job. My e350 power stroke van hasn’t been acting right. And it has the second battery in the worst place. Well today it was time to change that.
6AA3969A-2524-4574-AC2C-C1E51A5B98E1.jpeg
OEM frame mount
5C61BD56-E8E0-441A-B5FF-F84AB3C79681.jpeg
busted terminal
9B67326A-07C1-424F-9C4E-216AA529DFFC.jpeg
DC81028B-38E6-42F5-84A9-63A27A029FB1.jpeg
Relocated to behind the seat. Works great
 

Chunk ball

Member
40
45
18
Location
NC
Starter cables hooked up and secured away from headers, IP cables on, trans dipstick and VRV line attached, and inspection cover put on.

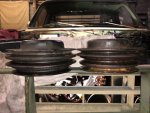
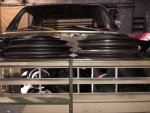
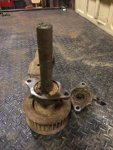
Bolt broken off in the block for the passenger side alternator so I reconfigured with some different hardware. Then the belts were too long! I realized both the water pump and main crank pulleys were different on this civvy engine. So once again swapped over from my old engine to new.
207FB531-F606-4736-AC7C-F9538BE42131.jpeg
water pump pulley
correct on left-wrong on right
0F19B95A-9056-40A7-90F6-35526A07B9D5.jpeg
pulley removal
A618AD5A-DC69-43E2-8EEB-5DD4914BDD61.jpeg
correct on left- wrong on right
E37C46D2-F35D-4A2D-9F56-74CC3EEC989A.jpeg
only a handful of things left to do. Radiator, fluids, batteries, fan, air cleaner, exhaust.

One more thing, who knows the correct part # for the exhaust flange gasket? This one didn’t work
38107E88-E145-41AC-BEAE-11534DD7DC59.jpeg
 

nyoffroad

Well-known member
942
690
93
Location
Rochester NY
Years ago I had a 1/2T Chevy 2wd with a 6.2. It would wear the belt(s) very thin and quickly, after many replacements from parts houses, I went to NAPA and was asked "will fit or recommended"? I was never asked that before , turns out that GM used a pully and belt with a slightly different angle on those and the aftermarket ones didn't. Point is the recommended Gates belt lasted for years rather then months. So check those pulleys carefully.
 

Chunk ball

Member
40
45
18
Location
NC
D25ED036-F2B4-414C-B796-867085D3714E.jpeg8952E734-AB58-401B-BCA4-DDCDF8432674.jpeg42696373-6E4D-452E-B525-450FEFFE1CEB.jpeg
had to pull off the old PTO generator welder parts- in the way of the exhaust. If anyone needs them let me know. I’ll never use that stuff. There was a critter nest in there and a small tree growing! Getting this stuff off without a lift is a pain.
262F4E8E-98ED-448C-A335-DB9960BFE5E9.jpeg
Upon fluid fill up the block was leaking from these little holes on the back. So I made some gaskets and it sealed up good. I actually ended up replacing the intake manifold gasket thinking that was the problem at first. Oh well couldn’t hurt.
 

Chunk ball

Member
40
45
18
Location
NC
after everything buttoned up had a strong crank no start. I figured not getting fuel. I found this funny little video that explains very well how to purge air from the fuel. this only takes about 5 minutes and it fired right up no problem. 997B62F7-EF82-4E20-A1D4-97EB4880C4A7.jpeg It’s alive. Thanks to you guys. Drove it around last night. Only problem left is not shifting right. I’m gonna try to mess with the shift points on the vacuum regulator valve on the IP. But other than that it runs like a top. Hell yeah
 

Chunk ball

Member
40
45
18
Location
NC
Hey guys. Happy new year. it's been a while.
I got some questions about a fuel leak. My new leak appears to be NOT filling up the valley like more common IP leaks.
I thought it was the rubber return lines, so after i replaced one and started it up, saw fuel coming from higher up near the coolant plumbing. You can see the one yellow transparent tube i replaced.
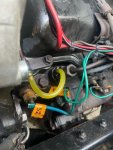
IMG_2949-2.jpeg
The leak is only on the driver's side, accumulating near glow plug #1/2 and thermostat sensor, and riding all the way down the trans cooler lines, dripping off there right under the trans on to the ground.
IMG_2961.jpeg
this is right behind driver's side alternator, top left corner of valve cover gasket. the stainless steel line that feeds IP i think is the culprit. does this stainless line ever fail? It seems to be pretty rusted. It leaks only while running, and is most definitely diesel fuel, not oil.

Side note: after watching some videos, here is the correct part for the IP fuel return lines if anyone happens to find this thread and needs that part number.
IMG_2955.jpeg

Alas, as I mentioned, this is not my issue. But- definitely a great thing to replace on an old truck anyway.
 

Chunk ball

Member
40
45
18
Location
NC
When I swapped the motor I think I might have done something funky with the torque converter.
It stopped going into gear and was whining and buzzing. Not driveable now.
Does this sound familiar to anyone? I am gonna have to separate the trans from the engine and check it out....... I'll post some pics when I get to it
 
Top
AdBlock Detected

We get it, advertisements are annoying!

Sure, ad-blocking software does a great job at blocking ads, but it also blocks useful features of our website like our supporting vendors. Their ads help keep Steel Soldiers going. Please consider disabling your ad blockers for the site. Thanks!

I've Disabled AdBlock
No Thanks