US6x4
Well-known member
- 1,269
- 2,348
- 113
- Location
- Wenatchee, WA
My big project for this year was to build a davit crane to handle my 16.00R20 spare tire and since Jim's price for a used crane at army6x6parts was decent enough I chose to modify an existing A1/A2 crane instead of starting from scratch.
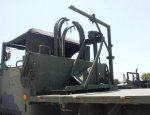
This ISO bed davit crane was the inspiration for how to get a crane tall enough and still fit inside the bed and cargo cover.

As you can see there's an extension piece on the upper mast which is what I needed to get the tire up and over the 20" tall fixed bed side. Here is what I did to make the crane work for my M813A1:
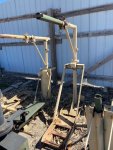
I had Jim send me this rougher condition crane instead of his nice one since I planned to hack & whack on it anyway and it arrived with all the pieces.


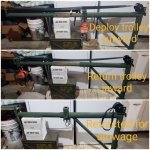
Once I was able to gather all the measurements off of this real crane I modeled up the modifications I wanted to make to get everything packaged just right and to add some capability to make a tire change easier. The 3D models show the mast both stowed away and also mounted for use.


This bottom image kind of shows the tricky balance to sizing the extension tall enough to get the tire over the bed rail yet short enough that it would stowe beneath the cargo cover when not in use.
To start with, the bottom frame had a middle cross member for use with the original ramp that I cut off and it had a large plate that hung down below the angle iron rails. I added 8 spacers made from 1 15/16" shaft at 1" long to get the rails and the plate to be flush.


The spacers, 15' of hardened 5/16" transport chain and the mount for storing the mast were welded onto the frame.
The mount is made of 1/4" steel with 3 grade-8 bolts welded on as studs.


This ISO bed davit crane was the inspiration for how to get a crane tall enough and still fit inside the bed and cargo cover.

As you can see there's an extension piece on the upper mast which is what I needed to get the tire up and over the 20" tall fixed bed side. Here is what I did to make the crane work for my M813A1:
I had Jim send me this rougher condition crane instead of his nice one since I planned to hack & whack on it anyway and it arrived with all the pieces.


Once I was able to gather all the measurements off of this real crane I modeled up the modifications I wanted to make to get everything packaged just right and to add some capability to make a tire change easier. The 3D models show the mast both stowed away and also mounted for use.


This bottom image kind of shows the tricky balance to sizing the extension tall enough to get the tire over the bed rail yet short enough that it would stowe beneath the cargo cover when not in use.
To start with, the bottom frame had a middle cross member for use with the original ramp that I cut off and it had a large plate that hung down below the angle iron rails. I added 8 spacers made from 1 15/16" shaft at 1" long to get the rails and the plate to be flush.


The spacers, 15' of hardened 5/16" transport chain and the mount for storing the mast were welded onto the frame.
The mount is made of 1/4" steel with 3 grade-8 bolts welded on as studs.


Last edited:


