• Steel Soldiers now has a few new forums, read more about it at: New Munitions Forums!

  • Microsoft MSN, Live, Hotmail, Outlook email users may not be receiving emails. We are working to resolve this issue. Please add support@steelsoldiers.com to your trusted contacts.

Valence's MEP-531A

Valence

Well-known member
Steel Soldiers Supporter
2,112
555
113
Location
Davis County, UT
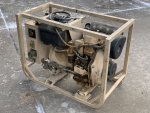
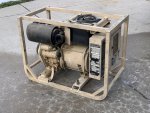
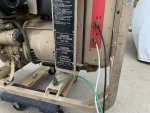
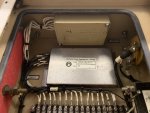
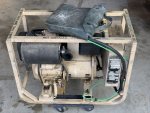
On December 9th I made a ~6 hour round trip up to Jerome, Idaho and bought from a police officer an MEP-531A he was tired of moving around for years and hadn't had it running in just as long.
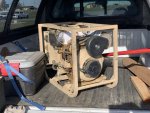
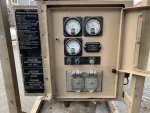
2023-12-09 12.01.14.jpg 2023-12-09 16.11.12.jpg
Hour meter at time of purchase: 274.9 hours
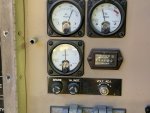
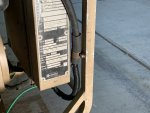
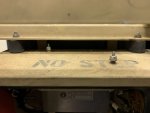
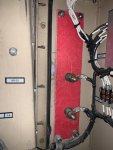
The front panel needs some repair and it is only held on by two wood screws.

Once home, I tried to use the electric start via slave cables to my MEP-803A. The start switch rotates freely 360 degrees, but I could hear the pre-heat engage when rotated that direction and when turned to start there was only "clicking". I assume there is an issue with the starter or something there.

With verbal instructions from a good friend who already has two of these units, I used a metric socket and loosened the injector and pulled on the manual start cord until fuel started to dribble out. I then re-tightened the injector. After a number of manual pulls (more than I thought it needed), I got the hang of the procedure and the generator fired up and ran! Ambient temperature was about 22F.


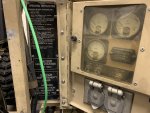
About 113v on the terminals and the convenience ports work well, showing about 50% load with both 500W halogen work lights on (~1000W)
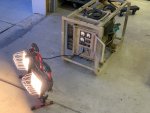
2023-12-09 17.13.23.jpg 2023-12-09 17.13.34.jpg

2023-12-09 16.09.31.jpg 2023-12-09 16.09.52.jpg 2023-12-09 16.10.05.jpg 2023-12-09 16.10.17.jpg 2023-12-09 17.14.29.jpg

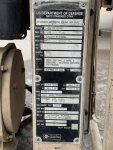
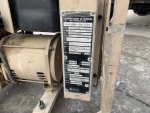
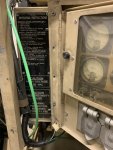
Data Plate reads:
GENERATOR SET DIESEL ENGINE 2KW 60HZ
MODEL: ASB 2D / DND7
SER NO: 27B V2
NSN 6115-21-912-0393
REG NO: (blank)
TM TO: (blank)
NAVFAC TM: (blank)
VOLTS: 2KW, 120 VAC, 2 WIRE & GROUND (NEUTRAL BONDED TO FRAME)
AMPS: 18.3 PEAK 16.7 CONT
PF: 1.0
DRY WT: 138.9 LBS
W: 16.0 IN
LG: 29.5 IN
HGT: 21.7 IN
INSUL: CLASS F
TYPE: 3600 RPM, STANDARD SERVICE
FUEL: DIESEL, A/B, F-34, F-35, JP-8
MAX AMBIENT TEMP: 122 ° F
DATE MFG: (blank)
CONTR NO: DAAK01-96-C-0045
MFD BY: MECHRON POWER SYSTEMS INC 35537
WARRANTY: (blank)
DATE INSP: (blank)
INSP STAMP: (blank)


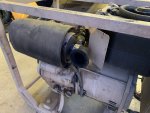
I'm not sure how old it is as the "DATE MFG" is not stamped, but if I had to guess via the Contract Number, perhaps manufactured in 1996. Apparently it is also missing the baffle over the exhaust, and it is in great need of an oil change, new fuel filter, and air filter clean and re-oiled or replaced, (now to search for those part numbers, hah)!

But otherwise, it still seems to be pretty decent condition.
 
Last edited:

Valence

Well-known member
Steel Soldiers Supporter
2,112
555
113
Location
Davis County, UT
Change your fuel lines, and your rubber plugs in the bottom of the tank. easy components to get. Looks like the spark arrester off the end of the exhaust is missing, fun little units, just picked up another one today as well as a 501a.
Definitely good advice!

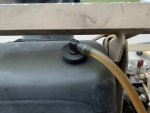
But I'm not sure where to get the spark arrestor or the rubber plug at the bottom (to filter) and top (fuel return) of the tank. But now, looking at the photos on my computer, there might be readable numbers on the plugs I'll have to inspect closer in better light.
2023-12-23 17.05.44.jpg 2023-12-23 17.06.00.jpg

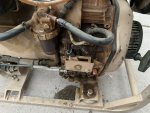
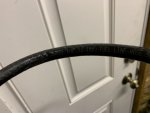
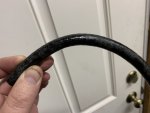
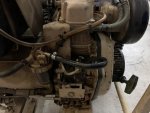
As I went to add the wiring below, the fuel line from the filter to the injector demanded to be replaced right at that moment as the spring clamp had slipped off the filter end of the nipple and I couldn't get it to move on the old hose. The previous owner had sent me with some ArmorMark 50057 1/4" fuel line hose (SAE J30R7 Made In USA), Working Pressure 3.4 Bar. Of course, I used a worm clamp in place of the spring clamp

2023-12-23 17.02.12.jpg 2023-12-23 17.25.30.jpg 2023-12-23 17.25.20.jpg 2023-12-23 17.35.06.jpg


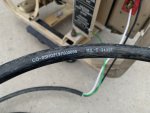
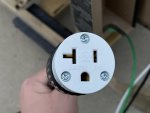
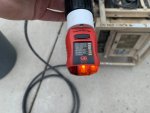
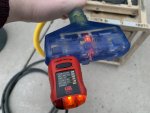
I bought about 15ft of 3-conductor, 10 gauge wire (MIL-C-3432F), wired on a 20A receptacle (5-20R), and then tested my wiring and the Chinese 20A splitter. I always test all cords, power strips, and etc to ensure they were wired correctly. In this case, I found out early that the 3-way splitter had plastic partially filling one of the grounding terminals.

2023-12-23 16.53.07.jpg 2023-12-23 16.53.26.jpg 2023-12-23 16.53.47.jpg 2023-12-23 17.00.24.jpg 2023-12-23 17.01.08.jpg

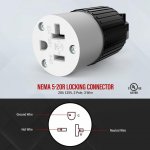
The Chinese 5-20R female plug I ordered:
https://www.amazon.com/dp/B0100RQ5H4
1703796994431.jpeg
It specifies that it is for 12 gauge wire but the 10 gauge wire fit into the terminals, but I did have to cut plastic in the back to crimp onto the thick mil-spec cord.

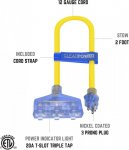
The Chinese 20A, 3-outlet plug I ordered to go with it:
https://www.amazon.com/dp/B08514PCRZ
1703797131956.jpeg
As stated above, I had to send the first one back as some of the plastic molding had partially filled one of the outlet's grounding terminals.
 
Last edited:
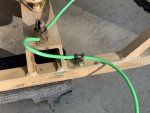
Guyfang

Moderator
Staff member
Moderator
16,711
23,951
113
Location
Burgkunstadt, Germany
These were a problem area. To many sets were stored outside and the bushing dried out and cracked.

I like the clear hoses the army used, because I could see if there was fuel there, and not air. The fuel line from the filter to the IP is a place that was always a problem area for air in the hose.
 
Last edited:
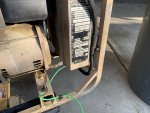
FarmingSmallKubota

Well-known member
Steel Soldiers Supporter
467
1,109
93
Location
Wapakoneta, Ohio
These were a problem area. To many sets were stored outside and the bushing dried out and cracked.

I like the clear hoses the army used, because I could see if there was fuel there, and not air. The fuel line from the filter to the IP is a place that was always a problem area for air in the hose.
I replace the lines on all the sets i work on and sell with a blue fuel line that is see through.
Raider Polyurethane Fuel Gas Line Tubing Hose Roll Blue (5 Ft. x 5/16 In.)
Raider 716B-5 Polyurethane Fuel Gas Line Tubing Hose Roll Blue (5 Ft. x 3/16 In.)
 

Valence

Well-known member
Steel Soldiers Supporter
2,112
555
113
Location
Davis County, UT
Happy New Year!

I drained the fuel tank by placing the supply hose going to the injection pump into a clean #10 can (took 2 cans as tank was full). I then tipped the generator backwards and placed a 4x4 under one side.

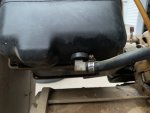
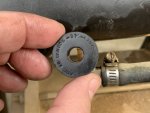
The stock fuel tank bushings read "Made in Canada" with, I assume, the part number of 570-1351-001
2023-12-30 13.35.51.jpg

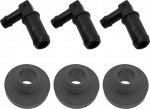
I had purchased the set of "3 kit of products 532139277 Fuel Tank Stem & 532003645 Bushing Kit for Husqvarna" FarmingSmallKubota had linked above
1704128312656.jpeg
https://www.amazon.com/gp/product/B09334GKDK/
The fit was perfect and the barbed stems fit very snug, was actually a bit of work to get them inserted.

2023-12-30 14.21.45.jpg

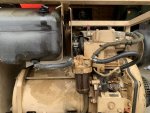
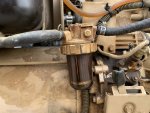
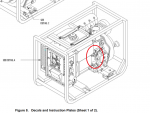
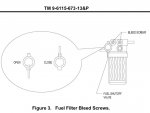
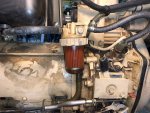
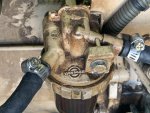
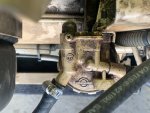
This is when I noticed that my fuel filter housing (still waiting on a new filter element to arrive) appears backwards from my friend's MEP-531A and the Technical Manual - the shut off valve and bleeder screws are on the backside. I took off the filter housing but it cannot be mounted in reverse. I guess mine is just a bit different/older maybe.
2023-12-30 12.47.30.jpg tm_drawing.png 2023-12-30 13.01.28.jpg

I also drained the oil. It was very thick, pure black (as expected), and probably very old (ambient temperature was around 40F). It also made a mess trying to run onto the frame rail but my "form a funnel" helped (mostly) direct it where to go. I took the drain plug to the hardware store and its threads are M16-1.50. When an oil change is messy/difficult it discourages me from doing it, so I ordered the following so I can attach a drain hose for, hopefully, faster/cleaner oil changes:
Fumoto F108N
1704129417114.jpeg
https://www.fumotousa.com/f108n.html

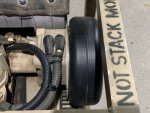
I was also surprised to learn that the unit has two oil drain plugs and dipsticks. I would think even if it were mounted in such a way to make the fuel filter side difficult to access that would be a problem changing the fuel filter, or even setting the start/stop lever.

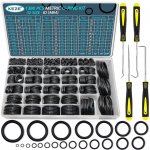
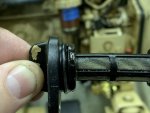
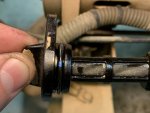
The oil strainer appeared in good condition, after I got the thick oil off of it. The o-ring also appeared okay, but I'm sure it needs to be replaced due to age (though it wasn't leaking). I had ordered a generic metric nitrile rubber assorted o-ring kit. Several of these fit the strainer great, but they were much thicker o-rings than the stock one. I am not concerned about the oil strainer leaking, but that the oil strainer cap doesn't sit flush against the unit, or isn't inserted quite as far.
1704129961999.jpeg
https://www.amazon.com/dp/B0BBP7JGB9


I drilled the frame and inset a couple 1/4" nutserts for wire clamps to secure the power and ground terminals form being pulled on directly. I reused a slightly too large wire clamp I pulled off, I believe, a trailer, but some left over hose filled the space. I also added THHN 8 gauge green grounding wire and I put the excess wire in a documents case I've had kicking around my garage for years that I hadn't found a use for.
2023-12-30 19.04.02.jpg 2023-12-31 15.14.45.jpg 2023-12-31 15.19.08.jpg 2023-12-31 15.45.02.jpg
 
Last edited:
Guyfang

Moderator
Staff member
Moderator
16,711
23,951
113
Location
Burgkunstadt, Germany
This is when I noticed that my fuel filter housing (still waiting on a new filter element to arrive) appears backwards from my friend's MEP-531A and the Technical Manual - the shut off valve and bleeder screws are on the backside. I took off the filter housing but it cannot be mounted in reverse. I guess mine is just a bit different/older maybe.

I thought it looked odd, when I looked at the picture. Someone probably put it on when the original one came up missing. There is no change in that part. The original one was used from first to last day that the sets were in the military inventory.
 

Valence

Well-known member
Steel Soldiers Supporter
2,112
555
113
Location
Davis County, UT
This is when I noticed that my fuel filter housing (still waiting on a new filter element to arrive) appears backwards from my friend's MEP-531A and the Technical Manual - the shut off valve and bleeder screws are on the backside. I took off the filter housing but it cannot be mounted in reverse. I guess mine is just a bit different/older maybe.

I thought it looked odd, when I looked at the picture. Someone probably put it on when the original one came up missing. There is no change in that part. The original one was used from first to last day that the sets were in the military inventory.
That's the thing, the fuel filter doesn't appear to be some aftermarket part, it is a Yanmar part - though said part could still have been put on later, but the 686 Tan paint on the filter housing matches the rest of the unit... :shrugs:

2024-01-01 16.47.02.jpg 2024-01-01 16.47.17.jpg

At least this filter housing also appears to be flowing the fuel correctly - that the fuel has to flow outside -> inside the filter element.
 
Last edited:

Valence

Well-known member
Steel Soldiers Supporter
2,112
555
113
Location
Davis County, UT
Is there a bleeder screw on the back side?
Yessir, there are. There are two screws and I believe one is the bleeder for the inlet and the other is for the outlet (but I'm sure you know that, ha).

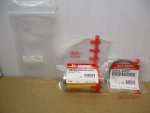
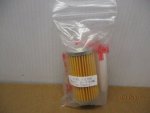
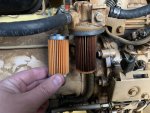
I also received my order of Yanmar fuel filters I purchased off eBay
Fuel Filter Element w/ O-Ring Set: GS-3021-1:
s-l1601.jpg s-l1602.jpg s-l1603.jpg s-l1604.jpg
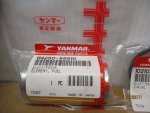
Fuel Filter Element, Yanmar P/N: 114250-55510
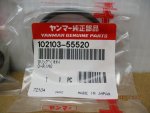
Fuel Filter O-Ring, Yanmar P/N: 102103-55520

2024-01-02 16.53.32.jpg 2024-01-02 17.00.20.jpg 2024-01-02 17.14.28.jpg
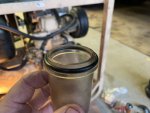
The plastic housing looks dirty, but it's just stained/scratched. I cleaned it quite thoroughly (honest!). Also, the metal bottom on the old fuel filter fell off when I removed the housing. The bottom was corroded, indicating moisture in the fuel at some time. (Probably from sitting outside)
 
Last edited:
Valence

Well-known member
Steel Soldiers Supporter
2,112
555
113
Location
Davis County, UT
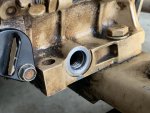
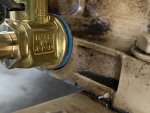
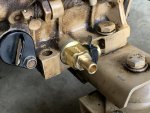
As mentioned earlier, for easier, and less messy oil changes, I received and installed an oil drain valve:

Fumoto F108N
M16-1.5 thread
https://www.fumotousa.com/f108n.html
IMG_4733.jpeg
‘N’ for the extended nipple for a drain line, so don’t forget to buy the 3/8” clear vinyl tubing too.

It was a close, but a GOOD fit. The valve just cleared the frame mount to the right while spinning on, and the gasket fit just inside the lip on the drain.
IMG_4707.jpeg IMG_4708.jpeg IMG_4709.jpeg
 
Last edited:
Valence

Well-known member
Steel Soldiers Supporter
2,112
555
113
Location
Davis County, UT
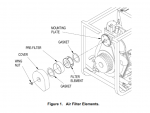
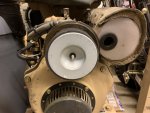
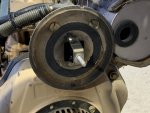
Not surprising, my air filter is dirty, in need of replacing, and the pre-filter is partially falling about.

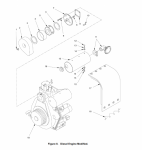
The air filter consists of two parts, the interior paper element in the metal housing:
Yanmar P/N 114250-12581 (958142)

And the Air Pre-Filter, or the outer foam cover:
Yanmar P/N 114250-12580F (95-8143)

There is also a thin, sticky gasket on either side of the air filter, and the TM-9-6115-673-13P says that is P/N 95-8053-1
(I would like to have a few spares of this gasket, but I have not been sucessful in finding them.)

tm_air_filter.PNG tm_air_filter_part_numbers_01.png tm_air_filter_part_numbers_02.png

Question: Is the outer foam air pre-filter supposed to be oiled or not? I assume that it should be, even though my OEM pre-filter is basically dry.

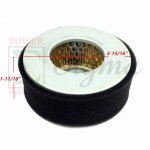
I had a hard time finding actual Yanmar air filter element WITH the foam pre-filter, so I went with the aftermarket (aka Chinese) "replacement" filter from eBay.

s-l1600.jpg

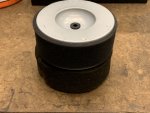
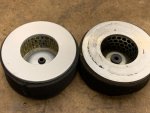
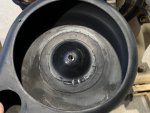
The filter housing size is almost an exact match, and I was pleased to see it come with the interior rubber grommet, but the "replacement" (ie: non-OEM) filter has a couple drawbacks:

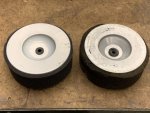
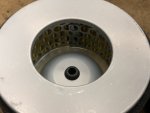
1) I don't think the center is recessed as much, and thus, when securing the wingnut on the plastic cover, it didn't fit perfectly tight against the mounting plate.
2024-01-05 19.12.25.jpg 2024-01-05 19.12.45.jpg

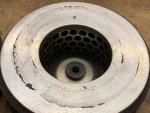
2) The interior paper element isn't as wide (diameter - it doesn't fill up the whole interrior) as the OEM, which does show it is cheaper/lower quality.
2024-01-05 19.13.03.jpg 2024-01-05 19.13.20.jpg 2024-01-05 19.13.16.jpg 2024-01-05 19.17.18.jpg
 
Last edited:
2Pbfeet

Well-known member
425
758
93
Location
Mt. Hamilton, CA
I think finding OEM Yanmar filters can be a challenge. It has been my experience that if you don't by the filter from a Yanmar dealer, the knockoffs are quite variable in quality and fit. YMMV... I don't have a great 3rd party source. Some of the knockoffs that I have seen had paper so porous that they were of questionable filtration value.

I believe that the foam is to be dry, but it is washable.
Good luck,

2Pbfeet
 
Last edited:
Guyfang

Moderator
Staff member
Moderator
16,711
23,951
113
Location
Burgkunstadt, Germany
As far as I know, this is the company that provided the gasket to the Army.

Get in touch with us

Address: 9011 Hampton Overlook
Capitol Heights, MD 20743

Phone: 301-336-7400

For your Rubber Products or Gasket Needs, please email Bryon Ciotti: bc@potomacrubber.com

For all other inquiries: Info@PotomacRubber.com

Web: www.potomacrubber.com

Hours: M-F : 7:00am-3:30pm

POTOMAC RUBBER CO., INC. has been providing quality rubber goods and products, to government, military, and industrial customers since 1921. We have a large local inventory and provide assistance for a wide range of products. Many items are fabricated in-house, some while you wait. Our experts are standing by to assist you.
 

Valence

Well-known member
Steel Soldiers Supporter
2,112
555
113
Location
Davis County, UT
The oil strainer appeared in good condition, after I got the thick oil off of it. The o-ring also appeared okay, but I'm sure it needs to be replaced due to age (though it wasn't leaking). I had ordered a generic metric nitrile rubber assorted o-ring kit. Several of these fit the strainer great, but they were much thicker o-rings than the stock one. I am not concerned about the oil strainer leaking, but that the oil strainer cap doesn't sit flush against the unit, or isn't inserted quite as far.
View attachment 913953
https://www.amazon.com/dp/B0BBP7JGB9
The o-rings I purchased from Amazon were NOT a good fit. They were too thick and I could not get the oil strainer to seat:
2024-01-03 16.07.31.jpg 2024-01-03 16.52.25.jpg

Searching around I found WH&E HARDWARE STORE on eBay sold genuine OEM o-rings but they were NOS.
Yanmar Part Number: 24341-000224

These were noticeably thinner but still a good, tight fit. I put a small amount of oil on the o-ring and twisted the oil strainer back and forth as I pushed inward until the cap was fully seated.
2024-01-12 17.10.21.jpg 2024-01-12 17.38.42.jpg

(Visible in the background, I added a Fumoto NC-10 cap to the drain valve for 3/8" nipples)
https://www.fumotousa.com/nc-10.html
1705180253927.jpeg

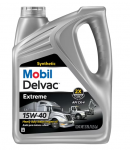
I filled the oil with about 1/5th a quart of Lucas Synthetic Oil Stabilizer (hard to tell as the bottle is opaque and the Lucas liquid is clear) and the rest with Mobil Delvac Full Synthetic 15W40. This was my first time using Lucas and boy is that stuff thick/sticky. No wonder some folks call it "crank case honey".
1705179457440.png 1705179535800.png
I swear I had to put in more oil than the TM claimed of 0.85 quarts. TM was explicit to not screw in the oil dip stick when checking the level.

Just another uninteresting video of a brief test start and run after all the services rendered. It was about 45-50F in the garage, and it started after about the 4th manual pull.

Now to investigate the electric start issues (I suspect the starter or start switch). Oh look, the voltage regulator is just sitting on the bottom, not bolted to the top where I believe it belongs. I should have checked this long ago.
2024-01-06 16.26.03.jpg
 
Last edited:
Valence

Well-known member
Steel Soldiers Supporter
2,112
555
113
Location
Davis County, UT
If anyone cares, the holes in this voltage regular will fit a #10 screw, but the riveted threads on top are for 6-32 machine screws. I would say I purchased longer screws on purpose but the local hardware store didn't have 1-3/4" long, pan head 6-32 machine screws, so I purchased 2" and added nyloc nuts to the top to ensure they don't back out again.
2024-01-13 18.02.58.jpg 2024-01-13 18.39.27.jpg

The rivets that were missing on the piano hinge for the instrument door also fit 6-32 machine screws perfectly without any drilling, I just needed to use my electric drill to run the screws in, but I did not anticipate that the hole for the former rivets would be so close to panel wall I wouldn't have room for the nut. However, I had purchased 3/4" long screws and they ran perfectly over top of the opposing panel rivets, that their backs acted like a nut. I guess we'll see if any of these walk out when the generator is running. I suppose I could try putting Loctite on them. haha.

2024-01-13 17.04.06.jpg 2024-01-13 18.22.13.jpg 2024-01-13 18.29.26.jpg
2024-01-13 18.29.11.jpg

And as usual, I'll need to make another trip to the hardware store later for another, shorter, 6-32 machine screw for the missing rivet on the bottom of panel side of the hinge that I forgot about.
 
Last edited:
Valence

Well-known member
Steel Soldiers Supporter
2,112
555
113
Location
Davis County, UT
As far as I know, this is the company that provided the gasket to the Army.

Get in touch with us

Address: 9011 Hampton Overlook
Capitol Heights, MD 20743

Phone: 301-336-7400

For your Rubber Products or Gasket Needs, please email Bryon Ciotti: bc@potomacrubber.com

For all other inquiries: Info@PotomacRubber.com

Web: www.potomacrubber.com

Hours: M-F : 7:00am-3:30pm

POTOMAC RUBBER CO., INC. has been providing quality rubber goods and products, to government, military, and industrial customers since 1921. We have a large local inventory and provide assistance for a wide range of products. Many items are fabricated in-house, some while you wait. Our experts are standing by to assist you.
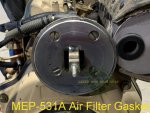
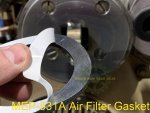
Thanks to Guyfang here, Potomac Rubber was able to sell me the air filter gaskets! Though the gaskets were a special order material and Potomac Rubber only sold them in full sheets. So I could buy the small quantity I wanted or I could buy the whole sheet and it was the same price. Well, so I guess I now have a new item to sell on my little basement business. Hah.

The original gaskets were completely smashed flat:

2024-01-26 17.49.48.jpg 2024-01-26 17.49.58.jpg

The new gaskets are 1/8" thick and actually do not let the plastic air filter housing sit flat against the generator as it is probably designed to. I even put the old, original air filter back in place and it fits with the same gap. Perhaps that is why the previous gaskets were crushed flat?
(Please forgive the water marking and text on some of these photos, but these are the same photos I use on my business website so I try and protect them from the very common image thievery on the internet - which is probably highly unlikely for this type of item, but still, it is the principle of the matter).

2024-01-26 18.09.51.jpg 2024-01-26 18.09.38.jpg
mep531a_air_filter_gasket_05.jpg mep531a_air_filter_gasket_06.jpg mep531a_air_filter_gasket_07.jpg mep531a_air_filter_gasket_08.jpg

I suppose one could have instead adhered the gasket directly onto the air filter and that'd make for quicker changes if one didn't mind replacing the gaskets with every air filter but I opted to copy the way it had already been done.
 
Last edited:
Top
AdBlock Detected

We get it, advertisements are annoying!

Sure, ad-blocking software does a great job at blocking ads, but it also blocks useful features of our website like our supporting vendors. Their ads help keep Steel Soldiers going. Please consider disabling your ad blockers for the site. Thanks!

I've Disabled AdBlock
No Thanks