• Steel Soldiers now has a few new forums, read more about it at: New Munitions Forums!

  • Microsoft MSN, Live, Hotmail, Outlook email users may not be receiving emails. We are working to resolve this issue. Please add support@steelsoldiers.com to your trusted contacts.

Steering knuckle

Redleg130

Active member
80
168
33
Location
Kansas
Grease was coming out the sides of the knuckle on the inside side, where it looks like a sphere is at the end of the axle. There is a felt seal there and if its ever been serviced, its been decades. Watsons Wagons is messing with knuckles so Id thought Id give mine a go.

I found this helpful resource - Knuckle Rebuild (imageevent.com)
knuckle 1.JPG
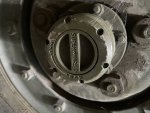
Superwinch lockout hubs - This can be taken apart, but not needed for this project. I cant find the gaskets anywhere in any case. They seem to work well so I am happy with them.
knuckle 2.JPG
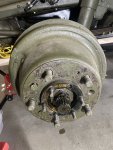
Getting the drum off

knuckle 3.JPG

knuckle 4.JPG
And the bearings

knuckle 5.JPG
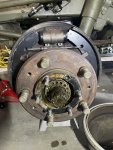
Removing the brake, have not done this previously and was surprised the bolts weren't frozen. Naturally Ill have to bleed the brakes after this
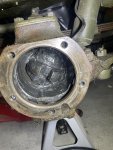
knuckle 6.JPG
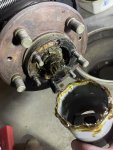
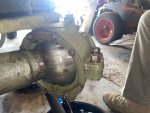
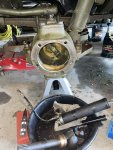
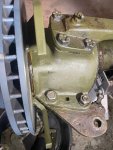
The knuckle housing

knuckle 7.JPG
Keeping the position of the knuckle so I can mark it after I clean the grease off so I can put it back the way it was
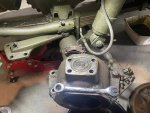
knuckle 8.JPG
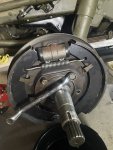
Getting the arm out of the way

knuckle 9.JPG
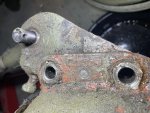
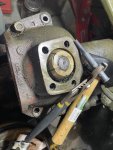
The part I am stuck on

There are dowels on both sides of this housing, but they dont want to move.
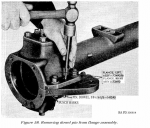
dowel.png

I am using a punch pin and hammer, but these things aren't budging. I am fairly certain that I have to get these apart to get to the felt seals, part of MM - Flange oil seal in the TM, the part that holds grease in on the spherical part. I have the retaining ring/flange oil seal off, but its stuck between the knuckle housing and axle currently. I can try, but replacing the seal spring and felt seal will be super awkward like it is, stuck between the housing and axle.

Any ideas for getting that dowel out, or other tips regarding the steering knuckle service?
 

Roller

Active member
Steel Soldiers Supporter
191
58
28
Location
North Lake, WI
Grease was coming out the sides of the knuckle on the inside side, where it looks like a sphere is at the end of the axle. There is a felt seal there and if its ever been serviced, its been decades. Watsons Wagons is messing with knuckles so Id thought Id give mine a go.

I found this helpful resource - Knuckle Rebuild (imageevent.com)

View attachment 929488
Superwinch lockout hubs - This can be taken apart, but not needed for this project. I cant find the gaskets anywhere in any case. They seem to work well so I am happy with them.

View attachment 929489
Getting the drum off

View attachment 929490

View attachment 929491
And the bearings

View attachment 929492
Removing the brake, have not done this previously and was surprised the bolts weren't frozen. Naturally Ill have to bleed the brakes after this

View attachment 929493
The knuckle housing

View attachment 929494
Keeping the position of the knuckle so I can mark it after I clean the grease off so I can put it back the way it was

View attachment 929496
Getting the arm out of the way

View attachment 929497
The part I am stuck on

There are dowels on both sides of this housing, but they dont want to move.

View attachment 929498

I am using a punch pin and hammer, but these things aren't budging. I am fairly certain that I have to get these apart to get to the felt seals, part of MM - Flange oil seal in the TM, the part that holds grease in on the spherical part. I have the retaining ring/flange oil seal off, but its stuck between the knuckle housing and axle currently. I can try, but replacing the seal spring and felt seal will be super awkward like it is, stuck between the housing and axle.

Any ideas for getting that dowel out, or other tips regarding the steering knuckle service?
You don't need to remove the knuckle to get the retainer off. The retainer flexes and you twist it to clear the axle tube. If you want to split the knuckle, support it well and use a bigger hammer.

Frank
 

Redleg130

Active member
80
168
33
Location
Kansas
This is true, the retainer can be twisted and removed. I was afraid of deforming it this way, but it seems fairly resilient and I noticed no deformities after this.

The seal does appear to be mushed up/deformed and did need replacement, but it wasn't disintegrated like I have seen other felt or rubber items elsewhere.

The advantage of splitting the knuckle would be it will be much easier to clean. I will also get access to the bearings to inspect and pack the lower one. The upper bearing is a simple bronze cone on a race. The disadvantage seems to be this is quite an undertaking with heavy parts and my dowels appear to be frozen, which isn't shocking really.

knuckle 10.JPG
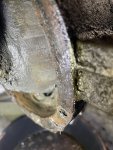
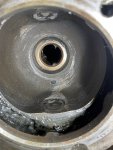
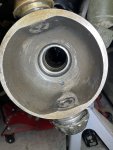
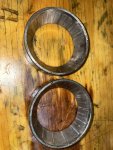
the interior side of the knuckle with retainer and felt seal removed. Lots to clean and no easy way to reach it, possible, just a pain

knuckle 12.JPG
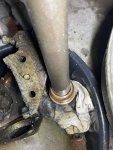
The retainer and felt seal. The seal spring wasn't in terrible shape, but was rusting through in a couple spots and its good that it is getting replaced

knuckle 11.JPG
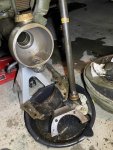
now to knock out the bushing and the seal behind this
 

Roller

Active member
Steel Soldiers Supporter
191
58
28
Location
North Lake, WI
This is true, the retainer can be twisted and removed. I was afraid of deforming it this way, but it seems fairly resilient and I noticed no deformities after this.

The seal does appear to be mushed up/deformed and did need replacement, but it wasn't disintegrated like I have seen other felt or rubber items elsewhere.

The advantage of splitting the knuckle would be it will be much easier to clean. I will also get access to the bearings to inspect and pack the lower one. The upper bearing is a simple bronze cone on a race. The disadvantage seems to be this is quite an undertaking with heavy parts and my dowels appear to be frozen, which isn't shocking really.

View attachment 929572
the interior side of the knuckle with retainer and felt seal removed. Lots to clean and no easy way to reach it, possible, just a pain

View attachment 929574
The retainer and felt seal. The seal spring wasn't in terrible shape, but was rusting through in a couple spots and its good that it is getting replaced

View attachment 929573F
now to knock out the bushing and the seal behind this
Support the knuckle with a pipe or 4x4, use a large punch and a 3 pound hammer and the dowel will move.

Frank
 

Redleg130

Active member
80
168
33
Location
Kansas
bigger hammer.

Frank
Bigger hammer :3

Picked up a 3lb hammer and this got the dowel to move.

knuckle 13.JPG

Chewed up the pin punch, but I didn't want my hands anywhere near this

knuckle 14.JPG
Got the knuckle split and this made getting a blind hole bearing puller in it easier. NAPA apparently loans tools for a deposit, which they refund. I had no idea this was available and its pretty great. Harbor freight sells a blind hole bearing puller, but only up to 1 1/4, and this hole is 1 1/2. NAPA had a spreading claw type thing and a slide hammer which got the bushing and inner seal out.

There appears to be a recessed area for the inner seal, and one for the bronze bushing

With the knuckle house off, I can see how grease is supposed to go - it comes in over the bronze top pivot, and into the inner housing, then out a relief hole on the bottom of the inner housing. The bottom bearing does not seem to have a path for fresh grease, but I suppose it really does not move much, just the side to side of steering.

Its good to get these thing apart and gain an understanding of what is happening, the knuckle has been a mystery to me until getting into it

knuckle 15.JPG
The bronze bushing does have some slop, not extreme, but its good that it is getting replaced. Replacements are on backorder, I should have looked in my shipment before I started taking this apart.

knuckle 16.JPG
The split housing - I had it supported when I split it so it wouldn't drop

knuckle 17.JPG

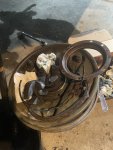
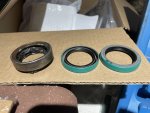
The old inner seal and the replacements - for the replacements do the hollow sides face the differential or the solid side? The old inner seal also appears much thicker than the replacements.

The old one is chewed up from removal, but there does not seem to be much sealing material, just gunk and the inner spring. Whatever was there disintegrated or something.
 

Redleg130

Active member
80
168
33
Location
Kansas
This project is taking a bit, but there is value in doing this if its not been touched in decades. I have found plenty of stuff that really needed attention.

knuckle 18.JPG
The felt seals are a fiddly to get stuffed into the groove, but the replacement fits noticeably better than the old one. I soaked the felt parts in oil and this make them more malleable. This part of the maintenance actually wasn't too bad. I was expecting a major juggling act with all the parts, inner spring, felt, little felt piece at the top and its retainer, all the bolts, the gasket, and getting this all aligned simultaneously. The oil soaked felt actually did a good job of holding stuff together as I got it lined up and popped back in.

knuckle 19.JPG
knuckle coming back together

knuckle 20.JPG
The races with the least movement, the knuckle races on the bottom of the assembly, had very deep pits. I was a bit surprised by this, given they probably are the races/bearings with the simplest job, that being turning a few degrees in either direction within the boundaries of the steering. Although, now thinking about it, that may be why they are pitted so badly, a wheel bearing is wearing evenly in constant rotation while these get wear in pretty focused places.


One question I did have - how does grease get to the bottom knuckle bearing? Grease is pumped into the brass cone bearing on the top, and exits from a hole the in the bottom of the knuckle sphere, but it never really gets down to that lower bearing. I greased mine heavily, ensuring a very thorough pack with plenty of grease surrounding it, but how is this maintained over time?
 

Rdinatal

New member
27
23
3
Location
Lake Normanopolis, NC
One question I did have - how does grease get to the bottom knuckle bearing? Grease is pumped into the brass cone bearing on the top, and exits from a hole the in the bottom of the knuckle sphere, but it never really gets down to that lower bearing. I greased mine heavily, ensuring a very thorough pack with plenty of grease surrounding it, but how is this maintained over time?
Excellent question. Anyone???
 

John Mc

Well-known member
218
303
63
Location
Monkton, VT
Unless I'm picturing s different grease point, aren't you supposed to grease from the bottom, not the top? You temporarily move a grease zerk to that point and pump it up into the bearings.
 

Redleg130

Active member
80
168
33
Location
Kansas
TM shows grease zerk on the top only in every illustration I have found. Moving a plate with zerk on it could be a way to do this from time to time. Splitting this thing is enough of a pain that doing the moving the zerk around would be worth it.
ssk.jpg

By design though, I suppose a maintenance element when in military service would have serviced this knuckle often enough that the designers didn't provide a way for the operator to grease this maybe is the reason it has no zerk? The top zerk I think primarily greases the tracta joint with the bronze bushing just being in the path?
 

John Mc

Well-known member
218
303
63
Location
Monkton, VT
TM shows grease zerk on the top only in every illustration I have found. Moving a plate with zerk on it could be a way to do this from time to time. Splitting this thing is enough of a pain that doing the moving the zerk around would be worth it.
I was told to remove a small plug near the bottom of the ball, then remove the zerk from the top, place it where the plug was in the bottom and grease until the grease just starts to come out of the top (where the grease zerk was). When done, return the plug and the zerk to their original positions.
 
Top
AdBlock Detected

We get it, advertisements are annoying!

Sure, ad-blocking software does a great job at blocking ads, but it also blocks useful features of our website like our supporting vendors. Their ads help keep Steel Soldiers going. Please consider disabling your ad blockers for the site. Thanks!

I've Disabled AdBlock
No Thanks