• Steel Soldiers now has a few new forums, read more about it at: New Munitions Forums!

  • Microsoft MSN, Live, Hotmail, Outlook email users may not be receiving emails. We are working to resolve this issue. Please add support@steelsoldiers.com to your trusted contacts.

002 teardown and rebuild

Jimc

Member
725
1
18
Location
Mullica, nj
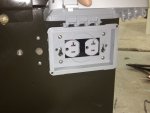
i have been reassembling the distribution and control boxes. when i was removing the 120v receptacle i noticed it was a little black in the corner like someone stuck something in it they werent supposed to and shorted it out. figured i had better replace it. also the original bell watertight cover for the outlet wasnt it too nice a shape either. a quick trip to home depot fixed that problem. i knew i wasnt going to find an original metal style cover. i havent seen those in years. i picked up a new 20a heavy duty receptacle and they had these nice hubble watertight covers that had the 4 mount holes in them which matched the gen. a little more bulky than original but definately more weather resistant. with the lid closed it sticks out the same amount as the cover for the voltage selector. about 1"
IMG_1500.JPG

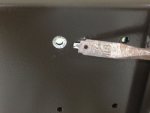
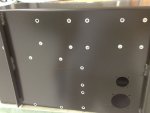
i took an old spade bit i had lying around and performed a little surgery on it. ground the tips off and made 1 in the center to match the screw hole dia in the control box. threw it in the drill to make quick work of removing the paint in a perfect circle. this assures when i remount all the electrical components in the box everything is grounded really well. i always replace all the machine screws and nuts on the unit with stainless so rust doesnt kill the connection down the road.
IMG_1506.jpgIMG_1507.JPG
 

Jimc

Member
725
1
18
Location
Mullica, nj
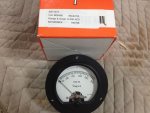
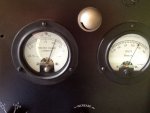
ok guys my new voltage meter showed up today. i got the control box all put back together except for the hour meter which i am waiting on. new voltage gauge installed. the simpson meter comes real close to matching the original a&m style. seems like a real nice quality piece. the control panel was faded almost white on this so i installed one of my overlay decals on the panel before putting in the switches and gauges.

IMG_1509.jpg

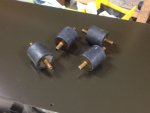
earlier on in the rebuild i mentioned that the rubber isolator mounts for the control box were shot. i did find new ones, i forget where but they were like $90 a piece and i need all 4 so basically forget that. the dimensions on the original mounts were 1 3/8" from mounting surface to mounting surface. closest thing that i found was at mcmaster. they have rubber isolators which are 1 1/4". i have to drill holes for the new mounts anyway in the brackets on the sides of the control box anyway so i just moved the lower set 1/8" back when i drilled and it sets dead on the money. the mcmaster part# is 9376K46. they were like $2.50 a piece.

IMG_1512.JPGIMG_1514.JPGIMG_1515.JPG

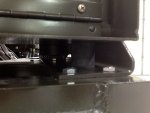
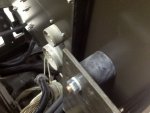
so i am getting close. i got the distribution and control box all installed and wire harness all hooked up. i just have to do a timing check and a few odds and ends and i should be ready to fire it up. here is where i am now.

IMG_1518.JPGIMG_1517.JPGIMG_1516.JPG
 

Jimc

Member
725
1
18
Location
Mullica, nj
thanks massey. when i find parts i always try to include the source and part # so everyone can find the stuff later.


ok guys here she is all done. i put one of my data plate kits on it and the diesel logos.

IMG_1523.jpgIMG_1522.jpgIMG_1520.jpg

took about 30 sec of cranking first time to get the fuel all up into the injectors. after that she fired right up, ran smooth and produced the right amount of power. ran it for a couple hours. started at 50% then 75 then 110% for about an hour. 110% included a 1500watt heater in the outlet and 34 4 tube fluorescent fixtures. 22 of them high output. not bad at all and zero black smoke even when loaded like that.

IMG_1525.JPG
 

Jimc

Member
725
1
18
Location
Mullica, nj
You can see if one if our other members chimes in and has one otherwise i would call delks, saturn or one of the other surplus places to see if they have one.
 

Jimc

Member
725
1
18
Location
Mullica, nj
thanks greenmv


i got a pm from someone looking for the source and part # for the dc voltage system capacitor i have been using in these rebuilds. just for future reference i will post the info. i have been getting them from www.newark.com and the part # is 65k2236. current price is only about 4 bucks.


zoltarp

New member
17
0
0
Location
Culpeper/VA
Man looking at yours makes me want to tear mine apart so I can paint it all, I can't decide what to do!! I think my first priority is to make sure it functions, I'd hate to do all that work to find it's a dud. I found this thread when I searched for the throttle cable replacement. My Dorman 55204 just arrived and I am noticing that I need a way to secure the cable end. Where did you get your stainless straps and battery tray?
I'll defiantly be ordering one of your decal kits. The oil/fuel kits are on the way too of-course I decided to get them after I bought replacement fuel filters and oil filters and tracked down a strainer. I can always sell them or use them on the next gen project (need one for mom). Looks great man!

Can we make this thread a sticky?
 
Last edited:

Jimc

Member
725
1
18
Location
Mullica, nj
hi, sorry been on vacation all week. the battery tray and straps are all the stainless originals. i just glass bead everything in my cabinet to make it all look new again and clean it up. the ends for the cables can be found at aircraft spruce. i think i posted the links somewhere in this thread. if you didnt find it already there is also a 003 teardown and refurb thread that i did which is a little more extensive and popular than this one. both are a good reference. prob wouldnt hurt to make it a sticky but not my call.
 

rustystud

Well-known member
9,280
2,988
113
Location
Woodinville, Washington
Jimc this is a great build !!! I'm a professional mechanic and I have never seen a rebuild this clean and thorough ! I have one question though, where did you get the "hi temp" cut-out and "low oil psi" switches from ? I need both for my MEP-002A .
Thanks,
Greg aka:rustystud
 

pclausen

Well-known member
Steel Soldiers Supporter
452
281
63
Location
Afton, VA
Awesome job Jim! Wow, wish I had seen the thread earlier. Where did you get the dark green paint from you used? And how did you make the templates for the white lettering?
 

Jimc

Member
725
1
18
Location
Mullica, nj
i am a professional painter and have my own shop so i just mix it right here. same with the lettering. i just made the file for the decals and cut them on the vinyl cutter. all the other data plates on it i recreated and have them printed as well.
 

pclausen

Well-known member
Steel Soldiers Supporter
452
281
63
Location
Afton, VA
Ah, that explains it. You make it look so easy! Yeah, being able to cut out templates would be awesome. Thanks for the link to the 003 rebuilt. I'll be busy reading that for a while!
 
Top
AdBlock Detected

We get it, advertisements are annoying!

Sure, ad-blocking software does a great job at blocking ads, but it also blocks useful features of our website like our supporting vendors. Their ads help keep Steel Soldiers going. Please consider disabling your ad blockers for the site. Thanks!

I've Disabled AdBlock
No Thanks