• Steel Soldiers now has a few new forums, read more about it at: New Munitions Forums!

  • Microsoft MSN, Live, Hotmail, Outlook email users may not be receiving emails. We are working to resolve this issue. Please add support@steelsoldiers.com to your trusted contacts.

1952 M135 W/Winch

USMC 00-08

Well-known member
1,182
179
63
Location
Skiatook, OK
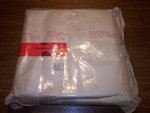
Finally got a few minutes to mush the huskies off to the post office and send off two seal kits. I'll PM the tracking number to you. They asked how much value we'd put on them for insurance purposes so I explained they may be the last of 10 on the planet and I'd like it if they didn't lose them.....$10.00 please. Let's hope they get these out to you in good shape. They're not packaged but the little lady at the counter did a fine job of taping the original packages together. Get a picture when they arrive so we can all have a laugh.
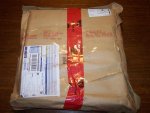
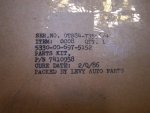
Dave, those beautifully taped transmission gasket kits arrived yesterday in great shape. Not even a scrape or wear spot on them. Someone took good care of them on their way south. Thank you very much for sending them to me. I was surprised to see the 1986 date on them. I had no idea Canada used these trucks that late into the 80's.

100_2829.jpg100_2831.jpg100_2830.jpg


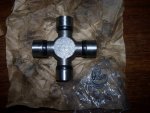
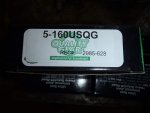
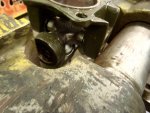
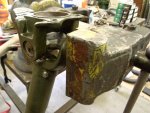
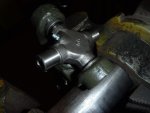
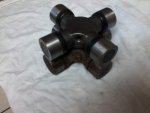
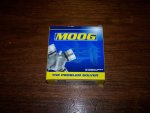
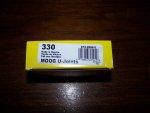
I picked up a u-joint yesterday in my effort to find a modern part number for them. Doing a little bit of research, I found that the CCKW guys use this u-joint for their trucks. I have nothing to base my hunch that this is right for our truck other than in my mind it makes sense for GMC to design a truck that would use some of the parts already in the military warehouses for the GM trucks already in use.
100_2834.jpg100_2835.jpg100_2836.jpg

I will try to remove one of the old u-joints out of a spare drive line soon and compare the two. Just holding this up next to the drive line.....it looks very promising. You can't see it in the picture but these are grease-able and the zerk is in the package with the clips.
 

m1010plowboy

Well-known member
Steel Soldiers Supporter
3,903
2,698
83
Location
Edmonton, Canada
I still might get a chance to measure a u-joint today. Had a little parade distraction....then a Dodge broke down.....a Dodge, go figure.....so I ended up playing WW11 command car rescue schlump.

Real happy I was in a position to get them over to you, you're welcome. The Tuk-tape was a bonus added sometime after it left here. The little girl behind the desk at Canada Post only added the clear tape. As I get older I seem to want things in straight lines more. It might be OCD, but with the letters arranged CDO, in the correct order...as they should be.

Both M135's did a 22km run, uphill, both ways, idled through a 45 minute parade route and we're not sure why we ran the trucks into the late 80's either. Our service members deserve to have the best gear under their butts at all times. ...oooops....I nearly slipped into a political rant there. Sweet little continent we're sitting on, we should give our kids the best gear possible to protect it.
 

m1010plowboy

Well-known member
Steel Soldiers Supporter
3,903
2,698
83
Location
Edmonton, Canada
G749 U-joints

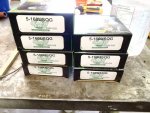
Houston, we have ignition. Found another part number for us. The Goat crew hit Pats Driveline http://www.patsdriveline.com/ and grabbed 8 of these babies for $20.00 each.

P6080064.jpgP6080060.jpg

Goat Dad hauled an old U into the supplier and they had a pile on the shelf. It's a common item so that is good news and for once we can give the shaft...and not get it.

Didn't have the presence of mind or time to take measurements. I'm thinking we have enough part numbers for reference that cross-over from different suppliers should be easy.

I spent 15 minutes between jobs with Goat and got one set done with a decent bench vice. I have fun at the displays and parades with Goose but twisting wrenches and working on the trucks with a few good soldier B's still tops the shows. I gotta find time to build another one!

P6080065.jpgP6080066.jpgP6080061.jpg
 

USMC 00-08

Well-known member
1,182
179
63
Location
Skiatook, OK
I did a search for that exact part number and can only come up with the Spicer 5-160X which happens to be the same as the Moog 330 that I found. I am guessing what the Goat crew has is the same thing?

If you get a chance, could you confirm measurements for me unless I get around and get one pulled out first. Should be 4.188 across and the cups should be 1.188 diameter...at least on the numbers I came up with.

Spicer is written all over the u-joints on the drive shaft I looked at, but no numbers. Only Spicer and US on the end of the cups.
 
Last edited:

USMC 00-08

Well-known member
1,182
179
63
Location
Skiatook, OK
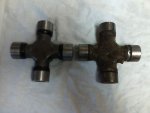
I had time this weekend to pull a u-joint and the Spicer 5-160X and Moog 330 are the exact same as what came out of the parts truck driveline. I will get them added to the parts list within the next few days. Here are pics of the new and old together.

0611162008.jpg0611162007.jpg

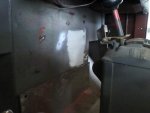
I was also able to apply some All Metal body filler to the inside of the cab. In 90 degree weather it sets up very quick so you have to move very fast when applying it. I didn't have time to sand any of it down this weekend but will post some more pics and update as I progress. Hopefully it holds up well.

0611161631.jpg
 

USMC 00-08

Well-known member
1,182
179
63
Location
Skiatook, OK
Finding a thermostat

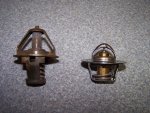
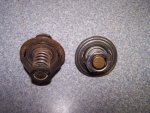
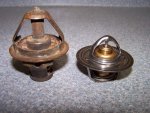
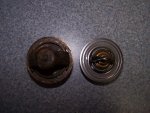
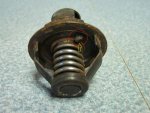
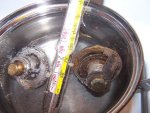
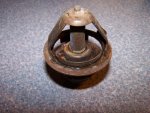
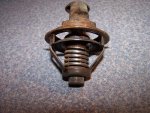
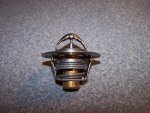
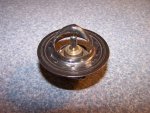
I am in search of a replacement thermostat to add to our parts list. I pulled the thermostat out of a parts truck to compare to one I ordered that is for a 270/302 engine and I am trying to confirm if the new one will work. It looks so different. The outside diameter is the same as the original one but everything else is not the same. The pictures are deceiving on the OD of the part. Calipers show them to be the same. I'm sure it will fit in the G749, but am worried about function. Does anyone see any reason the new one will not work? Is it just a new design? (The original style is on the left) The new one does not appear to let as much water flow when it is open. Is this a bad thing or will it really matter?

100_2837.jpg100_2838.jpg100_2839.jpg100_2840.jpg

On the original there is a hole with a little piece that appears to act as a valve of some sort to allow some water to flow by, but I am not sure that is it's function. I was thinking that if the new style will work, I would just drill a small hole in about the same place to let this function like the original. (Thanks Ahab for teaching us how to draw on the pictures!)

100_2843.jpg

Can someone educate me on this please? This new thermostat is for 160 degrees but there are other temperatures available too.
 

SturmTyger380

Active member
482
30
28
Location
Easley SC
The little hole is called a bubbler. It lets a small amount of coolant through. Helps avoid air pockets.

Do you think the old one might have a larger opening and more flow through the body?
 

USMC 00-08

Well-known member
1,182
179
63
Location
Skiatook, OK
Great info. Drilling a small hole would be effective then.

The old one does have a larger opening. That is what is causing me some concern with the new one. The opening on the new one is 1.070 and the old is 1.500.

The boiling water test made both of them start to open at 160-165 degrees and both were fully open around 180-190 degrees.

100_2847.jpg100_2850.jpg100_2851.jpg100_2849.jpg100_2848.jpg

Anyone see a problem with having a smaller opening?
 
Last edited:

m1010plowboy

Well-known member
Steel Soldiers Supporter
3,903
2,698
83
Location
Edmonton, Canada
I'm still a landscaper and not a mechanic but there are these motorheads I hang around with that drool over the 302 and tell me about the "racing days". The old "stovebolt" 302 was pretty popular back in the day and we've got plenty of facebookers and forums that might be able to back us up. I hope to meet the stovebolt boys Friday and we'll chat about modernized thermostats but in the mean-time, here are a few links to some old 302 guys. You've probably seen these and most of the conversations are a decade old but these guys know their 302's so might be a worthy forum to hook up to.

http://www.langdonsstovebolt.com/
http://www.stovebolt.com/

The difference between mil and civ
http://www.stovebolt.com/ubbthreads/ubbthreads.php?ubb=showflat&Number=41657

Some swap resources
http://www.jalopyjournal.com/forum/...de-230-235-261-270-292-302-stovebolts.527337/

.....besides rusty, boiling water,......is that paint I can smell....sniff sniff?

http://www.stovebolt.com/ubbthreads/ubbthreads.php?ubb=showflat&Number=41657
 

USMC 00-08

Well-known member
1,182
179
63
Location
Skiatook, OK
I did some sanding on that All Metal and it seems to be doing good. Now we will see what the primer does to it and how well it sticks when cured.

0619161556.jpg

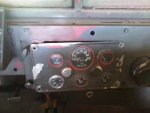
There were three good sized holes above the instrument panel in that primed spot. The holes are visible in the video of my truck. I still need to clean up the bottom of that top edge, but I will do that when the instrument cluster is taken out for replacement and painting. For now that edge will not be visible behind the panel.
 

USMC 00-08

Well-known member
1,182
179
63
Location
Skiatook, OK
I am pleased with the way it turned out. The differences in the primed spot that you can see is because the primer was not dried yet. We'll see how the primer holds onto it before I go much further.
 

USMC 00-08

Well-known member
1,182
179
63
Location
Skiatook, OK
Gear oil in rear wheel bearings

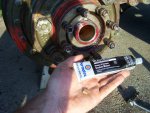
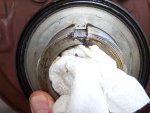
I am in the process of hooking the rear brakes back up and am taking everything back apart after putting everything on new a year ago. New inner hub seal, cork key way seal, etc. I still have gear oil getting into the wheel bearings. The truck probably doesn't have 150 miles on it since I packed the bearings and redid everything. The gear oil has already mostly washed out the bearing grease. When I put in the cork seals, I also used some Permatex Ultra Black Gasket Maker to fill that key way.

100_2491.jpg100_2492.jpg

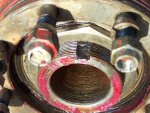
The outer hub seal is good, but it appears that the gear oil is getting in around where the outer hub seal does not fit tightly around the spindle just above the key way. My gear oil level is correct and the vent is not plugged. How can we make this stop happening???? aua

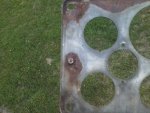
Another question...I am going to be changing out the instrument cluster panel for one that does not have holes drilled in it. On the back of the instrument panel, there is a screw going through it with a nut on the back. What connects to this? Is it a ground of some sort. This screw is missing from the panel I am replacing.

0701162010.jpg
 

USMC 00-08

Well-known member
1,182
179
63
Location
Skiatook, OK
Overkill

I will probably not be happy with myself later on because the Permatex is a pain to clean off, but this is my attempt to stop gear oil from getting in the wheel bearings.

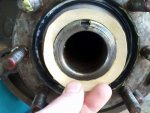
The outer hub seals are good, the key way had the seal and Permatex Ultra Black in it and still gear oil got in. I got to looking and there is this gap with nothing really to plug it. I think gear oil may be seeping in here. because I had to dig the Permatex out of the key way and it was in good shape.

100_2856.jpg

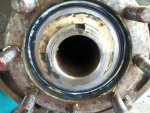
I cut a gasket that fits tight around the spindle to cover up that gap, slathered both sides in Permatex Ultra Black, cork key way seal with more Permatex and reassembled. Hopefully no more leak and no problems.

0707161620.jpg0707161623.jpg0707161625.jpg
 

m1010plowboy

Well-known member
Steel Soldiers Supporter
3,903
2,698
83
Location
Edmonton, Canada
Another question...I am going to be changing out the instrument cluster panel for one that does not have holes drilled in it. On the back of the instrument panel, there is a screw going through it with a nut on the back. What connects to this? Is it a ground of some sort. This screw is missing from the panel I am replacing.

View attachment 631187
I found it....page 318. It holds a clamp/rubber/grommet/thingy that the wires run through. It's not a ground.

I also used my new skill to draw some arrows. You mean these gaps? Hope the picture gets bigger after I hit Submit....if not...move closer.

seal gap.jpg
We certainly have something going on with my second hub being washed out in as many years. I think the last one was attacked with brake fluid because we had one wet wheel cylinder. I'm dropping the diff fluid level. If the trucks spend hours on the highway I could see it being a problem but the longest run I've done is 40 minutes. The TM chats about a 1/2" below the bottom plug so I'm dropping them to 1". I can't get my head around the diff fluid running down the axle, past the nuts, locks and seals and getting into the bearings. I hope your fix solves it for you....I'm seeing a dribble on the inside of the tire on my intermediate right again and I'm not loosing brake fluid.

We're getting good at sliding hubs on and off so that's a bonus. I'll get pics of that seal on the next removal.
 
Top
AdBlock Detected

We get it, advertisements are annoying!

Sure, ad-blocking software does a great job at blocking ads, but it also blocks useful features of our website like our supporting vendors. Their ads help keep Steel Soldiers going. Please consider disabling your ad blockers for the site. Thanks!

I've Disabled AdBlock
No Thanks