• Steel Soldiers now has a few new forums, read more about it at: New Munitions Forums!

  • Microsoft MSN, Live, Hotmail, Outlook email users may not be receiving emails. We are working to resolve this issue. Please add support@steelsoldiers.com to your trusted contacts.

1986 M1009 Blazer AC Install help

Dwayne00

New member
2
0
0
Location
Charleston, SC
I have an 86 m1009 Blazer with 24v system. I want to install an AC system and could use some help. I am an old K9 guy and have a PTSD Service Dog and I am making him a ZORT K9 Unit vehicle for us to go hunting in. Anyone close to Charleston, SC and could possibly give me a hand to get what I need and install? Thanks for any help you folks can give and thanks for adding me to the forums.

vr - Dwayne
 

NDT

Well-known member
Steel Soldiers Supporter
10,458
6,532
113
Location
Camp Wood/LC, TX
Welcome to the forum and thank you for your service. I am too far away to help you, but my suggestion is to obtain a complete kit designed for your truck. Here is an example: http://nostalgicac.com/complete-ac-kits/chevrolet-complete-kits.html?p=2
There has been a lot of discussion about a/c installs here so you might could do some searching here in the CUCV forum. These installs are not particularly easy, so you might consider finding a local shop that does a/c installs in custom cars.
 

Rvitko

New member
139
2
0
Location
Austin tx
I installed that kit myself. You may need more of the smallest hose, size 8 I believe. If you keep the two battery set up and use or want the ability to use 6tmf batteries, the drier has to go on the right fender and the hose is not long enough. Not a big deal as the hoses are a kit, so you have to take them to be crimped at an ac shop. Make sure your motor mounts are good, that was a later on project that bit me in the butt, the compressor belt slapped through the lower radiator hose, new energy suspension mounts and the belt to hose clearance went from 3/4" to 1.5". You can work with the guys at nostalgic on custom vents, I did not want to lose my voltmeter or black out lights and the stock kit replaces these with vents, I instead added under dash vents. Final note, this ac at least in Texas, only takes the edge off, it is 15k btu, your typical modern suv in this size has 21k btu and much better insulation, if it is 100 outside, you can get 80-85 inside in a reasonable time, and I added a headliner, spray liner, rubber floor over that, aluminum paint with a diy lizard skin over it on the fiberglass top, so I gave added insulation a serious go. I also put a plastic sheet under the door panel.
 

Rvitko

New member
139
2
0
Location
Austin tx
By the way, window tint is in my future and may be the last touch needed to make the ac just right and I forgot to add that you may also need to get a new glove box, you have to make some substantial cuts, you remove about 1/3rd of the back to accommodate the blower motor, my hinge failed from the trial and error removal and install and it was already on its last legs, not a huge deal, I even had a new spid tag made up for the new one and it really was a nice improvement.
 

sschaefer3

New member
212
3
0
Location
Tempe, AZ
I got a kit from Arizona Mobil Air, it is similar to the other one, but not exactly the same. It keeps both alternators as well. http://www.ackits.com/

You would have to call them, the listing is not on their website. But they do have one. Similar cost.
 

bl71236

Member
Steel Soldiers Supporter
59
63
18
Location
Corsicana, TX
I installed the kitfrom ackit.com in my M1008. However I also converted the truck to12volts and a single alternator, so I used the kit for a standardchevy truck with a 6.2L . My M1009 has a nostalgic kit
that was installedby the previous owner.( I had to redo most of the installation)


These kits are notplug and play. The installation instructions are vague and rely onthe installer to have considerable mechanical ability and tools. Theunits are very finicky and require fine tuning to deliver
cold air during allvehicle operations. The biggest challenge is installing the condensercorrectly to insure the installation has a “tunnel effect” forthe cooling air. The condenser does not have the same frontal area ofthe radiator so it needs to be centered and place very close to theradiator. The nostalgic instructions mention not to have it touchthe radiator but to not be more that 1” spacing.


Failure to get theright spacing and sealing will result in “ cold in the city and hoton the freeway”. This is due to the engines fan and clutch willpull air through the condenser and radiator at slow speeds and higherengine compartment temperatures. Ram air at freeway speeds will takethe least path of resistance. Since the fins are not the same betweenthe radiator and condenser, air will bounce around in the gap and orspill around the sides resulting in inadequate heat transfer from thecondenser.


I used 3/4”weatherstripping along the edges of the condenser and used aviationaluminum “speed tape” around the edges from the vertical supportsso that air has to flow across the condenser. I used high densityfoam inside the engine compartment on either side of the radiator soair will not spill out of the sides. All air is brought through thecondenser and then across the radiator.


Servicing the unitafter installation is kinda tricky as well. All R134A are very pickywhen it comes to servicing. The freon charge needs to be just right.Due to length of hose runs there is not a hard charge amount.Basically it will be 2 cans and then maybe a little more till you getthe pressure right for the outside air temperature during thecharging. I recommend early morning when the temperature is around 75to 80 deg.


Placement of the airconditioner temperature control bulb is important as well. You mighthave to adjust the amount of the probe that is installed in theevaporator housing. All R134A systems need to cycle, if they don’tinternal evaporator coil freezing can occur. Since the system doesnot have an electrical control unit the old school bulb has to beplaced just right so the system will cycle. On a modern vehicle theair temperature control computer uses electrical sensors that detectchanges instantly. The bulb probe is a little slower.


I also modified theon/off & fan switch in my M1009 so that I can use the fan onlywhen the temperatures are mild without the compressor kicking on.


As Rvitko mentionedinsulating the M1009 is critical. I have done the firewall, floor andtinted the windows. The truck is still an oven here in Texas and thefiberglass shell is next on my list to insulate.


The unit in theM1008 is overkill, it will flat out freeze you out. I have onlyinsulated the firewall and floor on the 08. I hope this help. I canget some pictures if you like.
 

Rvitko

New member
139
2
0
Location
Austin tx
I will second that on the instructions, vague and with horribly blurry black and white photos. More or less expect a box of parts and have fun. I did find they were helpful by email with any questions. You also brought up some good points. My evaporator was freezing up and I was told to just never run max. I did not do more than center the condenser and place it 1/2" from the radiator, it would probably be improved if I did as you describe and I will try that, as you know it is a colossal pita to work in that space.
 

82ABNMP

Active member
Steel Soldiers Supporter
556
53
28
Location
Winston Salem NC
I have used the: http://www.vintageair.com/67-72chevygmcpup.asp with good success. The trucks I've installed them in have have had no problems over years of use. Biggest thing you can do to supplement the heat reduction in the interior is have your windows professionally tinted, this alone can lower interior temp 35%. If you wish to keep the 24volt system in place you will need the extra pulley kit. Search this site for info.
 

bl71236

Member
Steel Soldiers Supporter
59
63
18
Location
Corsicana, TX
I had the rear windows on my M1009 tinted with limo tint and the front doors are the legal Texas limit. as far as 35% reduction in heat, well I don't know about that the fiberglass top gets so hot you can't keep your hand on it. The previous owner installed a headliner in the cab area and it is warm to the touch after sitting in the sun all day. I plan on slipping a radiant barrier under it. I have access to some very dense 1" and 2" packing foam that im going to use for the aft fiberglass section. The 1" is for the ceiling and the 2" for the the sides. The foam is black so it might just stay as is. I can't complain about the quality of the componets, these air conditioners can only do so much in a bare bones steel and fiberglass box.
 

richingalveston

Well-known member
1,715
120
63
Location
galveston/Texas
As far as I have researched, you cannot have turbo, two alts and compressor. one must go thus a turbo and AC equals 12volt conversion.. You can't loose hydro pump so you end up choosing two of the three: ac compressor, turbo or second Alt.

There is room under the hood but it would be a long belt to put it on the drivers side outside the alternator. Not sure you could get things to line up.
 

Ilikemtb999

Active member
699
45
28
Location
Denver, CO
I'd have to see a better picture and maybe a measurement of where the top of the AC compressor is in relation to the bottom of the valve cover and maybe how far back it sits.
 

bl71236

Member
Steel Soldiers Supporter
59
63
18
Location
Corsicana, TX
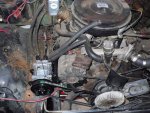
When I got my M1009 both alternators were installed and the compressor was on the drivers side. The vehicle had been half way converted to 12 volts. The drivers side alternator was mounted piggy back onto the compressor brackets. I removed this alternator and completed the 12 volt conversion. I believe the air conditioner kits designed specifically for the M1008/M1009 had the compressor mounted on the passenger side below GEN2. The civilian air conditioner kits have the compressor on the drivers side.

20160825_193041.jpg20160825_192931.jpg
 

86m1028

Active member
1,687
17
38
Location
Murphy TEXAS
I installed that kit myself. You may need more of the smallest hose, size 8 I believe. If you keep the two battery set up and use or want the ability to use 6tmf batteries, the drier has to go on the right fender and the hose is not long enough. Not a big deal as the hoses are a kit, so you have to take them to be crimped at an ac shop. Make sure your motor mounts are good, that was a later on project that bit me in the butt, the compressor belt slapped through the lower radiator hose, new energy suspension mounts and the belt to hose clearance went from 3/4" to 1.5". You can work with the guys at nostalgic on custom vents, I did not want to lose my voltmeter or black out lights and the stock kit replaces these with vents, I instead added under dash vents. Final note, this ac at least in Texas, only takes the edge off, it is 15k btu, your typical modern suv in this size has 21k btu and much better insulation, if it is 100 outside, you can get 80-85 inside in a reasonable time, and I added a headliner, spray liner, rubber floor over that, aluminum paint with a diy lizard skin over it on the fiberglass top, so I gave added insulation a serious go. I also put a plastic sheet under the door panel.
WOW, I was hoping it would be better than that.

Thanks for your real world experience.
 

Rvitko

New member
139
2
0
Location
Austin tx
This is interesting, with the nostalgic kit the compressor is to the right of the 2nd alt. My nightmare has been working in a cold air intake. I had assumed turbo was right out but maybe it isn't, but cold air intake is still a challenge, I got a silencer off a civy model and it makes a world of difference but I kept the 6tmf batts and the right is very tight, keeping hoses clear of belts is an issue.
 
Top
AdBlock Detected

We get it, advertisements are annoying!

Sure, ad-blocking software does a great job at blocking ads, but it also blocks useful features of our website like our supporting vendors. Their ads help keep Steel Soldiers going. Please consider disabling your ad blockers for the site. Thanks!

I've Disabled AdBlock
No Thanks