• Steel Soldiers now has a few new forums, read more about it at: New Munitions Forums!

  • Microsoft MSN, Live, Hotmail, Outlook email users may not be receiving emails. We are working to resolve this issue. Please add support@steelsoldiers.com to your trusted contacts.

2000 HMMWV M1123 Project

mow***com

Active member
72
205
33
Location
Salt Lake, Utah
Okay... I've decide to create a thread for the M1123, mostly to keep the different project threads clean.
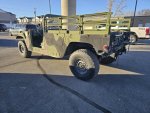
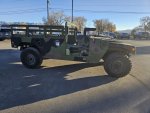
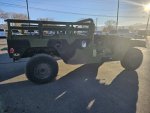
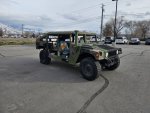
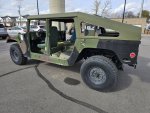
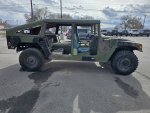
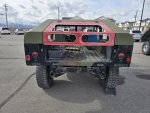
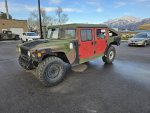
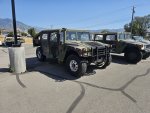
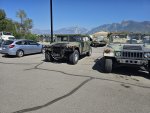
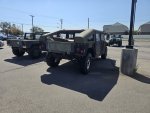
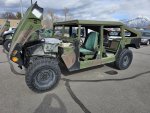
This is an 11/99 (2000) M1123 that I found pretty much left for dead. The engine/transmission/transfer case were all about to be gutted and it just needed to be saved.

When we were buying the truck, the seller told me that he could get it running. I didn't think too much of it and just kept saving.
Then, I got a call, that he got it running and it was time to pick it up.
When I arrived, it runs, but almost just barely. That is fine to me, because that can be improved.

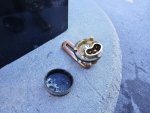
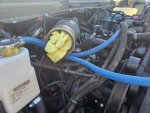
The seller told me he replaced the injection pump and put in a used glow plug box, with matching sensor(I'll probably replace with a new smart start box).
As much as I wanted to keep the miltary battery units, I've been doing pretty well on my Megalomart batteries in my M998.
So, I will just opt for the less expensive batteries for getting it up and running.

The truck comes with the 4 speed, which I have been waiting for. Plus, I have been looking for a lower weight/higher payload capacity truck for the next phase of my experience.
The NP242 is a good thing to see. I did salvage the speedometer adapter months ago, to use on my M998.
So, I have to pay for that twice. But, it was worth it.

The transmission module appears to be there, so that will be interesting, I just have a feeling.
The wiring harness has been cut in some places, but I was able to snag an older harness, that I can use to rebuild the original(the condition should be solid).
There is no CDR and the seller told me that the fuel pump has shit the bed.
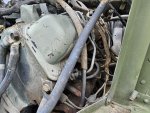
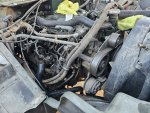
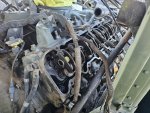
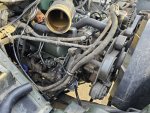
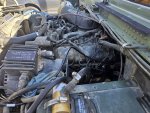
The valve covers look like decoration and have oil covered down the sides.
So, I'll pop those off and clean it all up.

Having the dual voltage alternator is what really gives opportunity to my build. It is at this point, where I decide how wild that I want to get with the electrics.
In my heart, I want simplicity, but in my mind, I want whatever I can design/build.
It would be nice to build a custom doghouse and maybe some amenities to go along.

Anyway... Just like the last truck, I will go through each hub, go through the diffs, transmission, transfer case, engine, fuel system, vent systems, brakes, power steering, cooling system, plus all the wiring and junk.
I will be transferring my wheels/tires over and selling the M998 with the original 12 bolts.
It should be an adventure and probably a bit more involved than the M998.
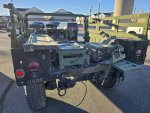
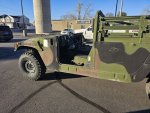
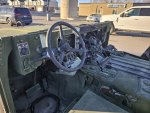
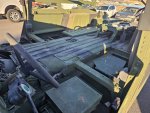
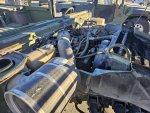
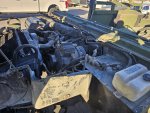
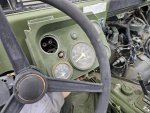
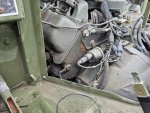
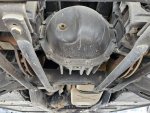
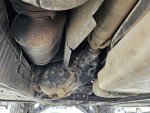
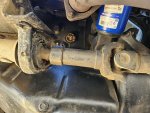
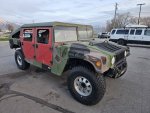
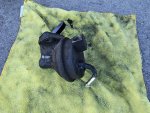
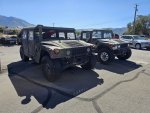
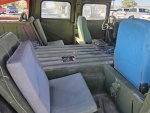
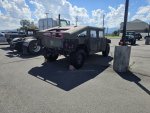
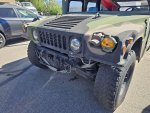
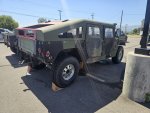
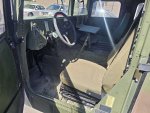
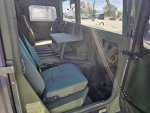
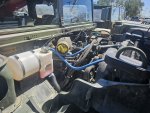
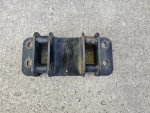
But, I am here to learn and progress. Thanks, for reading. Here are some pics of the project truck.
 

Attachments

Last edited:
mow***com

Active member
72
205
33
Location
Salt Lake, Utah
Since, it is early on a Sunday, here comes a follow up.
Funny enough, when I sell my trucks, I enjoy being able to link someone to the thread. It gives them a chance to read over the entire journey. I guess these are moreso journals for me and being able to look back upon them usually makes me chuckle a bit.

Since, I am already a recon manager at work, my job is basically to keep costs in check, source parts and install them.
The main difference between the M998A0 and this build, is the amount of resources that I've gained along the way.
I've already met some awesome local folks that have led me in the right directions and helped with sourcing parts.
One day, with permission, I may go through some of their shops and show what they are building.

Oddly enough, I am already working to lock up a non running M998, that has been gutted of the powertrain/drive train.
It will be on the back burner, since costs will be imperative for that build.
But, I am hoping it leads to more local HMMWV trucks.
I still haven't done the GovPlanet route and have been considering it, especially for the ECV trucks.
The only the keeps me back is taxes, fees, transportation costs, etc. The nearest place for me that sells ECV trucks is California.
To be honest, it makes more sense to me to just drive there and pick it up, depending on if I can somehow get two at a time.
So, we will see how this all evolves.

While I may do some more custom work in the future, it makes more sense for me to keep ending costs down. Especially since, everyone has their own vision after buying one.
It is too early to tell whether hard top/hard doors, custom doghouses, custom stereo systems, insulated and lined interiors, resprayed trucks, lift kits, engine swaps, etc. are a viable solution to me being able to do this on the side.
But, I will just take one truck at a time and have some fun.

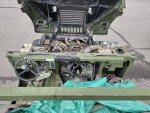
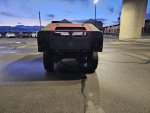
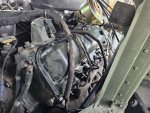
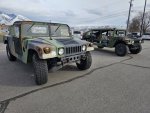
Back to the M1123. Here are pictures of the engine area, and other pictures showing the condition. The bed has a rhino lined typed of bed, then carc'd over. I like it, actually(I wish I had the original seat backs and tailgate).
Troop seats are coming off. Since, this will be at least a basic open top, 4dr, they are too long.
This truck will get LED lights all the way around the exterior.
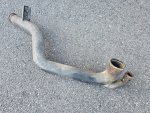
Exhaust tip is missing. Part of me wants a deep fording exhaust, but part of me does not.
I will likely swap my deep fording intake over, after I get a new windshield frame.
Brakes don't work, so that will be a joyous event.

For now, I just want to drive it. So, it is time to say goodbye to the M998. I am now just trying to button up wiring, a couple hoses that I want to replace, and clean it up for sale.
Funny enough, someone slid into the M998, while parked on my street. My truck faired pretty well. The other car, not so much. I will see if I can find pictures.
 

Attachments

Last edited:
mow***com

Active member
72
205
33
Location
Salt Lake, Utah
New update:

Well, it has been an absolute crazy 3 days of running around, with my head cut off.
After having it surgically reattached, I can now continue to press on.
In my other thread, I mentioned that I finished a trade deal for a slantback kit. It is intended to stay with my personal truck and I plan to reverse it, if or when I sell the M1123.
But, for now, I would like to keep the M1123 longer term.

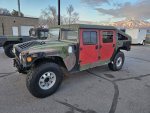
Anyway, here are some pictures. He recently sprayed it, so I will have to spray the hatch and doors to match.
He did include the flat back piece, to convert it to a standard 4 door hardtop. But, I will likely just order a new hardtop piece later on, to have two complete top kits.

This was a little unplanned, as I usually like to have trucks running down the road, before considering cosmetics. But, I didn't think I would have had another chance to snag an aluminum 5 window slantback kit at this point in my journey.
So, it was worth the sacrifice and it actually looks pretty mean.

So, now I will continue with getting the engine running well, and going through the entire truck.
It would be nice to have this truck driving down the road in about 60 days, or so.
I dream of 70+ mph, as I am glued to 55 mph on the motorway. It lights a fire within.
 

Attachments

osteo16

Well-known member
Steel Soldiers Supporter
587
588
93
Location
Evansville, IN
Okay... I've decide to create a thread for the M1123, mostly to keep the different project threads clean.
This is an 11/99 (2000) M1123 that I found pretty much left for dead. The engine/transmission/transfer case were all about to be gutted and it just needed to be saved.

When we were buying the truck, the seller told me that he could get it running. I didn't think too much of it and just kept saving.
Then, I got a call, that he got it running and it was time to pick it up.
When I arrived, it runs, but almost just barely. That is fine to me, because that can be improved.

The seller told me he replaced the injection pump and put in a used glow plug box, with matching sensor(I'll probably replace with a new smart start box).
As much as I wanted to keep the miltary battery units, I've been doing pretty well on my Megalomart batteries in my M998.
So, I will just opt for the less expensive batteries for getting it up and running.

The truck comes with the 4 speed, which I have been waiting for. Plus, I have been looking for a lower weight/higher payload capacity truck for the next phase of my experience.
The NP242 is a good thing to see. I did salvage the speedometer adapter months ago, to use on my M998.
So, I have to pay for that twice. But, it was worth it.

The transmission module appears to be there, so that will be interesting, I just have a feeling.
The wiring harness has been cut in some places, but I was able to snag an older harness, that I can use to rebuild the original(the condition should be solid).
There is no CDR and the seller told me that the fuel pump has shit the bed.
The valve covers look like decoration and have oil covered down the sides.
So, I'll pop those off and clean it all up.

Having the dual voltage alternator is what really gives opportunity to my build. It is at this point, where I decide how wild that I want to get with the electrics.
In my heart, I want simplicity, but in my mind, I want whatever I can design/build.
It would be nice to build a custom doghouse and maybe some amenities to go along.

Anyway... Just like the last truck, I will go through each hub, go through the diffs, transmission, transfer case, engine, fuel system, vent systems, brakes, power steering, cooling system, plus all the wiring and junk.
I will be transferring my wheels/tires over and selling the M998 with the original 12 bolts.
It should be an adventure and probably a bit more involved than the M998.
But, I am here to learn and progress. Thanks, for reading. Here are some pics of the project truck.
I bet that was fun driving home 😂😂😂
 

mow***com

Active member
72
205
33
Location
Salt Lake, Utah
I bet that was fun driving home 😂😂😂
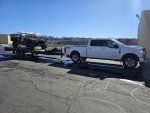
I actually towed it home on a deckover trailer... It was only about 40 miles. It doesn't even have working brakes, plus I have no idea the condition of the engine, trans, transfer case, hubs, etc.
Since it will be my daily driver, I prefer to go through each individual system before even driving it.
 

Attachments

mow***com

Active member
72
205
33
Location
Salt Lake, Utah
Alright... Small update.

I have just been kind of fitting things and making small adjustments with the slant top and doors. In the coming weeks, it would be nice to shoot some coats on paint on the hatch, tailgate, plus doors and roll with it for a while.
In complete honestly, I rather enjoy the color depth and camo pattern.
I truly may just strip the slant back later in the year and try to shoot it in camo.
But, I am a dreamer and we will cross that bridge when we get there.

Funny enough, I was getting ready to order an exhaust and the project truck that I traded, had the exhaust tip sitting loose inside it. It is the little things that matter, sometimes.
I have started swapping wheels over, but the studs look like dung, plus the wheel nuts suck balls.
So, I have been cleaning the studs and I will order new nuts this upcoming week.

I have already taken out the glow plug box(w/ matching temp sensor) and am running it in the M998.
I'd prefer to run my Smart Start box in the M1123, for my own reasons.
Later this weekend, I would like to drain all the fluids, change the valve cover gaskets, install a new CDR, install the block heater, change the fuel filter/hoses and start changing out crusty old radiator hoses.
I've still got to order a new thermostat, check the glow plugs, injectors, etc.

The coming weeks should be fun.... But, while I am awaiting parts, I will start to go through the diffs, change the transmission filter, and start working through each hub.
From the looks of it, some axles are weeping at the hub, so it is time to order some seals there as well.

There is a lot to do, but I will be pretty excited to have it going down the road.
The M998 is already up for sale. So, my time and energy have now shifted to the M1123.
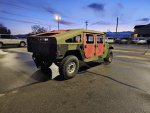
I could only get two Hummer wheels on the truck, but it makes it look taller with full tread tires.
Just getting some windows in, to make a warmer space to work(but will require some fitting, due to paint build up).
Plus, I couldn't get the rear passenger latch in before the sun set. But, enjoy the fun.
 

Attachments

Last edited:
mow***com

Active member
72
205
33
Location
Salt Lake, Utah
Another small update.... I've started working in the engine area.
Most of the fluids have been drained, valve covers removed. The frost plug has been removed and a new 1000W block heater installed.
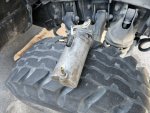
Lower coolant pipe looks pretty crusty, so I will eventually order another.
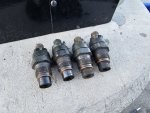
The injectors looked a bit ratty, so I've decided to pull them all and clean them up.
Five of the glowplugs came out with ease. But, three have been fighting me.
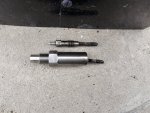
I managed to work one of them out and worked the others loose. But, it has been slow going stuff, without an extraction tool.

The fuel has been drained and I am starting to cycle diesel in the tank, to clean it out a bit. It it is pretty sludgy and I was surprised that this truck actually ran.
Fuel filter has been changed, screen cleaned. Will probably replace all soft fuel lines and clean/or remove the check valves.
A new injector pump being installed, prior to purchase, saves me hassle for this truck.
Still need to install the mechanical fuel pump, but I ordered one without a nipple, so another fuel pump ordered.

After that, I plan to drain the transmission/change filter and drain/fill the transfer case. The diffs have already been drained and it is almost time to work my way to the hubs.
I've also started collecting parts to create my ground harness. It costs less and is just as efficient as the pre made ones.

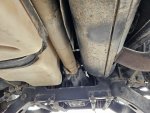
One thing that now makes me laugh, is the fact that I've bought a truck that has 100% been deep fording.
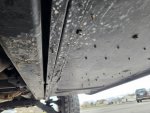
It clicked, when I noticed the frame and underbody had been painted like 20 times. Plus, all the deep fording vent lines, etc. are present.
At first, I though that I was looking at sunflower seeds in the truck floor areas.
But, it turns out that it is river bed pebbles. All over the entire truck.
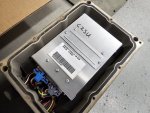
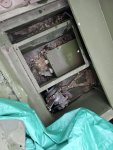
So, I pulled the TCM, expecting to see it rusty as any old bucket. Especially, since it was missing top bolts. When I unbolted it, it was dripping water.
But, when I opened it up, it looked nearly pristine.

So, this truck is a bit more of a project, than the M998. But, it has its own story to tell and is just as rewarding, trying to get it back on the road.
Thanks again, for reading my thread.
 

Attachments

Last edited:
mow***com

Active member
72
205
33
Location
Salt Lake, Utah
I've always said that some days bite harder than others. Today, it was mother nature that bit the hardest.
Today, I fought winds that made me laugh, damn near hysterically. It felt like a desert that I couldn't escape. But, I wasn't about to let the day bust my spirits, so I pressed forward.

That being said, I may need to reseal the transmission gasket. Only time will tell.
I gave it my best effort. But sometimes, it feels like it isn't enough to get the job done right.

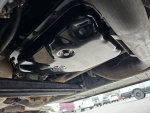
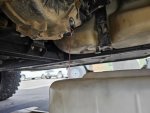
Transmission filter has been changed, but I couldn't easily remove the little tube insert. So, I just reused the original. It just didn't feel tight and it left me feeling off.
So, I may have to do this one again. But, I will at least go through testing, before I make that call.
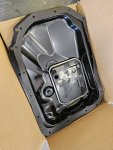
The pan was pretty crusty, and the interior liner was starting to corrode, flaking metal in the process. Well, another pan will do, I guess.

Anyway... Yeah. What a day. Besides that, the transfer case has been drained and the fluid looked great.
The transfer case does shift from H, to HL a little notchy and this raises my brow. But, I will continue forward, thinking it may need a future rebuild.

The fuel pump arrived. Quickly, might I add... So, tomorrow, I will try and tackle that.
Plus, I would like to finish the valve cover gaskets and move on to the next items.
My pace almost feels hurried, but I am trying to be concise, nevertheless.

Maybe, I will get time to do another update before the next week starts. But, that is another bridge that I can cross, when I finally arrive.
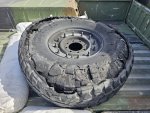
*Lastly... I had a blowout, as I was getting on the freeway. Old tires are a risk, that is for sure.*
 

Attachments

mow***com

Active member
72
205
33
Location
Salt Lake, Utah
Quickish update....

Today was a pretty decent day with the M1123. The glow plug extractor kit arrived, along with the thermostat, lug nuts, etc....
So, it was a day, but most of it got accomplished. I still need to button up quite a few things in the area. But, I feel like progress is being made.

There is one thing that I cannot figure out. Probably, because I am terrible at finding the correct diagrams.
But, I cannot figure out where the hell the speedometer cable routes through. My truck doesn't have the hole on the side of the drivers tub area.

Anyway... fuel pump is in. Hopefully, I didn't use too much grease to hold the rod in place, but time will tell.
I don't really trust the valve cover replacement job that I did, but it will do to get the truck up and running.
I did nudge/bully some of the fuel lines around, but life goes on. I wasn't about to take off the intake manifold and crack all the injector pump lines.

So, onto to the other side. The fuel filter is done and I just need to finish the valve cover.
Part of me wants to take off the alternator to do this. It is just in my way... haha.
But, if I touch the serpentine tensioner, I know how this will go.

Of all systems touched so far, only the transfer case has me wondering. I can reach all sets, but there is a notchy feeling that I can't get past.
The fuel system is nearly finished. Now, I just need to finish the cooling system.
Then, it is on to brakes and hubs.

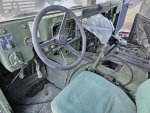
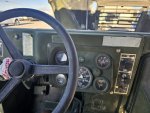
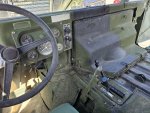
I've started to finish the dash panel. I still need to drill out the nutserts and add new ones.
I removed the shifter assembly, mostly to add a new indicator and clean the dirt(there was alot of dirt).
Almost time to get to the lighting and get some batteries.
It seems like I am going pretty quick. But, I've set a date for 21-30 days to have it driving around the block.
I haven't even painted the hatch and doors, so it had better be well planned. Thanks.
 

Attachments

Mullaney

Well-known member
Steel Soldiers Supporter
Supporting Vendor
7,773
19,884
113
Location
Charlotte NC
Quickish update....

Today was a pretty decent day with the M1123. The glow plug extractor kit arrived, along with the thermostat, lug nuts, etc....
So, it was a day, but most of it got accomplished. I still need to button up quite a few things in the area. But, I feel like progress is being made.

There is one thing that I cannot figure out. Probably, because I am terrible at finding the correct diagrams.
But, I cannot figure out where the hell the speedometer cable routes through. My truck doesn't have the hole on the side of the drivers tub area.

Anyway... fuel pump is in. Hopefully, I didn't use too much grease to hold the rod in place, but time will tell.
I don't really trust the valve cover replacement job that I did, but it will do to get the truck up and running.
I did nudge/bully some of the fuel lines around, but life goes on. I wasn't about to take off the intake manifold and crack all the injector pump lines.

So, onto to the other side. The fuel filter is done and I just need to finish the valve cover.
Part of me wants to take off the alternator to do this. It is just in my way... haha.
But, if I touch the serpentine tensioner, I know how this will go.

Of all systems touched so far, only the transfer case has me wondering. I can reach all sets, but there is a notchy feeling that I can't get past.
The fuel system is nearly finished. Now, I just need to finish the cooling system.
Then, it is on to brakes and hubs.

I've started to finish the dash panel. I still need to drill out the nutserts and add new ones.
I removed the shifter assembly, mostly to add a new indicator and clean the dirt(there was alot of dirt).
Almost time to get to the lighting and get some batteries.
It seems like I am going pretty quick. But, I've set a date for 21-30 days to have it driving around the block.
I haven't even painted the hatch and doors, so it had better be well planned. Thanks.
.
I wouldn't worry about the grease that held the push rod in place for your fuel pump.
Soon as you start the truck, that grease will get washed out and eventually dissolve.

.
 

Mogman

Moderator
Staff member
Moderator
Steel Soldiers Supporter
7,016
9,690
113
Location
Papalote, TX
If you are shifting the TC properly, with the engine off and the trans. in neutral then at times the shifting dogs do not line up making it difficult to get it into the range you want.
 

mow***com

Active member
72
205
33
Location
Salt Lake, Utah
Small update... I have run into a few snags. First, renting trailers big enough to haul Humvees, are costing me, since I don't have a proper truck and trailer set up.
Plus, locating trucks that can move 10k-ish easily, isn't always on the menu.

That being said, Humvee building is on slight hold. It won't take long to capture what I envision.
It would be nice to have the ability to move more than one truck, or even two trucks at a time.
Plus... In the mountains, it becomes a different game vs flatlanding the load across the plains.
Then, I dislike trucks that get bullied by the load. It just creates insane amounts of wear on smaller truck set ups.

So, I am on the hunt for a unique set up. Over the next couple weeks, I will be looking at some trucks that I've narrowed down.
Then, I have a lead for the trailer that I am seeking.
In some universe, I am hoping for a miracle. Because, I am spread out pretty thin and just want to get my hands dirty.

Stay tuned. Thanks again, to all. This thread may slighty get derailed by the OP.
 

Thunderbirds

Well-known member
270
388
63
Location
Northern Black Hills South Dakota
Okay... I've decide to create a thread for the M1123, mostly to keep the different project threads clean.
This is an 11/99 (2000) M1123 that I found pretty much left for dead. The engine/transmission/transfer case were all about to be gutted and it just needed to be saved.

Anyway... Just like the last truck, I will go through each hub, go through the diffs, transmission, transfer case, engine, fuel system, vent systems, brakes, power steering, cooling system, plus all the wiring and junk.
I will be transferring my wheels/tires over and selling the M998 with the original 12 bolts.
It should be an adventure and probably a bit more involved than the M998.
But, I am here to learn and progress. Thanks, for reading. Here are some pics of the project truck.
Hey mow***com,

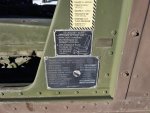
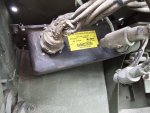
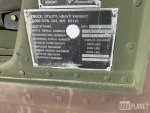
I just read your thread about your M1123 project. I too have a newly purchased '99 M1123, so that made me look at your data plate pic and compare... Your serial number is only 8 trucks younger than mine. 187408 vs 187416.

1.jpg

Pretty cool rig, and like you I also had charging and other electrical issues but they seem to be fixed, nothing too serious, yet. Still need to do a fluid and filter refresh, replace dry rotted tires. Waiting on the SF97 then off to apply for a South Dakota title. Can't wait to get the rig on the first road trip into the Black Hills.

Keep the updates coming.

Lee
 

mow***com

Active member
72
205
33
Location
Salt Lake, Utah
Hey mow***com,

I just read your thread about your M1123 project. I too have a newly purchased '99 M1123, so that made me look at your data plate pic and compare... Your serial number is only 8 trucks younger than mine. 187408 vs 187416.

View attachment 924231

Pretty cool rig, and like you I also had charging and other electrical issues but they seem to be fixed, nothing too serious, yet. Still need to do a fluid and filter refresh, replace dry rotted tires. Waiting on the SF97 then off to apply for a South Dakota title. Can't wait to get the rig on the first road trip into the Black Hills.

Keep the updates coming.

Lee
That is awesome, I will try to find your posts... It was sad that I stopped updates for a while though. So many things have been in the way, that I have found it hard to find time for everything.
That being said. I plan to start the updates again. I've slowly been collecting parts over the months and working on bits, here and there.
I plan to start the truck in the next couple weeks. I am just trying to get the last few things done that are needed.

I'll do a speedy uptodate later this evening. Best wishes.
 

Thunderbirds

Well-known member
270
388
63
Location
Northern Black Hills South Dakota
That is awesome, I will try to find your posts... It was sad that I stopped updates for a while though. So many things have been in the way, that I have found it hard to find time for everything.
That being said. I plan to start the updates again. I've slowly been collecting parts over the months and working on bits, here and there.
I plan to start the truck in the next couple weeks. I am just trying to get the last few things done that are needed.

I'll do a speedy uptodate later this evening. Best wishes.
Yea, been there. In the beginning the lure of figuring stuff out and tinkering is greater than most life's' problems. But the problems don't go away... Usually they catch up. You would enjoy the labor of working on the truck much more when you're less distracted by everyday stuff. I have to fight myself not to fall to the fallacy of interest vs importance.

I am lucky enough to recently have made a connection, I am retired military near an Air Force Base, and the Auto Hobby shop is managed/led by a motor-pool Sgt. He has agreed to meet me on Saturday 9/7/24 to go over anything I have issues with. So far on my list is troubleshooting the TPS and brake switch, either or both giving me TCC lockup issues. It seems my transmission is jumping in and out of TCC lock (most noticeable when warm and going uphill). Then while on the lift I'll finish up the lube, and replace the glow plugs. Only drawback is the base is nearly 55 miles away, and some will be interstate (only 4 miles) due to a lack of service roads on that stretch. Luckily, here in rural South Dakota where we have twice as many Bovine than humans, no one will mind.

Your project seems to be more hard hitting with major components need attention. Keep us updated, pictures and comments. And good luck!
 

mow***com

Active member
72
205
33
Location
Salt Lake, Utah
Okay... Here is an update. I've gotten the old rusted dash expanding nutserts out and installed new ones.
While I was at it, I picked up a traditional rivet gun. I have a feeling I could need/use it in the future.

I had to make some of the back pieces for the gauges. Most were plastic and cracked out. So, I just carved them out of some metal and called it a day.
So, the gauges are all wired up and mounted up. Sadly, my truck has a really long routing for the speedometer cable, so I will be ordering a longer one and installing it soon enough.

I pulled the windshield frame out. I tried mounting a windshield and it cracked. Since, I don't really like textured finishes anyway, I am thinking about stripping it, or finding a take off to replace it.
I've started the 4 door conversion, by adding rear seat belt mounts, ordered all new seat belts, plus added the rear soft door striker/latch set up(I didn't really bond with the hard doors, so they are gone.)

I have been trying to clean out sticky diesel goo from the tank for the last weeks/months. Almost there.
I ordered 8 new injectors, basically for peace of mind. The original injectors still looked ratty.
Once the other 4 injectors arrive, I will put the fuel filter and rest of the fuel system back together.

All the radiator hoses are new. I didn't want to mess with used, cracked hoses, since I plan to keep this truck for a while.
I ordered a new overflow tank. I couldn't get the other one clean enough for my preference and can use it on another project.

I have swapped a lot of parts over from the other truck. Mostly the stainless steel bolts that I had to pay for. I didn't want to pay for them again(It is expensive).
I swapped the windshield sprayer tank to the new truck also, plus the newer doors that I bought.
For now, I'll be running basic rear seats, until I can afford something better.

Next post will be a part 2.
 

Attachments

mow***com

Active member
72
205
33
Location
Salt Lake, Utah
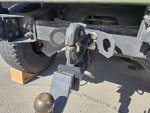
Part 2..... I've also installed a rear ball hitch set up. I took the advice of a thread I read about earlier.
I rearranged the chain holder to the outside, and cut the tabs down. The castle nut was extremely close and I didn't really want to weaken it much. I carved each castle slightly, until I could slide a pin into the pintle threading.
It took a awhile, just taking my time. But, for me, it was worth it.

Almost time to get some batteries and see what lights up. I am going to LED's for almost everything.
Someone gave me some LED headlights that were scratched up and didn't have a harness. But, I can easily make the harness with some bullet ends, so it was a little score.

Drilled the slantback front piece for the intake snorkel bracket. Not sure why Plan B doesn't index those holes from the start.
Mine probably isn't dead nuts perfect, but it should line up when I get it all together.

Still quite a few things to go over. Some time next week, I will do the hubs and swap the H1 wheels back to the slantback.
Not enough time in my life, to get this done as quick as I want.
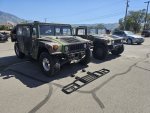
However, in the background.... You can see my bigger truck and the reason the slantback took a slight backseat delay.
Well, I will try to keep up with this thread again. It is getting closer and I can almost taste it.
 

Attachments

mow***com

Active member
72
205
33
Location
Salt Lake, Utah
Minor updates... Swapped the tailgate for an AM General stamped one. It has some dings, but so did the other one that was one it. Life goes on. At least they came with some used chain hooks. But, I will make some reinforcement plates out of some steel that I have.
Also, swapped the windshield frame and got some glass in. The only problem was, the retaining strips were drilled in the wrong location.
I was about to order new ones. But, I can do that later and the hardtop will cover most of the drill holes.

Got most of the seat belts in. But, I need to buy a SAE tap and die set tomorrow, to run through a lot of the holes. Excess paint and dirt/grit in the threads.
Also, found a nice, used drivers seat locally and put the other seat in the passenger area. Plus, thicker rear seat top plates that feel much better.
Got a battery cover in a local deal and it is really in solid condition too, among a few other smalls that will help complete the truck.

I decided that I might want to use the Luverne brush guard. But, the mounting points are different and a frame section appears to be in the way.
This weekend, I'll take off the front plate and see what needs to be done to get it mounted up.

Truck is getting closer everyday. But, my checklist is still pretty long. Hopefully, it will get it's first start up in the next week or so.
Then, I suppose the real fun starts. Swapped the wheels back and still need to do the hubs and fill the diffs.
I am going to redo the transmission filter, due to dirt getting In a failed dipstick seal hole. A little peace of mind to clean the pan and reseal.

That is all for now. Feel free to stay tuned.
 

Attachments

mow***com

Active member
72
205
33
Location
Salt Lake, Utah
Super small update... It had been a step ahead, two steps behind kind of days. But, in the end, I got the result I was seeking.
For some reason, I couldn't shake the idea that the Luverne brackets were so close to the mounting points on the winch plate.
But, as I read in another thread. I cut the mounting bracket, losing the tie down hooks. Flipped them on the other side and used the excess for spacer plates, to get clearance on the frame tube's.
It is very close and I may need to make need to make an extra spacer in the future. But, it mounts and folds just fine.
I did have to flip my outer bolts around, but the other bolts I left for mounting to the frame section. Here is the result.... When I take it apart to paint, I will show how much of the plate need to be altered to make the mounts fit.
It is a tight fit. But, if it ain't tight, it ain't right.

Also, I removed the rear hatch to paint it. I am just going to paint it a generic olive green, to get me by a season.
It isn't a big deal, to repaint it later, since I might strip and repaint the entire slantback at some point.

Anyway. Got the shims for the tail gate and it mounted up incredibly snug, with solid clearance.
Going to maybe make a template for the inner windshield bracket, or I might just buy the AM General ones. We will see.
Also picked up a tap and die set. It was a very good decision as, most if the exposed holes were gritty.

I wanted to do the transmission filter today. But, plans changed with the lady.
So, that can wait until later this week. Hopefully, this next upcoming weekend, I will get a chance to start it.
Just trying to be thorough as I make my way there though.
Patience might be the key. We will soon find out.
 

Attachments

Top
AdBlock Detected

We get it, advertisements are annoying!

Sure, ad-blocking software does a great job at blocking ads, but it also blocks useful features of our website like our supporting vendors. Their ads help keep Steel Soldiers going. Please consider disabling your ad blockers for the site. Thanks!

I've Disabled AdBlock
No Thanks