• Steel Soldiers now has a few new forums, read more about it at: New Munitions Forums!

  • Microsoft MSN, Live, Hotmail, Outlook email users may not be receiving emails. We are working to resolve this issue. Please add support@steelsoldiers.com to your trusted contacts.

303M HydraMatic rebuild

rustystud

Well-known member
9,295
3,068
113
Location
Woodinville, Washington
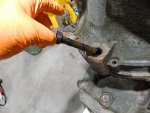
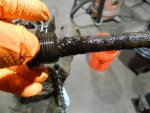
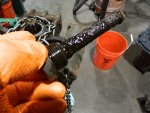
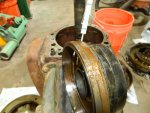
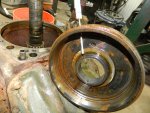
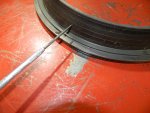
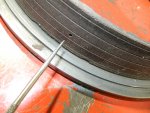
Tonight's little rant involves the 303M's rear oil pump filter. For you guys running your m135's with the HydraMatic, you need to clean this filter on a regular basis ! It's a small filter and easily clogs up thus depriving your reduction system of oil. Every filter I have removed lately has been clogged up. I know it looks like a drain plug, so your natural inclinations are to leave it alone, don't !

001.JPG002.JPG003.JPG
 

rustystud

Well-known member
9,295
3,068
113
Location
Woodinville, Washington
I'm in the process of tearing down transmission number 3 of the 5 Canadian 303M's I brought home early September.
I found the transmission 'Lyle" warned me about that had died during an extraction from the mud. He mentioned the previous owner had tried to "rock" it out and during this procedure the transmission died.
I found out why.
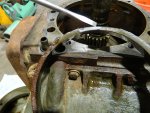
Can anyone see what is wrong here ?
005.JPG006.JPG
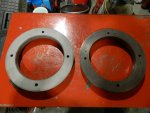
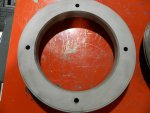
This is the "reverse internal gear" . It is the same part as a civilian transmission and should "NEVER" be rocked ! It was not made for the kinds of load the M135 can put on it. Also, you should always use low range when using reverse gear if you want your 303M transmission to live a long happy life. I know a lot of people get really testy about this, but the truth hurts sometimes.
It was not made strong enough to handle the weight of a M135 truck. Like I said, it is literally the same part used in cars. Like your great granddaddy's Oldsmobile.
I have never seen this kind of damage to this part on any car, only M135 trucks.
Kinda makes you think "HUMMMMM? " maybe this part should have been made bigger for this application ?

011.JPG013.JPG That 1" bright spot was the only thing still holding this part together.
 

rustystud

Well-known member
9,295
3,068
113
Location
Woodinville, Washington
Well I finally found out what MWO "B" means. MWO "A" means the front clutch has 5 disc's instead of the original 3 the 302M came with, (though the 302M later added a fourth clutch plate, not sure when) . MWO "B" means the reduction piston has four holes drilled in it to help with piston release, plus it helps lubricate and cool down the "reduction driven cone" which can get really hot.
I had a 302M which had both "A" and "B" MWOs applied to it. That made it hard to figure out what they did since now it is basically a 303M transmission. I knew the original 302M had 3 clutch plates in it (sometimes four) . So that was a given, but I didn't know what the "B" mod was since all my other transmissions were the 303M's. This last transmission though was a 302M that had the "A" mod done but was last rebuilt in early 1964 before the "B" mod came out (sometime in September I believe) . Looking at all the parts to see what was different, I finally found the reduction piston had no holes in it.

005.JPG006.JPG007.JPG008.JPG010.JPG
This was the last piece of the puzzle.
Later on came the "C" mod which is the front servo modification which I have already implemented in this rebuild.
So now I'll drill out this piston and put it in the stockpile.
 
Last edited:

rustystud

Well-known member
9,295
3,068
113
Location
Woodinville, Washington
Great work Studly.. This is truly a fantastic thread. You may have another transmission coming your way....
Are you buying another truck ?
Is this truck for sell ? I'll buy it if you don't. I need a decent cab.
I'm still tearing down transmissions trying to get good parts.
This last transmission was almost a total loss. I have never seen such destruction before ! The main case was even broken !!!
Half the bronze thrustwashers where destroyed. The front clutch assembly, destroyed. The input shaft and output shaft destroyed. It was really disturbing looking at all the damage.
The one that really gets me is the "Oil Delivery Sleeve" . It had gotten so hot the sealing ring on the end "Fused" into the sleeve !!!!
I'll take some pictures.

I'm going to look into having new "oil delivery sleeves" made from 4140 steel. That would eliminate all the problems associated with this part.
 

DUUANE

Active member
426
176
43
Location
Qualicum Beach BC
Yep, it's coming to the shop. Wifey agreed to the deal..because I'm her favorite:ROFLMAO: ...and it's just around the bend from me. Practically followed me home.
I have yet to see it in person. I'm hoping to get home next week and do an evaluation of the power pak. My 135 and this 211 are both slated for repowers. This one I'm thinking will get a 4-71 and 13 over road ranger. keep the tcase single speed and use the pto for a hiab i picked up today. The 135 is going to get the 2 speed converted tcase. The 303 I'll save for you.
 

williamh

Well-known member
472
651
93
Location
SanDiego Ca.
Not to change the subject matter. The original transmission were designed to run on 30wt oil. Did you start using atf or stay with the 30wt. ?? I haven’t had that series truck for about 10 years. I really liked that truck for the auto trans. The M135 I had would cruise at 65 on flat ground until the tires would start to bounce. Wouldn’t climb hills for crap. 🤣 but no military truck does. It looks like it had atf in it. Just asking. 👍
 

rustystud

Well-known member
9,295
3,068
113
Location
Woodinville, Washington
Yep, it's coming to the shop. Wifey agreed to the deal..because I'm her favorite:ROFLMAO: ...and it's just around the bend from me. Practically followed me home.
I have yet to see it in person. I'm hoping to get home next week and do an evaluation of the power pak. My 135 and this 211 are both slated for repowers. This one I'm thinking will get a 4-71 and 13 over road ranger. keep the tcase single speed and use the pto for a hiab i picked up today. The 135 is going to get the 2 speed converted tcase. The 303 I'll save for you.
Great !!!
Thanks Duuane.
It will be nice to see your new place.
 

rustystud

Well-known member
9,295
3,068
113
Location
Woodinville, Washington
Not to change the subject matter. The original transmission were designed to run on 30wt oil. Did you start using atf or stay with the 30wt. ?? I haven’t had that series truck for about 10 years. I really liked that truck for the auto trans. The M135 I had would cruise at 65 on flat ground until the tires would start to bounce. Wouldn’t climb hills for crap. 🤣 but no military truck does. It looks like it had atf in it. Just asking. 👍
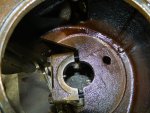
No automatic transmission was ever designed to use 30W oil, including the HydraMatic. GMC just gave the military a "waiver" on using 30W oil since the military mechanics didn't know what to do with an automatic. Plus, it was one less oil the military didn't need to stock up on.
If you had ever torn down an automatic transmission that had used 30W oil in it, you would see for yourself the damage it can cause, especially to the clutch plates.
 

rustystud

Well-known member
9,295
3,068
113
Location
Woodinville, Washington
Here's some pictures of that poor transmission I just tore down.
002.JPG You see that ring in the case ? That was from the front clutch assembly grinding into it. It was almost through the metal.
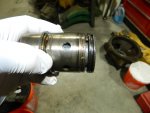
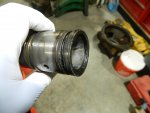
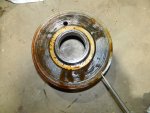
003.JPG005.JPG This oil delivery sleeve has the seal ring welded in ! I have never seen such heat related damage !
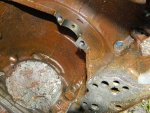
006.JPG Besides having that groove cut into the housing, the rust damage was extensive in the main case.
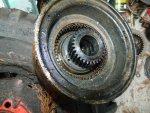
008.JPG The front clutch assembly had welded itself together. I didn't even try to disassemble it.
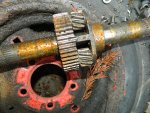
009.JPGThe gears had seized on this shaft.
The input shaft and output shaft were also destroyed. I threw them in the dumpster so sorry no pictures.
 
Last edited:

rustystud

Well-known member
9,295
3,068
113
Location
Woodinville, Washington
Today I'll show you how to check the "reduction" piston and the "direct clutch" piston.
I finally received the new reduction pistons outer oil seals from "Fatsco" . I bought two. They have six left.
So, I reassembled the reduction unit (again !) and now I need to check the operation of the pistons.

Just a note here: I would recommend using "NordLocks" on the bolts since the "straps" are no longer available and the old straps are all worn out and are basically useless to prevent the bolts from loosening.
013.JPG
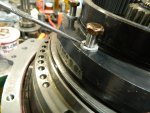
014.JPG You apply air pressure here to apply the "reduction" piston. Be very careful to "NOT" use too much air pressure here. 20 Ibs of air pressure is all you need to check the seals. Just allow the piston to gently rise up about 3/16" no more, since the "driven cone" has no "stationary cone" to push against it yet. Without the "stationary cone" the piston can blow out of its bore.
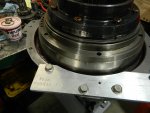
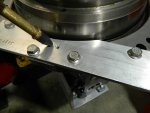
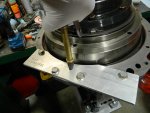
010.JPG011.JPG012.JPG

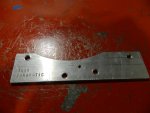
I made up a "test plate" to air test the "direct clutch" piston.
019.JPG
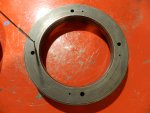
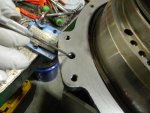
020.JPG The test plate needs to cover this "T" shaped hole shown here.

You can use full air pressure here once you bolt down and torque the bolts for the "internal gear assembly" to the "reduction clutch drum". The bolts I used the "NordLocks" on.
On either piston, you should have no leakage at all. If you do, disassemble it and find out why it's leaking. Usually it's because you allowed the oil seal to twist in it's bore.
When I was installing the reduction piston, one side was not going down. The oil seal had come partially out of the bore. So, I added more assembly lube and pushed the seal back in. The assembly lube helps hold in the seals.
Remember when installing the large reduction piston to "never" push hard to install it. It should almost go in all by itself if done correctly. Once it has started going into its bore (about a 1/4" ) you can gently push it in the rest of the way.
 

DUUANE

Active member
426
176
43
Location
Qualicum Beach BC
i
Today I'll show you how to check the "reduction" piston and the "direct clutch" piston.
I finally received the new reduction pistons outer oil seals from "Fatsco" . I bought two. They have six left.
So, I reassembled the reduction unit (again !) and now I need to check the operation of the pistons.

Just a note here: I would recommend using "NordLocks" on the bolts since the "straps" are no longer available and the old straps are all worn out and are basically useless to prevent the bolts from loosening.
View attachment 935914
View attachment 935919 You apply air pressure here to apply the "reduction" piston. Be very careful to "NOT" use too much air pressure here. 20 Ibs of air pressure is all you need to check the seals. Just allow the piston to gently rise up about 3/16" no more, since the "driven cone" has no "stationary cone" to push against it yet. Without the "stationary cone" the piston can blow out of its bore.
View attachment 935915View attachment 935916View attachment 935917

I made up a "test plate" to air test the "direct clutch" piston.
View attachment 935918
View attachment 935920 The test plate needs to cover this "T" shaped hole shown here.

You can use full air pressure here once you bolt down and torque the bolts for the "internal gear assembly" to the "reduction clutch drum". The bolts I used the "NordLocks" on.
On either piston, you should have no leakage at all. If you do, disassemble it and find out why it's leaking. Usually it's because you allowed the oil seal to twist in it's bore.
When I was installing the reduction piston, one side was not going down. The oil seal had come partially out of the bore. So, I added more assembly lube and pushed the seal back in. The assembly lube helps hold in the seals.
Remember when installing the large reduction piston to "never" push hard to install it. It should almost go in all by itself if done correctly. Once it has started going into its bore (about a 1/4" ) you can gently push it in the rest of the way.
I'm a huge fan of nordlocks..Rolls Royce marine junk used that design before nordlock was a thing. Hugely effective and non marring for the most part.
 

DUUANE

Active member
426
176
43
Location
Qualicum Beach BC
Great !!!
Thanks Duuane.
It will be nice to see your new place.
It'll be nice to see you. I'm going to have a little time to myself in december. Hopefully the weather will co operate and i can make some hay. Word on the street at the drydock is Jan and Feb will be mayhem. 6 vessels with 5 year major overhauls in 2-2 1/2 months. All mechanical. No time to even sleep. I'll keep you posted.
 

rustystud

Well-known member
9,295
3,068
113
Location
Woodinville, Washington
I've been trying to get ahold of "Tom Wolboldt" to no effect. All I get is an answer machine which I've left many messages on. No call backs.
So I will be using the best reduction piston spring I have and hope it holds up.
Haven't been able to work in the shop lately due to a massive power outage we are having. Today I ran a cord to my MEP-003 (which runs the house) and hocked up some lights and the shop heater. So tomorrow I should be back in there working on the 303M. Power should be back on this Saturday.
 

rustystud

Well-known member
9,295
3,068
113
Location
Woodinville, Washington
Hold your horses !
Tom Wolboldt sent me a text message today ! I called him back and he thinks he might have the wave spring !
So tonight I'll look up the part numbers of items I need and see if he has them.
Also the power finally came back on at 1:00 AM tonight. My little MEP-003 ran like a champ for 4 days straight ! We even had a little hiccup when the well house pumps came on (two pumps at 1 HP each) and the swim spa pumps came on (two 1 HP each) at the same time. The generator was outputting over 120% and did not like it, but it still ran ! The house lights dimmed and I went out to see what was going on. I shut-off the spa pumps until the well house pumps shut off. Good little generator !
 
Top
AdBlock Detected

We get it, advertisements are annoying!

Sure, ad-blocking software does a great job at blocking ads, but it also blocks useful features of our website like our supporting vendors. Their ads help keep Steel Soldiers going. Please consider disabling your ad blockers for the site. Thanks!

I've Disabled AdBlock
No Thanks