• Steel Soldiers now has a few new forums, read more about it at: New Munitions Forums!

  • Microsoft MSN, Live, Hotmail, Outlook email users may not be receiving emails. We are working to resolve this issue. Please add support@steelsoldiers.com to your trusted contacts.

303M HydraMatic rebuild

rustystud

Well-known member
9,298
3,072
113
Location
Woodinville, Washington
I tore down a mid fifties HydraMatic that someone had installed "bronze friction" clutches in the front drum assembly. Sadly they messed it up so bad it killed the transmission !
Sometimes the "bronze" frictions do not fit the hub as well as they should, and they need a little file work.
This rebuilder just forced them together causing the engagement "lugs" or I like to refer to them as little fingers to bend upward. This caused them to gouge into the hub after the first apply. Effectively making the clutch always on !
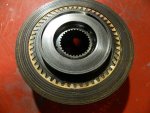
I was wondering how this transmission failed when I first started tearing it down. It looked like a brand new rebuild. New bushings, new thrustwashers, new bearings. Then I came to the clutch packs and I was unable to open the front clutch. I hammered on it ( with a soft faced dead blow hammer) for some time trying to get it to open. At one point I almost put it into the press, but I wanted to be able to save as much of it as possible. When it finally came apart and I could see what happened, I was horrified to see those priceless "bronze" frictions destroyed as was the clutch housing itself due to the extreme heat built up. The housing was actually blue due to the high heat. Those "bronze frictions" were burned and bent upward with their little fingers mangled beyond repair. I almost cried.
Oh the inhumanity !!!
I saved them so I could show them to others as a lesson in "what not to do ! " .
I forgot to take pictures as I was grief stricken, but I'll take some tomorrow.
 

rustystud

Well-known member
9,298
3,072
113
Location
Woodinville, Washington
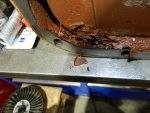
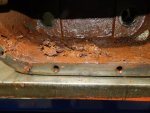
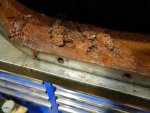
Since I was in a cleaning mood today, I thought I would tear down and clean the oil pan cooler from my other 303M transmission.
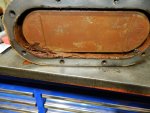
You can see all the crud that was in the bottom of the cooler. The crud reached the cooler itself. No coolant was flowing around this cooler.
014.JPG016.JPG019.JPG020.JPG
I'll clean this mess up and then sandblast it. After that I'll give it a good paint job and put it away.
 

rustystud

Well-known member
9,298
3,072
113
Location
Woodinville, Washington
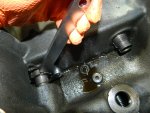
I have noticed that previous people who have rebuilt these 303M HydraMatics did not use the correct tools when disassembling this transmission. Case in point, the oil pan cooler nuts.
I used my "spanner" wrench but you can see where others used a "chisel" to remove these nuts.
The thing is, the spanner I used only cost around $30.00 . I can use it for years now on other projects and no more damaged nuts. Using the proper tool makes life so much easier and the cost is usually not that much. Especially considering the possible damage to parts.

011.JPG012.JPG
 

tobyS

Well-known member
4,832
833
113
Location
IN
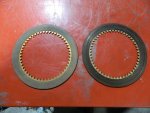
So here's the steel plates.
View attachment 924714View attachment 924715View attachment 924716View attachment 924717View attachment 924718
The first one is brand new NOS steels. The second one is slightly used and I buffed them out. The next two are really used but they could be reused if you were desperate. Which in this time means they will get used as parts are almost gone now. The last steel is totally shot. It is blued from the heat and warped.
Never use a steel that has blue in the metal. It is a hot spot that the friction will not be able to grab onto.
Basically it has been "heat treated" and become hard.
The Allison 1545 used in the M35A3 has a lot of issues with clutch destruction, I think comes from locking the converter. They should have stuck with the 545 and no locking converter. A3 is doomed to be slow with 1:1 final...so now I want Eaton 6 gears and sell the rebuilt 1545. This is a well detailed rebuild Rusty!
 

msgjd

Well-known member
1,112
3,414
113
Location
upstate ny
I think the bad reputation of this transmission has been why very few people have an interest in the G749 series.
as you know the hydramatics have had a reputation almost since they came out , and yes, much of the issues are from operators and mechs/rebuilders who don't grasp the special aspects or quirks of them .. I had a loaner XM211 for a couple years until I was able to sell it for the fella.. Never had an issue with it .. The last of them were sitting at DRMO's awaiting disposal when I enlisted , thus I sure had heard a lot about them and their quirks from the older drivers , so I am glad I had listened to them 20-some years before I had one on the property..

I have seen a couple converted to a spicer 5-speed manual tranny from a C60 or C70, but they lost their transfer case (and 6x6) in order to do it.. A carrier bearing had to be installed as well as different driveshaft.

Seems to me someone could more-easily take a M44-series tranny w/xfer case and stuff it into a Jimmy , but I have not seen one (yet) .. Saying this for those who want a Jimmy but are afraid of the tranny or prefer a standard
 
Last edited:

rustystud

Well-known member
9,298
3,072
113
Location
Woodinville, Washington
The Allison 1545 used in the M35A3 has a lot of issues with clutch destruction, I think comes from locking the converter. They should have stuck with the 545 and no locking converter. A3 is doomed to be slow with 1:1 final...so now I want Eaton 6 gears and sell the rebuilt 1545. This is a well detailed rebuild Rusty!
Thanks Toby. Too bad about your Allison 1545 though. They're a good transmission in the right application, and that would be in a smaller truck.
Have you thought about using an Allison 1000/2000 series transmission ? With that nice overdrive they have you should be able to fly down the road.
My next build will be installing an Allison 1000 behind my MultiFuel.
 

rustystud

Well-known member
9,298
3,072
113
Location
Woodinville, Washington
Sorry, no new pictures or build information today. The machinist has my pistons and soon will have my clutch housings to modify. I'm turning all my 3 rod housings into 6 rod units. I mean if you're going to rebuild it, you should rebuild it right from the start.
 
Last edited:

G744

Well-known member
Steel Soldiers Supporter
1,724
3,883
113
Location
Hidden Valley, Az
Ah, the G749 GMC Hydramatic.

70 years on, there is still the argument around either ATF or OE-10 in it.

I always like the water-cooled aspect of it, BTW.
 

rustystud

Well-known member
9,298
3,072
113
Location
Woodinville, Washington
Ah, the G749 GMC Hydramatic.

70 years on, there is still the argument around either ATF or OE-10 in it.

I always like the water-cooled aspect of it, BTW.
Well according to GM the only fluid "they" ever recommended was and is ATF . I'm pretty sure the reason the military used regular motor oil was to simplify using the G749 . Since it was the only truck in the military at the time to need ATF. Remember, all military vehicles at this time used manual transmissions. The soldiers were used to using gear oils and engine oils not ATF. Even when the HydraMatic was used in the M5 tank they used engine oil in it. Since the M5 used "bronze" friction plates it really didn't matter much. So fast forward to the early fifties and here is this unusual truck with that newfangled automatic transmission in it. What to do ? Well, the M5 worked fine with engine oil so why can't we use it in this new truck ?
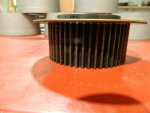
Of course this new HydraMatic used "paper/fiber" friction plates which doesn't tolerate engine oil all that well.( I refer you to the pictures of the "burnt" friction plates. that transmission had engine oil in it.)
So, can you use engine oil in the HydraMatic ? Yes you can. Is it the best oil you can use ? No, it isn't.
 
Last edited:

rustystud

Well-known member
9,298
3,072
113
Location
Woodinville, Washington
I still have a lot of cleaning to do, but I'll start on rebuilding the individual components.
Today is the front pump. The front pump is really quite simple and hardly needs a write up on rebuilding it except for a few little things.
One, the vanes need to be replaced if they show any wear in the middle. This is due to the way they fit in the rotor. If there showing signs of wear here, they will soon start to break.
Second, when reinstalling the vanes you need to put them back in the same orientation they had. There will be two wear marks from the two vane rings, and a solid smooth wear mark from the "slide" .
035.JPG037.JPG
I know the manual says to replace the vanes if there is more than .003" wear, but since you cannot find them anymore, we will need to reuse them. I bought a rebuild kit years ago that has the vanes in it. It is going into one of my better pumps.
Now about the bushing. You can buy new pump bushings from "Fatsco" . They will cost you an arm and a leg but they are available along with the front seal and seal ring.
Third, check for wear on the "cover assembly" . This is the area the "slide" fits into. For some reason it tends to wear more here from "vane" contact than the other half does. If you have visible wear and you can "catch" your finger nail on it, then you should have it machined. Of course this will cost around $200.00 and if your only going to use your truck in parades and such than use the pump. At this stage of the game a few thousands of wear is not going to make all that much difference.
003.JPG001.JPG
Four, taking the pump apart can be a real challenge. I know the manual says to "never" put the pump in a vise, but this is the real world and that little "tool" they say to use cannot handle the torque needed to split that pump housing . I know I have the tool .
I've had to use my "hammer impact" to remove those stupid screws on almost every pump I've taken apart.
001 (2).JPG
My vise has brass jaws in it so I can really torque it down. If you mount your pump using the large machined surface on the back and the machined surface in the front you will be OK.
033.JPG031.JPG
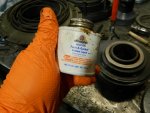
Five, the front seal only fits in about 3/16" so use your favorite "hukey-pukey" to help it seal. I use "aviation sealant" , and be careful to drive the seal on straight.
003.JPG007.JPG
 
Last edited:

rustystud

Well-known member
9,298
3,072
113
Location
Woodinville, Washington
For those who are wondering how much a rebuild kit would cost. I called Fatsco two weeks a go and asked about a "Master Rebuild Kit". This kit would include all the clutches (steel and friction) all seal rings and thrustwashers and bushings. All rubber lip seals and "O" rings and gaskets. Now remember this is for a "standard" HydraMatic" not our "303M" Military 8 speed unit.
The cost is $1010.00 . Yep, over one thousand dollars boys and girls !
They also sell "hard" parts like drum housings and such. Though their cost is way too high. For example, just for a front band they want over $250.00 !!! That's a "relined" band not a "new" band.
So save those parts !!!
 

Mullaney

Well-known member
Steel Soldiers Supporter
Supporting Vendor
7,767
19,873
113
Location
Charlotte NC
For those who are wondering how much a rebuild kit would cost. I called Fatsco two weeks a go and asked about a "Master Rebuild Kit". This kit would include all the clutches (steel and friction) all seal rings and thrustwashers and bushings. All rubber lip seals and "O" rings and gaskets. Now remember this is for a "standard" HydraMatic" not our "303M" Military 8 speed unit.
The cost is $1010.00 . Yep, over one thousand dollars boys and girls !
They also sell "hard" parts like drum housings and such. Though their cost is way too high. For example, just for a front band they want over $250.00 !!! That's a "relined" band not a "new" band.
So save those parts !!!
.
Yes sir. They are high dollar parts - but at least they DO have parts...
 

rustystud

Well-known member
9,298
3,072
113
Location
Woodinville, Washington
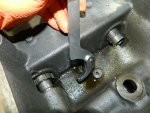
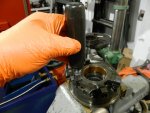
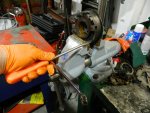
I spent too much time cleaning and painting parts to rebuild the rear servo, which was my planned component rebuild for today. So instead, I decided to replace the bushing in the "oil delivery sleeve" .
Now in most HydraMatic rebuild manuals they say to buy a whole new sleeve assembly and forget replacing the bushing yourself. This bushing can be a real pain to replace and is easily damaged and can cause damage to the sleeve itself, but if your careful you can replace this bushing and not cause any harm.
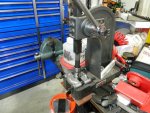
First off, do not try and beat this bushing out or in with a hammer. Use a "Hydraulic" press or an "Arbor" press. This way you're getting a smooth removal/install and not that hammered jerky removal/install which can damage the bushing and the sleeve. Also, a good set of bushing installers would be really nice about now.
I own an "OTC" set I bought decades ago. Their hardened steel and have given me good service all these years. I also bought a set recently from Amazon. Their made in China so there not really hardened that well, but I'm sure for the limited time I will be using them they will be OK.
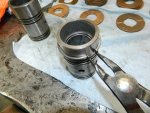
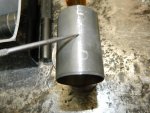
The first thing you need to do is remove the seal rings. Be really careful to not scratch the bearing surface with the seal ring. I always use a snap-ring pliers to remove and install seal rings.
013.JPG
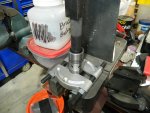
Then using the appropriate bushing remover press out the old bushing. Pay attention to the position of the old bushing so you press in the new one to the same position. Use a bearing splitter or something similar to press against.
024.JPG023.JPG

Then clean out all the gunk that was behind the bushing.
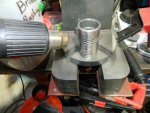
Now here comes the little trick to help install this bushing. Using a heat gun or hair dryer, heat up the sleeve. Do not overheat it, just heat enough to where you cannot touch it.
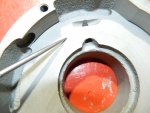
Now press in the new bushing, making sure that the new bushings seam is centered on the alignment hole. That is the smaller hole that is opposite the two larger holes.
025.JPG020.JPG
I know some of your guys are wondering why on earth am I obsessing about this stupid bushing install.
Well some of my first attempts at installing this bushing meet with extreme failure. I broke a sleeve once. I mangled a bushing a couple of times, and I damaged the sleeves end a few times learning how to install this bushing.
This is a "long" bushing and you install it "without" lube. It needs to be dry to seal properly. So if you hammer this bushing in you run the risk of damaging the bushing or breaking the sleeve. Let me tell you, it is a gut sinking feeling when that stupid sleeve breaks in half !
That is why most dealership rebuild manuals say to buy a new sleeve assembly.

Now a word or two about seal rings.
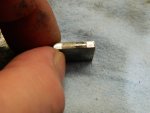
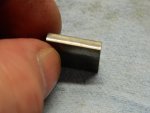
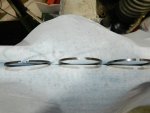
There are three types of metal seal rings used on the old HydraMatic. The "butt cut", the "Lap cut" and the "Locking" ring.
012.JPG The "Butt cut" is the most common and the worst sealing. The "Lap cut" is much better than the "Butt cut", but the best one is the "Locking" ring by far.
In the picture above, the first ring is the "Locking" ring, followed by the "Lap cut". Then lastly the "Butt" cut ring.
All three types where available to buy years ago so you don't know what you'll find in your rebuild . The three shown above fit the "oil delivery sleeve" . Luckily, I have four new "Locking" rings to use on my "oil delivery sleeve" .
 
Last edited:

1944mb

Active member
419
113
43
Location
Big Timber, MT
Hey Dave.
Yes, the parts arrived today. Sadly, they are for a 301MG transmission so no reduction parts. The seals seem to be Ok, a little stiff but I'll soak them in some rubber conditioner and they should be fine.
The gasket for this unit would be really nice to have, also the seal ring that fits in the center.
View attachment 925799
Also the gaskets for the reduction valve body (there are 3 ) would nice too.
View attachment 925800 If there are no gaskets available, I will attempt to make my own or send a copy to one of the guys here who has a CNC cutter attachment and see if he can make them.
The seal ring I will have to reuse. I'll try and buff it out to help seal better.
So, looking at making a kit for the reduction unit. With that in mind, this is a list of gaskets that would be needed....
1. Accumulator cover gasket
2. Reduction unit case halves
3. Lower valve body gasket(reduction)
4. Upper Valve body gasket(reduction)
5. Transmission to front reduction unit case half
6. "BB" pump gasket housing gasket

Did I miss anything? I don't want to tear down one of my cores to recover "BB". I will dig through some parts plowboy gasket me and see with luck if there is the mystical "BB"
 
Top
AdBlock Detected

We get it, advertisements are annoying!

Sure, ad-blocking software does a great job at blocking ads, but it also blocks useful features of our website like our supporting vendors. Their ads help keep Steel Soldiers going. Please consider disabling your ad blockers for the site. Thanks!

I've Disabled AdBlock
No Thanks