• Steel Soldiers now has a few new forums, read more about it at: New Munitions Forums!

  • Microsoft MSN, Live, Hotmail, Outlook email users may not be receiving emails. We are working to resolve this issue. Please add support@steelsoldiers.com to your trusted contacts.

A0 Alternator excite wire question- Get Well grounded

coachgeo

Well-known member
5,127
3,451
113
Location
North of Cincy OH
now that it is warm... my alternator occasional works LOL. (200 amp Hummer)

Will the excite wire get voltage if the alternator ground is not at all or is poorly connected? Knowing that will help me diagnose if it is that or ground (or regulator)
 

Ronmar

Well-known member
3,807
7,383
113
Location
Port angeles wa
The excite wire is fed down from K11 once the oil pressure goes above 15 PSI and de-energizes K11.

now that 24v’s ability to do anything in the regulator once it arrives at the excite terminal relies on it being able to complete a circuit to ground…
 

GeneralDisorder

Well-known member
Steel Soldiers Supporter
2,007
5,145
113
Location
Portland, OR
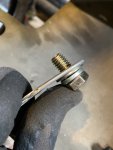
Don't neglect the cab ground under the grill. That one is a TERRIBLE design on both ends. Cab side is laughably poorly designed - on my truck the weld for the stud is so proud of the surface that the star washer they "installed" under the cable just hovers in mid air about 1/8" off the cab surface instead of piercing the paint and making a solid connection. The frame side is horrifically inaccessible - requires a 17mm open end wrench and a lot of swearing. I relocated both ends of the strap.
 

coachgeo

Well-known member
5,127
3,451
113
Location
North of Cincy OH
Don't neglect the cab ground under the grill. That one is a TERRIBLE design on both ends. Cab side is laughably poorly designed - on my truck the weld for the stud is so proud of the surface that the star washer they "installed" under the cable just hovers in mid air about 1/8" off the cab surface instead of piercing the paint and making a solid connection. The frame side is horrifically inaccessible - requires a 17mm open end wrench and a lot of swearing. I relocated both ends of the strap.
where is that one?

Redid the alt ground a bit (could not get bolt off.. but spun the shiat out of it with the impact to help it clean itself) and cleaned the ground by the starter. Added a ground from Batt to the chasses.
 

Ronmar

Well-known member
3,807
7,383
113
Location
Port angeles wa
where is that one?

Redid the alt ground a bit (could not get bolt off.. but spun the shiat out of it with the impact to help it clean itself) and cleaned the ground by the starter. Added a ground from Batt to the chasses.
It’s behind the grill, runs between passenger frame rail and a welded stud up in the engine tunnel.
 

GeneralDisorder

Well-known member
Steel Soldiers Supporter
2,007
5,145
113
Location
Portland, OR
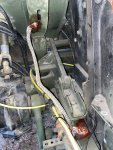
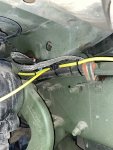
It's behind the grill - on the passenger side of the radiator tunnel. Other end is under the cab mount rubber stop on the frame and isn't even accessible for a picture. Have to disconnect the CTIS air lines, cut a bunch of zip ties to move wiring and AC hoses then throw tools and swear at if for an hour or so.

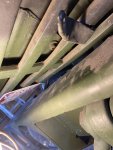
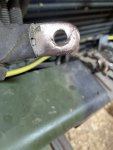
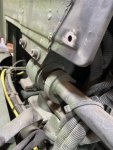
This is the upper mount stud. Completely worthless. Inaccessible to "fix" it so the strap can sit flush and have the star washer pierce the paint.

1000004878.jpg

You can see how the strap and the star washer are proud of the surface due to the weld not being ground flat around the stud. It was only making contact through the deformed-thread lock nut and the flat washer on the front side of the strap.

1000004881.jpg

1000004879.jpg

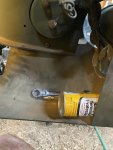
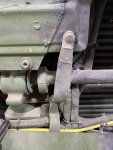
I reversed which end was on the cab - the frame side has a larger horseshoe opening and worked perfect (with the star washer in place) on the cab hinge bracket. I drilled a new hole for the frame side on the frame nose behind the bumper. I didn't have to modify the strap (which is in great shape on my truck being from the desert).

(I used the other end for this connection - didn't want to enlarge the hole for this socket-head mounting bolt).
1000004880.jpg

1000004883.jpg

1000004885.jpg
 
Last edited:

GeneralDisorder

Well-known member
Steel Soldiers Supporter
2,007
5,145
113
Location
Portland, OR
I've seen a huge voltage drop on that cab ground strap on a 3 year old A1P2 - the voltage drop was causing all the lighting and dash gauges to go out, the ABS had a code stored for retarder relay control. Oshkosh didn't remove the paint on the cab stud and the star washer didn't pierce it effectively and the whole thing was painted over with a poor connection. Since all the lighting and most of the vehicle electronics are grounded to the cab itself none of it worked properly.
 

MatthewWBailey

Thanks for this site. My truck runs great now!
Steel Soldiers Supporter
810
1,462
93
Location
Mesa Colorado
It's behind the grill - on the passenger side of the radiator tunnel. Other end is under the cab mount rubber stop on the frame and isn't even accessible for a picture. Have to disconnect the CTIS air lines, cut a bunch of zip ties to move wiring and AC hoses then throw tools and swear at if for an hour or so.

This is the upper mount stud. Completely worthless. Inaccessible to "fix" it so the strap can sit flush and have the star washer pierce the paint.

View attachment 925851

You can see how the strap and the star washer are proud of the surface due to the weld not being ground flat around the stud. It was only making contact through the deformed thread lock nut and the flat washer on the front side of the strap.

View attachment 925852

View attachment 925853

I reversed which end was on the cab - the frame side has a larger horseshoe opening and worked perfect (with the star washer in place) on the cab hinge bracket. I drilled a new hole for the frame side on the frame nose behind the bumper.

View attachment 925854

View attachment 925855

View attachment 925856
That looks easier to get to! I looked in there on mine after you alerted me to the inaccessibility. I'll just add a braided ground like yours. No need to increase the amount of swearing I'm doing
 

GeneralDisorder

Well-known member
Steel Soldiers Supporter
2,007
5,145
113
Location
Portland, OR
That looks easier to get to! I looked in there on mine after you alerted me to the inaccessibility. I'll just add a braided ground like yours. No need to increase the amount of swearing I'm doing
Yeah - since I ended up moving both ends it would have been just as easy to get a new strap and forget about the old one. But now we know!
 

Ronmar

Well-known member
3,807
7,383
113
Location
Port angeles wa
There is another one up under the power panel between the ground test point in the power panel and the extreme right end of the dash assembly(over by the door hinge on my A0).
 

GeneralDisorder

Well-known member
Steel Soldiers Supporter
2,007
5,145
113
Location
Portland, OR
There is another one up under the power panel between the ground test point in the power panel and the extreme right end of the dash assembly(over by the door hinge on my A0).
Yes - it's on the grab handle mounting bolt on the passenger side of the dash right? That one relies on the one under the grill to get back to the frame and ultimately the battery negative.
 

Ronmar

Well-known member
3,807
7,383
113
Location
Port angeles wa
Yes - it's on the grab handle mounting bolt on the passenger side of the dash right? That one relies on the one under the grill to get back to the frame and ultimately the battery negative.
Yes, exactly. The ground terminal board in the power panel, TB2 which all the circuitry is grounded back to, is tied to the ground test point. Its tied out to the panel edge and the grab handle bolt. Then Thru the dash and cab chassis to the ground lead behind the passenger grill down to the frame. Thru the frame to the starter ground strap, and thru the main ground lead back to battery -…
 

MatthewWBailey

Thanks for this site. My truck runs great now!
Steel Soldiers Supporter
810
1,462
93
Location
Mesa Colorado
It's behind the grill - on the passenger side of the radiator tunnel. Other end is under the cab mount rubber stop on the frame and isn't even accessible for a picture. Have to disconnect the CTIS air lines, cut a bunch of zip ties to move wiring and AC hoses then throw tools and swear at if for an hour or so.

This is the upper mount stud. Completely worthless. Inaccessible to "fix" it so the strap can sit flush and have the star washer pierce the paint.

View attachment 925851

You can see how the strap and the star washer are proud of the surface due to the weld not being ground flat around the stud. It was only making contact through the deformed-thread lock nut and the flat washer on the front side of the strap.

View attachment 925852

View attachment 925853

I reversed which end was on the cab - the frame side has a larger horseshoe opening and worked perfect (with the star washer in place) on the cab hinge bracket. I drilled a new hole for the frame side on the frame nose behind the bumper. I didn't have to modify the strap (which is in great shape on my truck being from the desert).

(I used the other end for this connection - didn't want to enlarge the hole for this socket-head mounting bolt).
View attachment 925854

View attachment 925855

View attachment 925856
Finished the cab grounds. Plural bc I added one on both sides. The existing braid can just land behind the grill as you showed yours in your the 5th picture.
No sense in me practicing my vulgarity trying to find that frame bolt.

starboard with cab down- (my cab lift bushing has issues)
CB21BD42-8AFB-4B95-A932-D78862050709.jpeg

port side with cab up
A23E3CA8-F416-4F16-B586-C123D4C6E9F8.jpeg

port cab down..
CEAAC5DF-A9CB-4BA9-B544-FC826B0F5503.jpeg

0314E344-8555-42B9-B6C6-961DDFFD5E60.jpeg8BAFBDE7-ABA0-4525-8AA5-C50B661E5D0A.jpeg

tapped cab Aluminim: 3/8
C93AFD80-C969-4925-B89C-88B847CBA271.jpeg

That nook behind the bumper is great for tool storage. Lots of thought in that
705AE695-8FC8-4A4B-BAF6-11FA1517F875.jpeg


Old braid landing zone.
98CED1DE-BFDB-4AA5-B45E-ACB77FA32CB9.jpeg
 

Ronmar

Well-known member
3,807
7,383
113
Location
Port angeles wa
What I usually do is bare metal patch, thin coat of silicone grease or copper coat(copper impregnated conductive grease) where they touch, torque in place and then layer of spray paint or cold galv compound to keep the weather and corrosion out…

i really need to do a volt drop test video one of these days. It is dead easy and any conduction issues stick out like a sore thumb. AC Delco has some good diagnostic videos showing how to do this…
 

MatthewWBailey

Thanks for this site. My truck runs great now!
Steel Soldiers Supporter
810
1,462
93
Location
Mesa Colorado
What I usually do is bare metal patch, thin coat of silicone grease or copper coat(copper impregnated conductive grease) where they touch, torque in place and then layer of spray paint or cold galv compound to keep the weather and corrosion out…

i really need to do a volt drop test video one of these days. It is dead easy and any conduction issues stick out like a sore thumb. AC Delco has some good diagnostic videos showing how to do this…
Copper coat is nice. I think once there's bare metal to metal, the connection only needs to be sprayed over with something to keep water out. Even then it's still going to conduct. Rust is conductive. Unless driving in a methane plant or doing chemical warfare drills, copper is not going to corrode. The CARC is the culprit on these from what I'm seeing. That and the chosen assembly timeline/method of these trucks. Someone in Enginerring 'approved' the use of these star washers as a quick method of assembling power connections. It Probably met a deadline
 

MatthewWBailey

Thanks for this site. My truck runs great now!
Steel Soldiers Supporter
810
1,462
93
Location
Mesa Colorado
i really need to do a volt drop test video one of these days. It is dead easy and any conduction issues stick out like a sore thumb. AC Delco has some good diagnostic videos showing how to do this…
That'd be a fun one. I watched some of those delco ones. Informative.
 
Top