• Steel Soldiers now has a few new forums, read more about it at: New Munitions Forums!

  • Microsoft MSN, Live, Hotmail, Outlook email users may not be receiving emails. We are working to resolve this issue. Please add support@steelsoldiers.com to your trusted contacts.

AC install on 923A2

Buffalobwana

Well-known member
Steel Soldiers Supporter
1,394
177
63
Location
Frisco Texas
First off, want to thank "Over" for his detailed AC install on his Non-A2. You can find it here. He saved me some trouble by figuring out problems before I had to!

http://www.steelsoldiers.com/showthread.php?125575-M923-air-conditioning-a-c-install-project

Thanks to 74M35A2 for his "A2 bracket kit" and 98G for the AC units (plural, going to attempt this twice.)

Love Texas, how hot our women are, but not the hot weather. Love my trucks. Hate driving them in the summer. Let's get to this.

I am using the Humvee AC kits, so they are not designed to go on an A2. No problem.

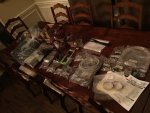
First I recommend unpacking all the pieces and laying them out. Don't unpack the bags, just Look at all of them, see what you have. Read the instructions and locate the parts. It will be a bit tedious because it's not for an A2 and there is a lot of "Take the 2"x3/4" bolt and washer and nylon lock nut and insert through the hole next to the inverted float valve, next locate the ..." You get the point.

After I read it, I figured out that you just need to mount the condenser, evaporator and receiver dryer where logical. Mount compressor. Then run hoses and electrical between them all.

Some assembly required.
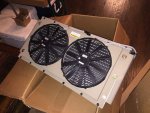
image.jpgimage.jpg
 
Last edited:
fuzzytoaster

Well-known member
Steel Soldiers Supporter
4,299
3,130
113
Location
Fort Worth, Texas
If you are in need of the correct condenser for the M939 series trucks I have a few spares. They mount in front of the radiator correctly.
 

Buffalobwana

Well-known member
Steel Soldiers Supporter
1,394
177
63
Location
Frisco Texas
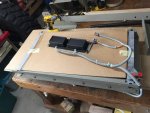
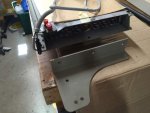
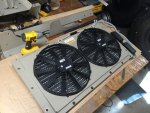
First step, take all the sides off the condenser. I'm going to mount mine on the passenger side tool box like Over did. Except I may make my braces a little different.

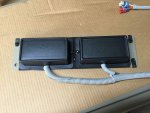
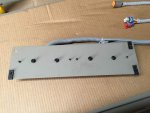
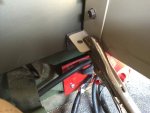
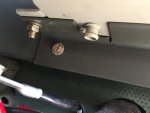
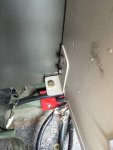
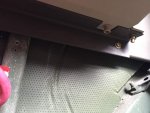
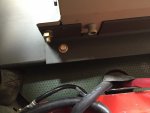
When I took the electrical boxes off the frame, I left them attached to the piece of metal. Don't follow the instructions and undo all the bolts. Just the 2 that attach the plate to the end plate. Picture 3&4

image.jpgimage.jpgimage.jpgimage.jpgimage.jpg
 
Last edited:
Buffalobwana

Well-known member
Steel Soldiers Supporter
1,394
177
63
Location
Frisco Texas
The 1/2" bolts that held the side plates on we're torqued to approximately a zillion ft-lbs. get a pipe and a friend or two. Don't slip and hurt the fins or copper tubing!!!
 

Buffalobwana

Well-known member
Steel Soldiers Supporter
1,394
177
63
Location
Frisco Texas
The Hummer AC kits are for V-belt application. Good for A1/0 install. Not so perfect for A2. So, I found a couple serpentine belt 24v compressors online for about $120 each. Sold my red dot compressors.
 

Buffalobwana

Well-known member
Steel Soldiers Supporter
1,394
177
63
Location
Frisco Texas
If you are in need of the correct condenser for the M939 series trucks I have a few spares. They mount in front of the radiator correctly.
Thanks Fuzzy, I think the one in the kit will be ok. It will fit nicely on top of the tool box, get plenty of airflow, and should be an easy install. If I was putting a kit together, I'd probably take you up on that though.
 

74M35A2

Well-known member
4,145
330
83
Location
Livonia, MI
That one is nice due to the fans on it. With the radiator one, it is probably big enough to not even need fans, but yours will work same driving or at a stop.
 

Buffalobwana

Well-known member
Steel Soldiers Supporter
1,394
177
63
Location
Frisco Texas
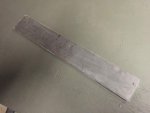
I have been tinkering with mounting ideas. There are numerous parts that come with the kit to mount to any configuration of Humvee. I take pieces of steel and put it here and there. Places it's not designed to go. And I came up with this. All I need to do is drill 2 holes in the back of the condenser and mount this side bracket to the back. I will likely secure the front with a hinge on each side (credit Over for this idea). This mount is perfect. I need to bend the top of it down so it doesn't interfere with the fins, but it looks as if it were meant to go here.

image.jpg

Luckily, the mount has holes that line up perfectly with the electronics plate. So, 4 bolts and that is a done deal!
image.jpg
 

74M35A2

Well-known member
4,145
330
83
Location
Livonia, MI
You need to stand back further when you take pics so we can better assess the treasures in your garage. All I could get out of it was a Goodyear A2 and a headlight trim ring.
 

74M35A2

Well-known member
4,145
330
83
Location
Livonia, MI
Unsure why, but nearly half of the folks that bought them so far have done the same exact thing. I probably need to either make them the size of a mattress, or charge $3000 for them. Either may help, case by case.
 

Buffalobwana

Well-known member
Steel Soldiers Supporter
1,394
177
63
Location
Frisco Texas
You need to stand back further when you take pics so we can better assess the treasures in your garage. All I could get out of it was a Goodyear A2 and a headlight trim ring.
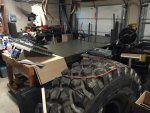
well, here is a better view of the madness that I call a garage. This is just "bay 1" The problem is I took on a huge project just before I got 5 ton fever. So, "not pictured" there is an adventure trailer build going on, there are a few new 16.00's some HEMTT rims, a pile of tarps and bows from the green 923a2, and a place that I have given up on ever seeing the floor again.

Now, you see how I could loose your brackets?
image.jpg
 

74M35A2

Well-known member
4,145
330
83
Location
Livonia, MI
Member Rustystud over in the M35a2 department has the win on this so far. His treasure trove is from floor to ceiling lights with all sorts of goodies. First thing I spotted was an old carburetor type automotive air filter housing, the classic type with a snorkle sticking out of the side of it. Probably fits everything made from 1955 to 1987. You know when you find something like that, there is no end to the goodness that lurks beyond. Thanks for sharing, that tire looks pretty meaty. Good luck with your continued install.
 

Buffalobwana

Well-known member
Steel Soldiers Supporter
1,394
177
63
Location
Frisco Texas
You prompted me to clean it all up. Well, actually, I set my yellow drill on the workbench and spent the next 10 minutes looking for it. There. Now that one spot in the middle is all clean and freshly painted!

image.jpg

There are three 16.00R20's in there. It's amazing how much room a little ol tire can take up!
 

Buffalobwana

Well-known member
Steel Soldiers Supporter
1,394
177
63
Location
Frisco Texas
Ok, back to work.

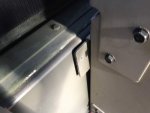
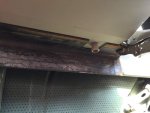
I opted to use the hanger brackets in the kit. I cut a piece of 4"x3/16 flat at 20". Which left 2.5" to play with (1.25" on each side). I screwed it to the top piece of the cabs lower frame with two 1/2" grade 8 washers as spacers (which worked out about perfectly.)

image.jpgimage.jpgimage.jpgimage.jpgimage.jpg
 

Buffalobwana

Well-known member
Steel Soldiers Supporter
1,394
177
63
Location
Frisco Texas
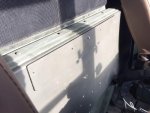
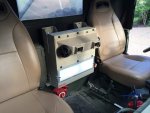
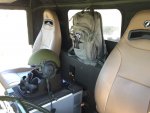
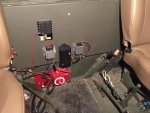
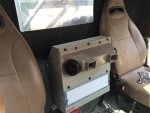
The board I mounted on the back wall was full of electronics. 24>12v converters and fuse panels module for backup camera, junction box etc. it was kind of junky and overkill, but we were in a pinch to leave Idaho and there was a fridge covering all of it anyway. So, I pulled all of the stuff off the board, except the backup camera module, that is behind the passengers seat. I need to find a home for the stuff I removed, I suspect I'll mount it back behind the passengers seat.

image.jpgimage.jpg
 

Buffalobwana

Well-known member
Steel Soldiers Supporter
1,394
177
63
Location
Frisco Texas
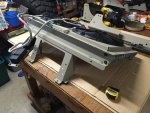
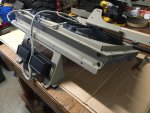
To be honest, I'm not wild about the placement, but it can't go lower, I have my battery shutoff, if I went higher, it would be up by my head. Meh ... I guess it's ok where it is. I guess I don't like how big it is. I guess I'll get over it when I feel the "cool air of freedom to drive whenever I want" blowing on my face!

I will put angle iron supports under the bottom feet to help support it. I don't like the idea of the one support on top. Five tons can shake pretty bad at times. Anything bolted down, needs to be secure.

Overkill is your friend.
 

Buffalobwana

Well-known member
Steel Soldiers Supporter
1,394
177
63
Location
Frisco Texas
Cut a piece of angle as wide as the feet on the AC. Cutout for the two condensation lines. Put it firmly in Place, hold with vice grips while I mark holes.

Drill all holes in angle iron.

Paint - quick dry.

Bolt angle to feet tighten bolts. Then drill through holes that mount to surface, install bolts, figure out how to put nuts on them behind the board, and tighten. Easy right?

Remove unused brackets from the top. Wipe as much blood off AC unit as possible with hand before you take a picture.

image.jpgimage.jpgimage.jpgimage.jpgimage.jpgimage.jpgimage.jpg
 
Top
AdBlock Detected

We get it, advertisements are annoying!

Sure, ad-blocking software does a great job at blocking ads, but it also blocks useful features of our website like our supporting vendors. Their ads help keep Steel Soldiers going. Please consider disabling your ad blockers for the site. Thanks!

I've Disabled AdBlock
No Thanks