• Steel Soldiers now has a few new forums, read more about it at: New Munitions Forums!

  • Microsoft MSN, Live, Hotmail, Outlook email users may not be receiving emails. We are working to resolve this issue. Please add support@steelsoldiers.com to your trusted contacts.

Advice needed - new guy with MEP004A

Ray70

Well-known member
2,592
5,907
113
Location
West greenwich/RI
Yet another TM ambiguous mistake??
The way I have always done it is set the motor as you did, at 20*
Verify marks in the IP window are aligned.
Remove the pump.
Do not touch or rotate the engine!
Rebuild the pump and align the marks when finished rebuilding.
Reinstall the IP with the IP marks aligned and tighten bolts.
That's it. I really don't see any reason to rotate 180* the return to 20* and recheck.
Its all solid connections with no slop, it's not like trying to align a timing belt with a tensioner involved or anything.
I also see no reason why you can't turn it backwards. There's nothing in the IP that will get damaged at this point.
There are a couple other tricks when installing the rebuilt pump, but we can discuss that when you are ready.
Just tricks to not screwing up the unbrella seals on the shaft ( like I did the first time ) and how to bleed out trapped air within the pump cavity.
 

Back-in-Black

Well-known member
296
277
63
Location
Louisiana
Awesome! I'm all ears... errrr eyes.

My weight cage came in today and supposedly, my kit should arrive Friday.

Pretty much everything I'll need for this rebuild should be here for the weekend. I've been working on getting the IP off the motor this evening. Will probably get it off before I quit tonight. Got the alternator and motor timing insp. plate off now. Time to eat dinner but was working on injector lines before I stopped.

May get this project done before 2030...
 

Back-in-Black

Well-known member
296
277
63
Location
Louisiana
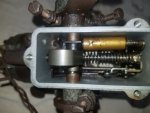
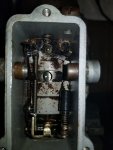
Well, the IP is on my work bench. I took the top back off - man there is a lot of gunk in there now! I also found at least part of why it won't start and probably why I couldn't figure out what the shut down arm did. My metering valve is all but stuck. Barely rotates. Haven't started taking things apart yet but kind of looking and trying to familiarize myself with it.

20211026_211349.jpg
 

Ray70

Well-known member
2,592
5,907
113
Location
West greenwich/RI
Yea, all those little particles are not helping anything... clean it up, then disassemble.
Once you get down to the final part... the pump head and the 2 little piston plungers, if the plungers are stuck in the head, that is the #1 cause of not getting any fuel out of the pump.
 

Back-in-Black

Well-known member
296
277
63
Location
Louisiana
Ran into 2 log jams:

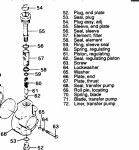
The fuel inlet fitting is so tight into #55, I'm afraid to turn on it any harder. Not sure what to do with this one. I assume I need to get #54 out to change the filter screen (#57) and some of the other O-rings in the picture. I backed off from that part for now...

inlet filter.PNG

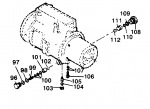
Also having real problems getting plug #103 out. I've broken 3 screwdrivers so far. I used to have an impact screwdriver but apparently don't anymore. May try to get another one. If I can't get that plug out, I can't get the cam advance screw out (#105).

103 plug.PNG

Lots and lots and lots of gradeaux in this thing20211027_100306.jpg

20211027_105007.jpg
 

Back-in-Black

Well-known member
296
277
63
Location
Louisiana
And if the linkage is binding up and holding the metering valve in the closed position you will never get any fuel from it either.

I got the metering valve out after some twisting and pulling. It was definitely "stiff". We'll see what happens when I get it all cleaned up.
 

Back-in-Black

Well-known member
296
277
63
Location
Louisiana
Got the fuel inlet out of the sleeve(#55). It was in the with pipe dope? Actually looks more like JB weld - and felt like it too. I had to put an incredible amount of force on a 3/4" wrench with the 45" elbow clamped in my vise to get it off.

Anyway, not getting how to take the rest of that apart - including the screen. In the TM it just says slide the screen off - yeah, not so much! Hint?

Also, there is no #54 (adjusting plug) but there is a brass sleeve that looks like it may thread in there but would need some kind of special tool to get it out. It has 2 small holes in the sides.

Basically, I cannot figure out how to get 55-62 apart. Any suggestions?

Broke a screwdriver bit trying again to get that plug out of the bottom. Tried my 1/4" impact driver and then just the bit with a crescent wrench. NOT! Got some impact bits on order that hopefully will do the trick.
 

Ray70

Well-known member
2,592
5,907
113
Location
West greenwich/RI
For now I would leave the fuel inlet screen as an assembly. I don't think the kit comes with anything other than new o-rings, so just clean it out with spray carb clean and don't disassemble any further just yet, wait until you have the kit.
It has a check valve inside it, so make sure it is clean and working correctly, then just change the o-rings if you have difficulty with it.
The screen does slide off, but if it's stuck tight you may crush it trying to remove it, and like I said, the kit may not come with another... depends which PN you bought.
And correct on the fact that there is no #54. The only thing screwed in there is the 45* fuel inlet fitting..... yet another of the many mistakes in the world of the TM's ;)
 

Back-in-Black

Well-known member
296
277
63
Location
Louisiana
I just looked at a picture of the Stanadyne kit I ordered (24371). You are correct, it does not come with a new screen. I will clean it as good as I can and change the O-rings that I can and have in the kit.
 

Back-in-Black

Well-known member
296
277
63
Location
Louisiana
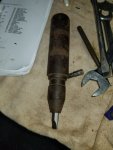
Found another problem. One of the advance pistons is stuck down in the sleeve / plug - won't move and it's pretty much bottomed out in there. I've got it soaking in Kroil and CorrosionX now. Hopefully in the next day or 3 it'll come loose and I can work it over a bit.

Also have that plug that is preventing me from getting the advance screw out soaking.

Guess all I can do now is wait.
 

Chainbreaker

Well-known member
1,796
1,992
113
Location
Oregon
I've used Kroil and its good stuff. On frozen parts I've also resorted to heating/cooling (thermal cycling using heat gun & a coolant) to break bonds after soaking in Kroil and its usually successful over time.

Also on parts where there is an outer ring or sleeve, and inner solid part that is stuck, I put the whole part in my freezer overnight and then heat the outer sleeve the next day to get it to expand a bit. Of course you have to be cognizant of the type of materials you are dealing with to not damage them in the process.
 
Last edited:

Back-in-Black

Well-known member
296
277
63
Location
Louisiana
I've used Kroil and its good stuff. On frozen parts I've also resorted to heating/cooling (thermal cycling using heat gun & a coolant) to break bonds after soaking in Kroil and its usually successful over time.

Also on parts where there is an outer ring or sleeve, and inner solid part that is stuck, I put the whole part in my freezer overnight and then heat the outer sleeve the next day to get it to expand a bit. Of course you have to be cognizant of the type of materials you are dealing with to not damage them in the process.

Good ideas. I'm gonna let it soak tonight and maybe try sticking it in the freezer and then heat gun tomorrow. Inner & outer appear to both be same material - steel. There is a spring in there and it should be pushing them apart but this thing was dry (w/o diesel) for so long in a VERY humid environment that I can see small rust spots on the one that's not stuck. If I get them apart, I may have to try polishing the mating surfaces with some 1200 sandpaper. I have that on hand. I also have some 2000 grit polish that I will probably try first though.

Thanks!
 
Last edited:

Ray70

Well-known member
2,592
5,907
113
Location
West greenwich/RI
Out of curiosity is it the "Idler" ( forget what the TM calls the passive one ) side that's stuck, or the power piston / active side?
I believe the internal components are slightly different.
Sounds like you are finding all sorts of issues! Something tells me the pistons will be stuck in the hydraulic head as well, just gotta get that dang flat head plug out of there!
 

Back-in-Black

Well-known member
296
277
63
Location
Louisiana
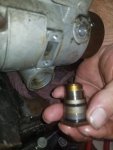
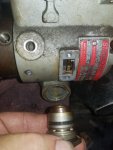
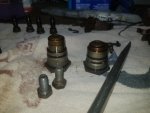
It's the one on the "outboard" side of the pump that's stuck. They look identical except one is semi-permanently compressed (I hope).

When I first took them out I thought they were different and took pictures but the more I look at them, the more I think they are identical.

20211027_112113.jpg

20211027_112058.jpg

20211027_112045.jpg
 

Ray70

Well-known member
2,592
5,907
113
Location
West greenwich/RI
In the last picture, left is the Passive one, right is the active power piston.
Left has a spring inside, right may not because it operated using hydraulic pressure created by the pump to pus outward on that ball stud to advance the timing as RPM increases.
 

Back-in-Black

Well-known member
296
277
63
Location
Louisiana
Yes, I was just looking at that picture too and noticed that they are different. The compressed one is shorter and has slots cut into it.

I have them right though don't I? The compressed one goes on the outboard side (away from the motor)?

If there's no spring in there, it'll be even harder to get apart.
 

Ray70

Well-known member
2,592
5,907
113
Location
West greenwich/RI
Correct, you have them in the right order.
Be careful not to drop or loose the dished cups on the top of them, they are just sitting there.... not attached at all.
The power piston is currently all the way in, so you could safely grab it with a pair of curved jaw pliers, twist and pull ( after you finish soaking and chill / heat).
 

Back-in-Black

Well-known member
296
277
63
Location
Louisiana
I noticed that about the cups. Thought I had broken something when the first one came off in my hand. I was thinking that I would put a little axle grease on the backsides to keep them in place on reassembly?

I just took the end plate (#66) and the mechanical governor cover out of the Chem dip and washed and blew out with air. Dropped the banjo bolts and the T from the top of the governor cover into the chem dip (took the check valve off first). With all the crap (which I assuming right now is bits of that plastic drive plate) floating around in there, I want to soak any pieces that have small holes that can be clogged up. The wife is out for lunch and I asked her to pick up 2 cans of B-12 spray carb cleaner while she's out. Will use that of stuff I think may have plastic or rubber parts inside that might get damaged in the chem dip like that inlet with the screen on it).

Also just put the power piston into the freezer. I had thought I might try pliers on it if all else fails but only as a last resort. I hate buggering stuff up!

I found my old impact screwdriver yesterday (the kind where you hit it with a hammer) but didn't have a bit for it that would work. I ordered a set of bits that should be here this evening and I'll try again. If that doesn't work, I'll have to try pliers on that plug too. Trying to avoid that if I can. there's not much to grab onto there. That plug is pretty low profile.
 

Back-in-Black

Well-known member
296
277
63
Location
Louisiana
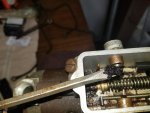
My bits came in and once again, that tool got my ass out of a crack. I had to whack it with the hammer a lot harder than I wanted to and even then it took multiple blows to break it loose. Now if I can just get the cam advance screw out.... I tried briefly to remove it. If anything, it's in there even tighter than the plug was! Got it soaking now! Will it ever end????


20211028_131936.jpg

20211028_131932.jpg
 
Top
AdBlock Detected

We get it, advertisements are annoying!

Sure, ad-blocking software does a great job at blocking ads, but it also blocks useful features of our website like our supporting vendors. Their ads help keep Steel Soldiers going. Please consider disabling your ad blockers for the site. Thanks!

I've Disabled AdBlock
No Thanks